Starting an art blog is a fantastic way to share your art expertise with the world – and earn some money while you’re at it.
Many of our more than 14,000 students have grown successful blogs in the art niche, and we’ve earned a lot of money ourselves from our blogging endeavors.


Let’s walk through the smartest way to start an art blog that stands the test of time and generates a substantial income.
Why Start an Art Blog?
Whether you’re a professionally trained artist or an enthusiastic hobbyist, there are a few reasons you might want to turn your passion and experience into an art blog:
For starters, you can earn money through a variety of methods, including display ads, affiliate marketing, and selling your own products. There’s a lot of potential here – our affiliate marketing statistics show that bloggers in the arts & crafts niche earn an average monthly income of $1,041.
You can also use your blog as a shop window for your artwork, positioning you as an expert in your niche and inspiring others to try their hand at art.
Another benefit is creating a community and connecting with fellow artists and art lovers.
Examples of Successful Art Blogs
Before launching your brand new blog, it pays to understand how other art bloggers do it. What makes them successful? How have they monetized their content?
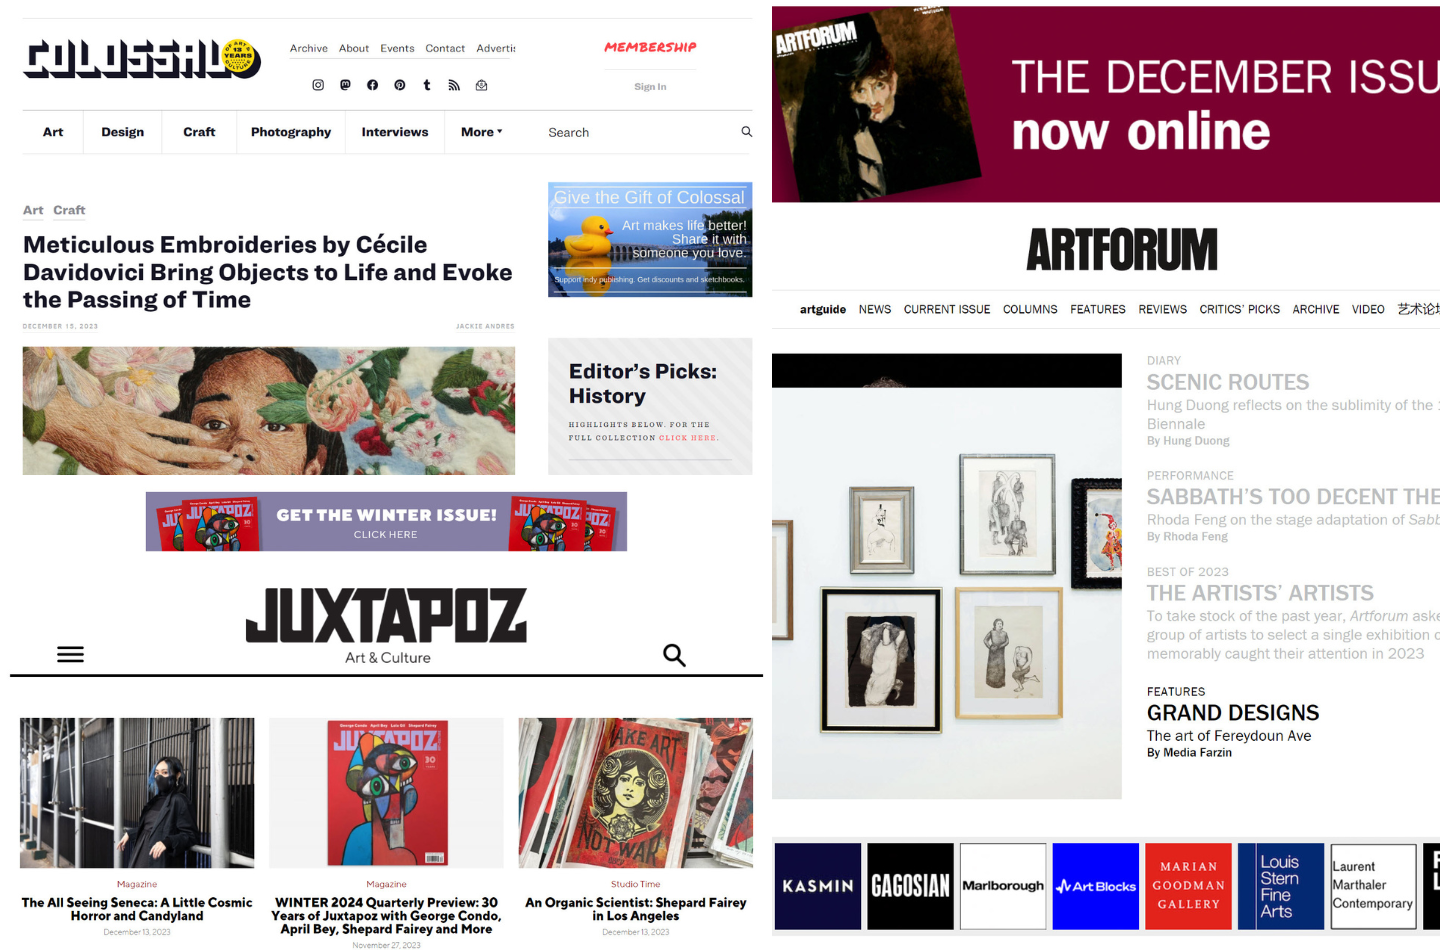
Here are three art blogs that have built significant followings and revenue from their love of art.
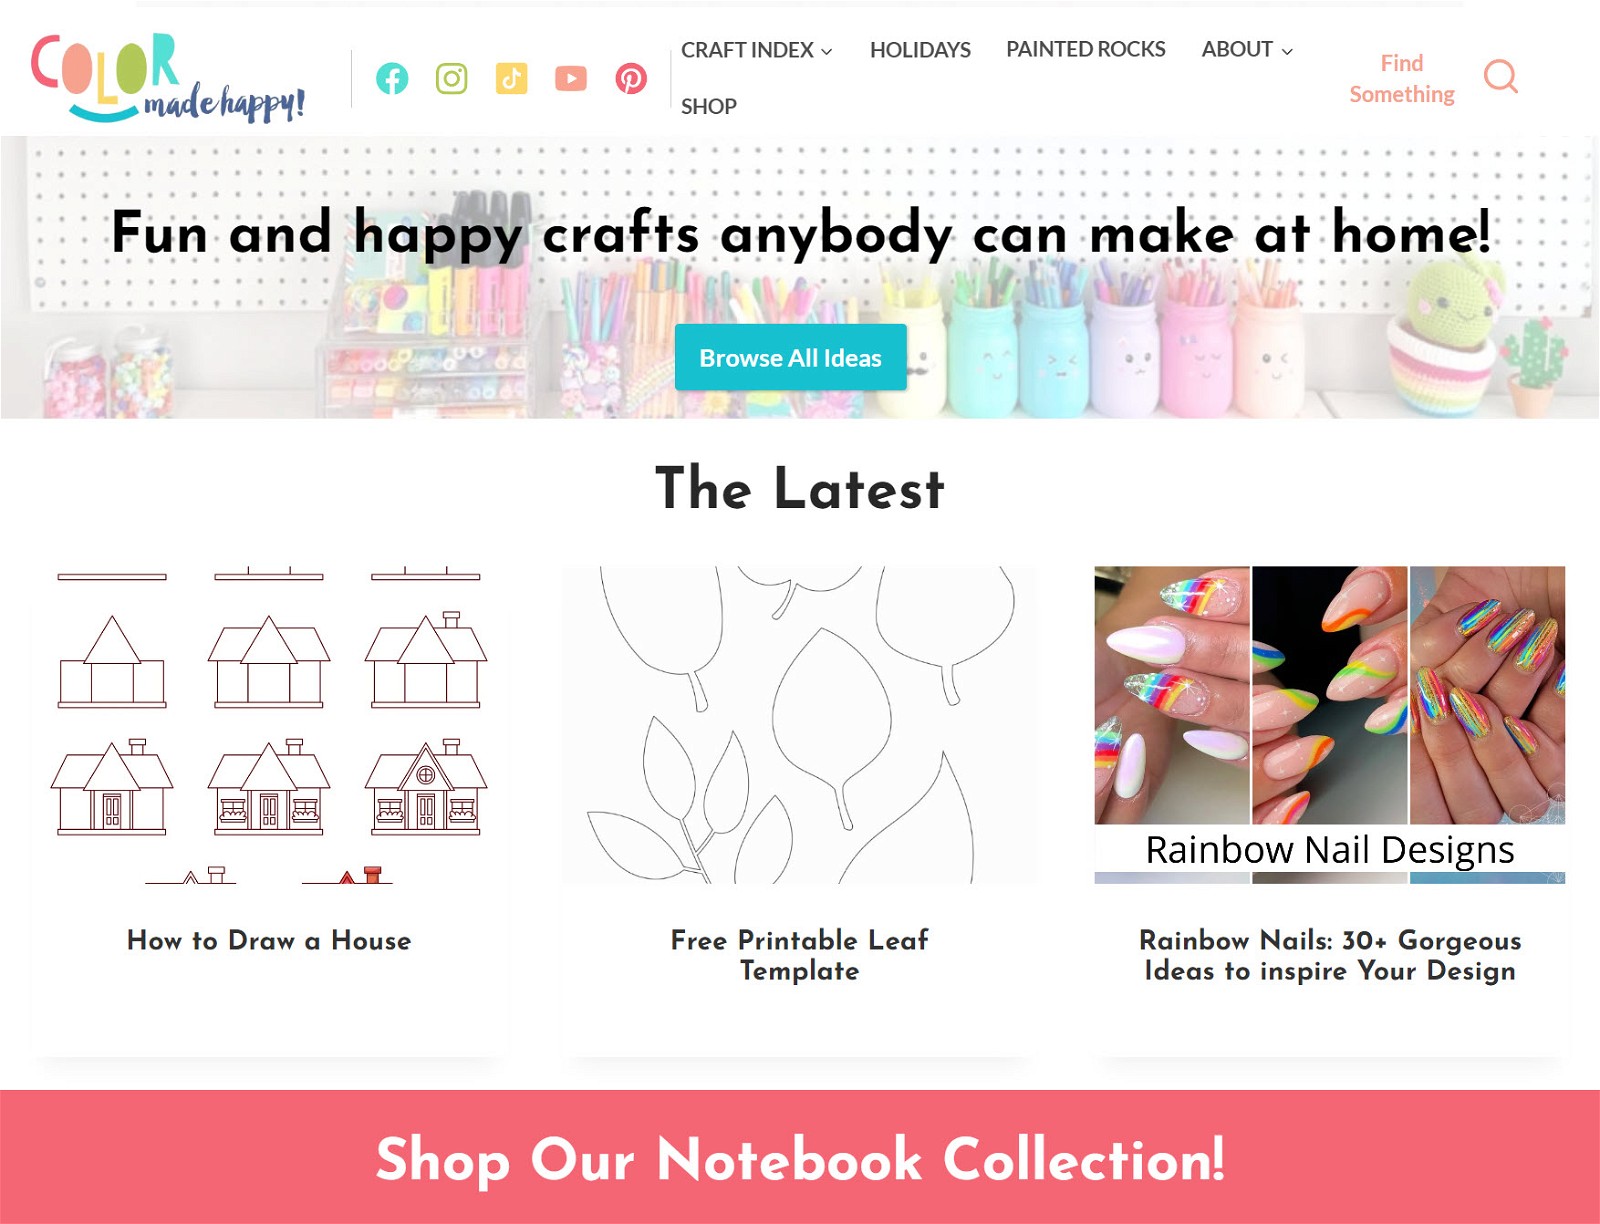
Color Made Me Happy
Shares arts and crafts projects and recommendations for enthusiasts of all ages to help people have fun while creating beautiful art.
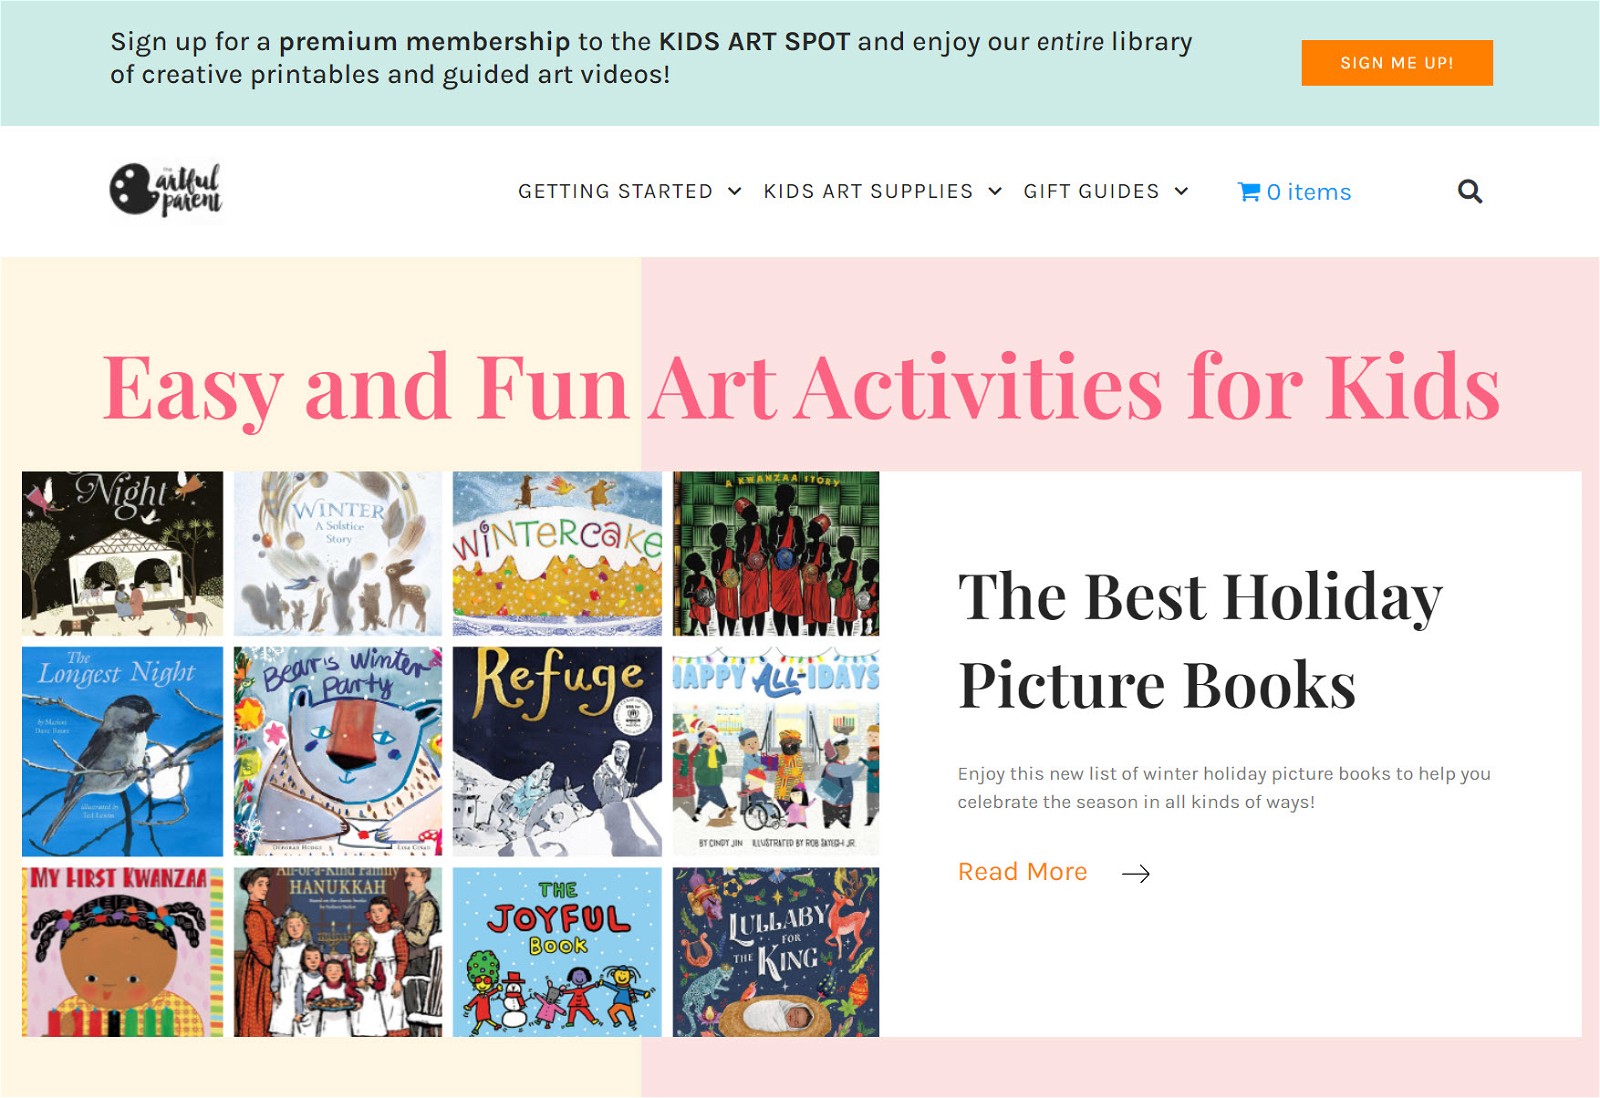
The Artful Parent
A resource for parents and educators looking for child-friendly seasonal crafts, art activities, and family fun.

Artful Haven
This site gives art enthusiasts tools and tips to make better art more consistently — even if you’re a total beginner.
How to Start an Art Blog in 10 Steps
Ready to begin your art blogging journey? Follow our step-by-step guide to get started.
1 Narrow Down Your Art Niche
While it’s tempting to write about anything art-related that comes to mind, a broad approach can make it harder to succeed. I recommend focusing on a specific sub-niche if you’re serious about building a following and making money.
Art is a very broad topic, and most people have specific interests within it. If I want to learn about watercolor painting, I’d trust an art blogger who specializes in watercolors over a generalist who covers everything from acrylics to coloring pencils.
So, your first task is to identify the area of art you want to cover. Here are some example art sub-niches to get your creative juices flowing:
- Family-friendly art: Inspire parents on art projects parents to keep kids entertained on a rainy day
- Portrait painting for beginners: Offer practical, accessible guidance on how to create better portraits from scratch
- Calligraphy: Give aspiring calligraphers tips on supplies and techniques to hone their craft
- Urban photography: A competitive but lucrative niche with many opportunities to recommend high-ticket products
- Art projects for interior design: Help people create beautiful posters, sculptures, and other home decor items
There are two primary elements to consider when selecting a niche: your own passion and knowledge, and the level of interest in the topic.
Without passion or expertise, it’ll be hard to consistently make great content. And if your niche isn’t popular, earning money will be tough.
I suggest choosing a sub-niche that already has successful art blogs. This tactic ensures you’re starting a project that has a real chance of success.
You can use the following process to identify niches with a proven track record of success.
Identify existing blogs in each potential niche. Find these by using a blog aggregator like Detailed, identifying similar websites through the “Organic Competitors” tool on Ahrefs, and Googling the types of keywords you’ll be targeting.

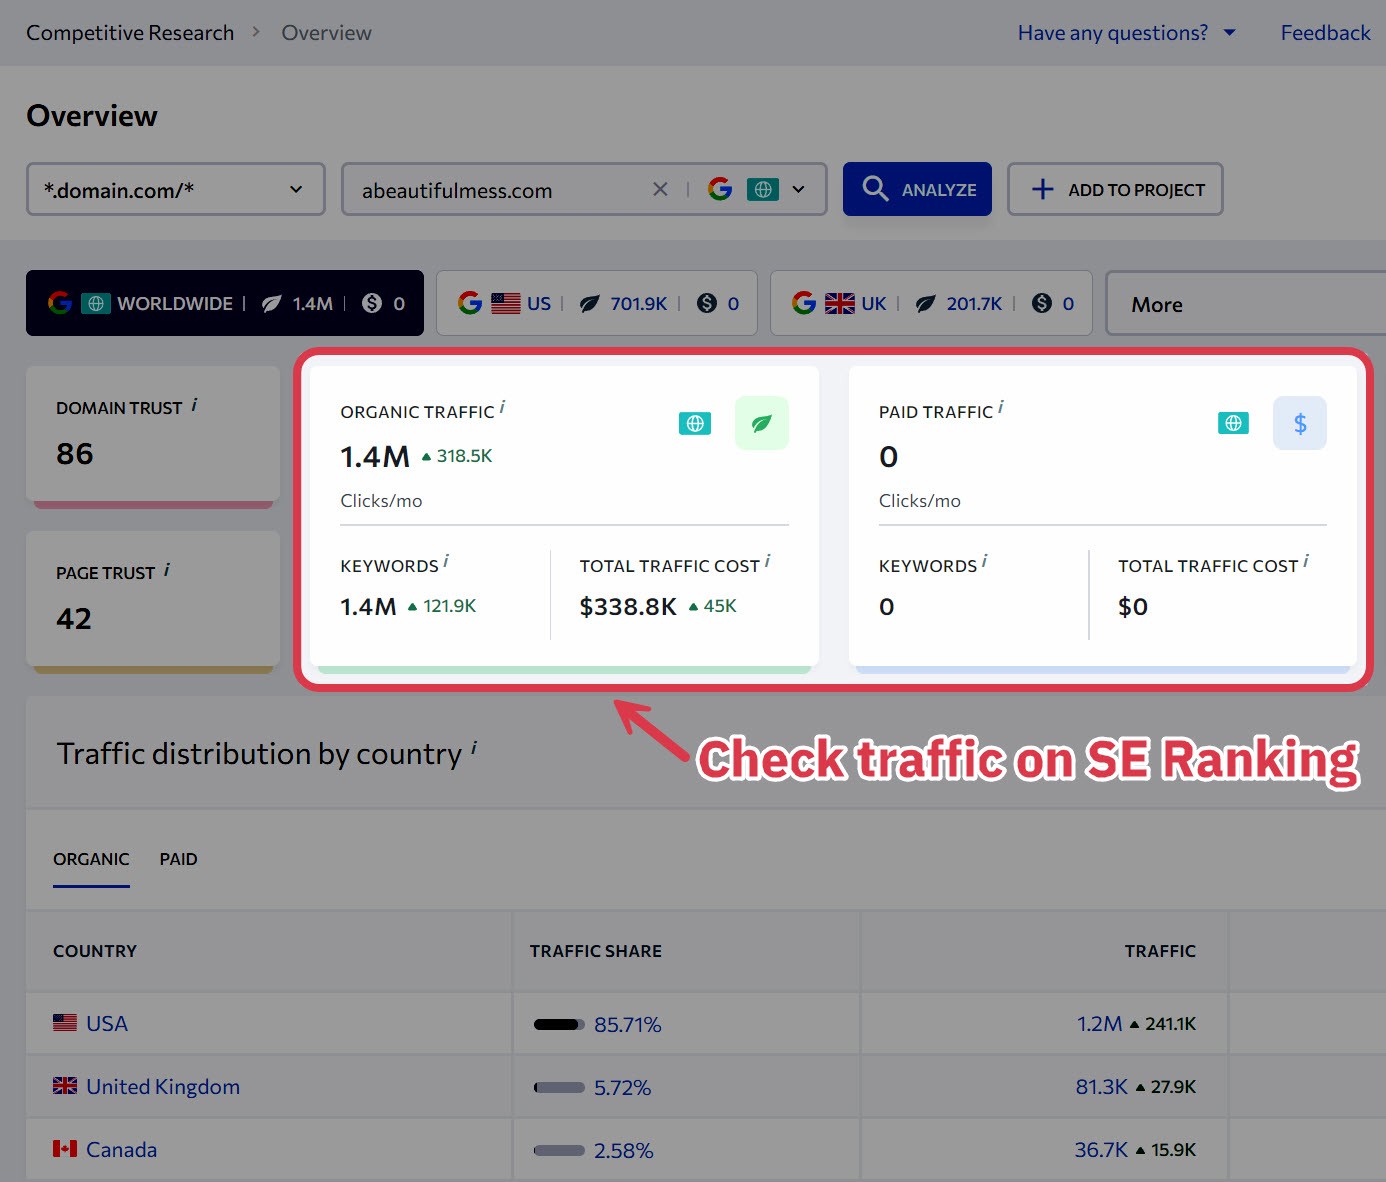
Dig into their traffic levels. Successful websites typically generate lots of traffic. When you’ve drawn up a list of blogs in your niche, analyze their traffic levels by signing up for a free trial at SE Ranking and using its Competitive Research tools.
Compare niches with Google Trends. Not sure which niche to choose? Compare your options using Google Trends to see which generates the most search activity.

Sometimes, you need to let an idea sit to make the right decision, so don’t feel forced to choose a niche instantly. Give yourself a day or two to pick one, then move to the next step.
2 Choose a Blogging Platform
Once you’ve identified a niche for your blog, you’ll need a platform on which to host it.
A blogging platform lets you publish and manage online content and share it with your audience.
Many free options are available, including social blogging platforms like Blogger and Medium. But they’re tough to make decent money from, have strict controls about what you can post, and only provide limited control over the appearance and functionality of your content.
That’s why we recommend starting your own website instead. Building a website offers many benefits versus other platforms:
- It’s easier to monetize through display ads and affiliate marketing
- You get total control over how your blog looks and feels
- No one can shut down your site or delete your content
- You can drive organic traffic to your blog by targeting relevant keywords with your content
- You can grow your audience on social media and point them toward your website
- You can build an email list and send content directly to your audience’s inboxes
We’ve grown and sold multiple blogs for six-figure exits, so trust us when we say that building your own site is the smart approach.
When it comes to hosting your site, we typically recommend WordPress.org (not the similarly named WordPress.com).
It’s free, simple to use, and offers thousands of themes and plugins to help you customize your site.
👉 Want to consider alternative options? Check our list of the best blogging platforms.
3 Choose Your Domain Name
Now it’s time to pick a domain name — a unique address for your website that includes the name of your blog and a domain name extension (such as .com).

Don’t just go with the first thing that pops into your head. Your domain name is one of the first things people see when they come across your site on a search results page or bump into your content on social media, so it’s essentially the cornerstone of your brand. Choosing a relevant, memorable name makes them more likely to seek you out again.
Consider these tips when choosing your domain name:
- Pick a .com domain. They’re more authoritative and convey more trust than other extensions.
- Ensure it’s not trademarked. Use the US Patent and Trademark Office’s trademark search tool to ensure no one else owns your desired name.
- Keep it relevant to your niche. Select a name that reflects your art niche. For example, PortraitPainting101.com would be a good choice for a blog helping first-timers paint better portraits.
- Give yourself some wiggle room. Pick a broad domain that gives you scope to expand into different sub-niches down the line.
- Make it short and sweet. Ideally, your name should be no longer than three words.
👉 Check our list with the best .com Alternatives
Struggling to come up with something decent? Use an AI domain generation tool like Brandsnap to generate a list of creative, relevant, available names.
Once you’ve picked a domain, you’ll need to buy it. I recommend using Namecheap, as you can get a domain for around $10 per year.
4 Host Your Website
The next step is to choose a web hosting provider.
A web host is a service that lets you store your WordPress site and serve it to web users.
While many people recommend Bluehost, we believe Siteground is the best option if you’re looking for an affordable, high-quality hosting solution. They offer better service and reliability for a slightly higher price.
Follow these steps to host your WordPress blog through Siteground in just a few clicks:
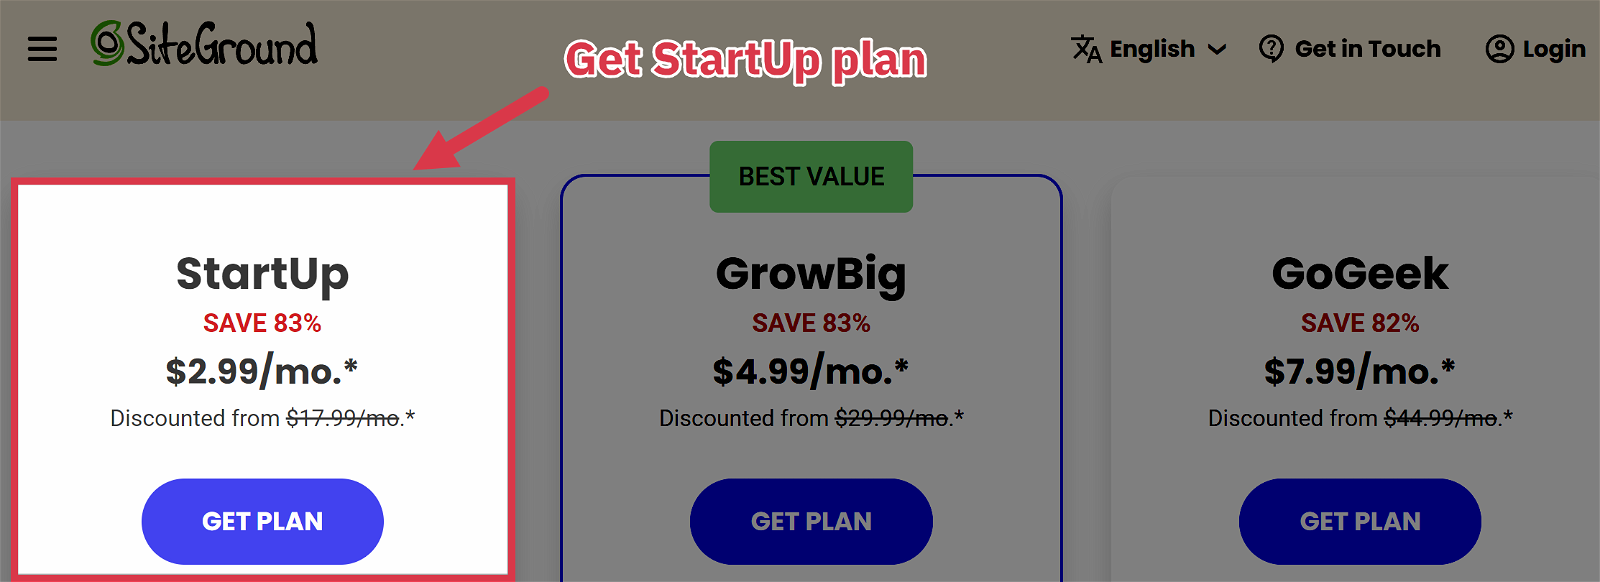
Step 1: Head to Siteground’s WordPress hosting page.
Step 2: Select the entry-level StartUp plan, which offers all the essentials required to start a new WordPress website.
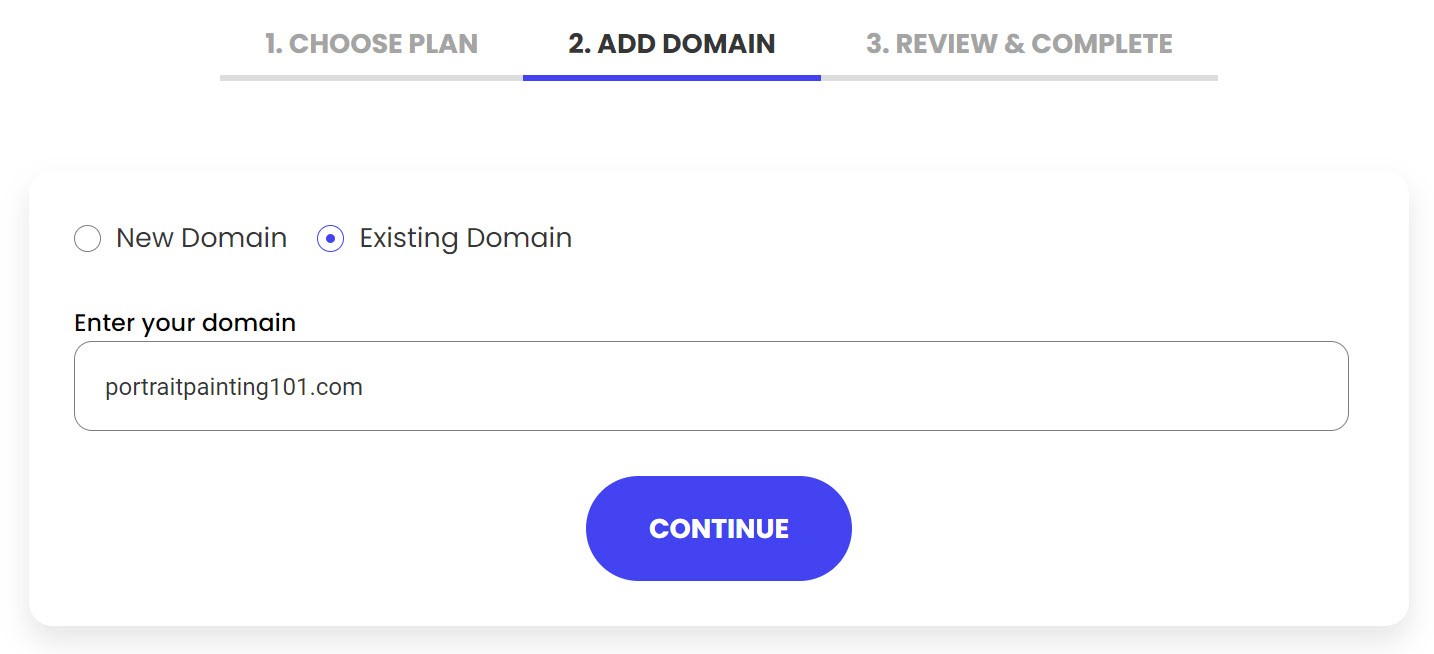
Step 3: Provided you’ve bought your domain from Namecheap, click “I already have a Domain” and enter it in the box below.
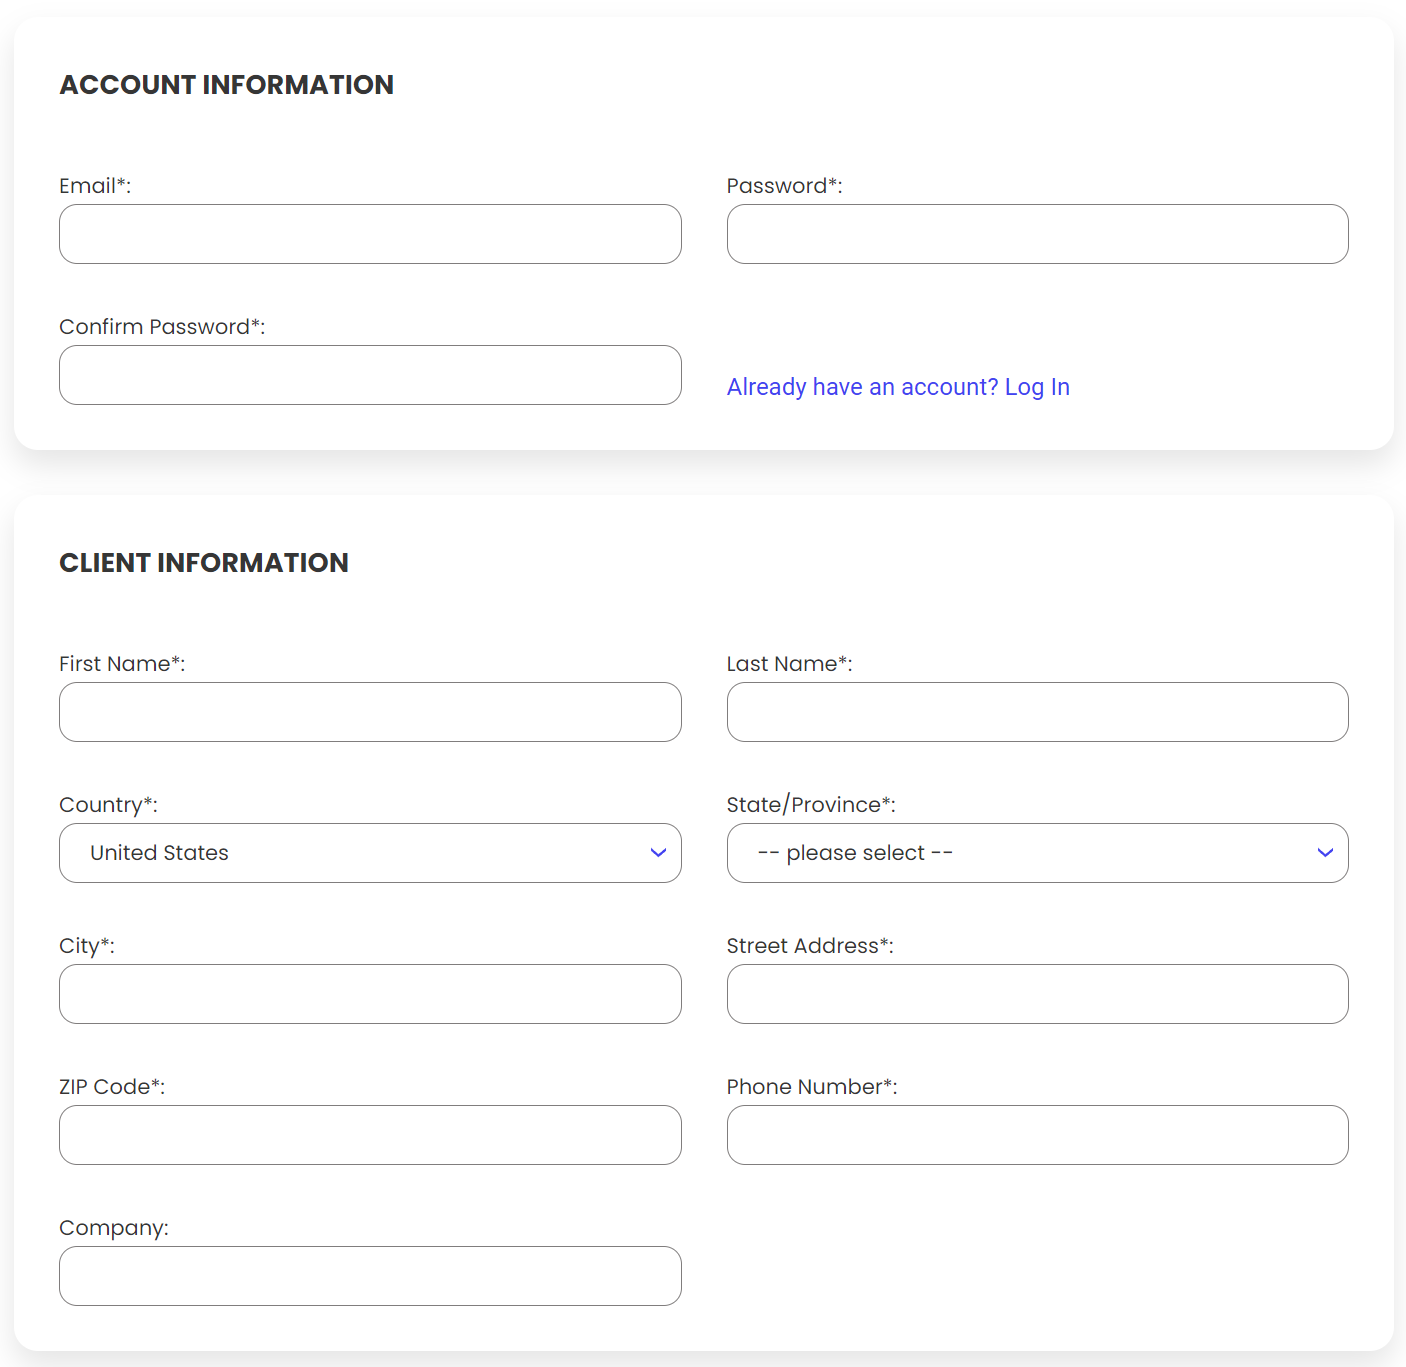
Step 4: Complete all the basic account information.
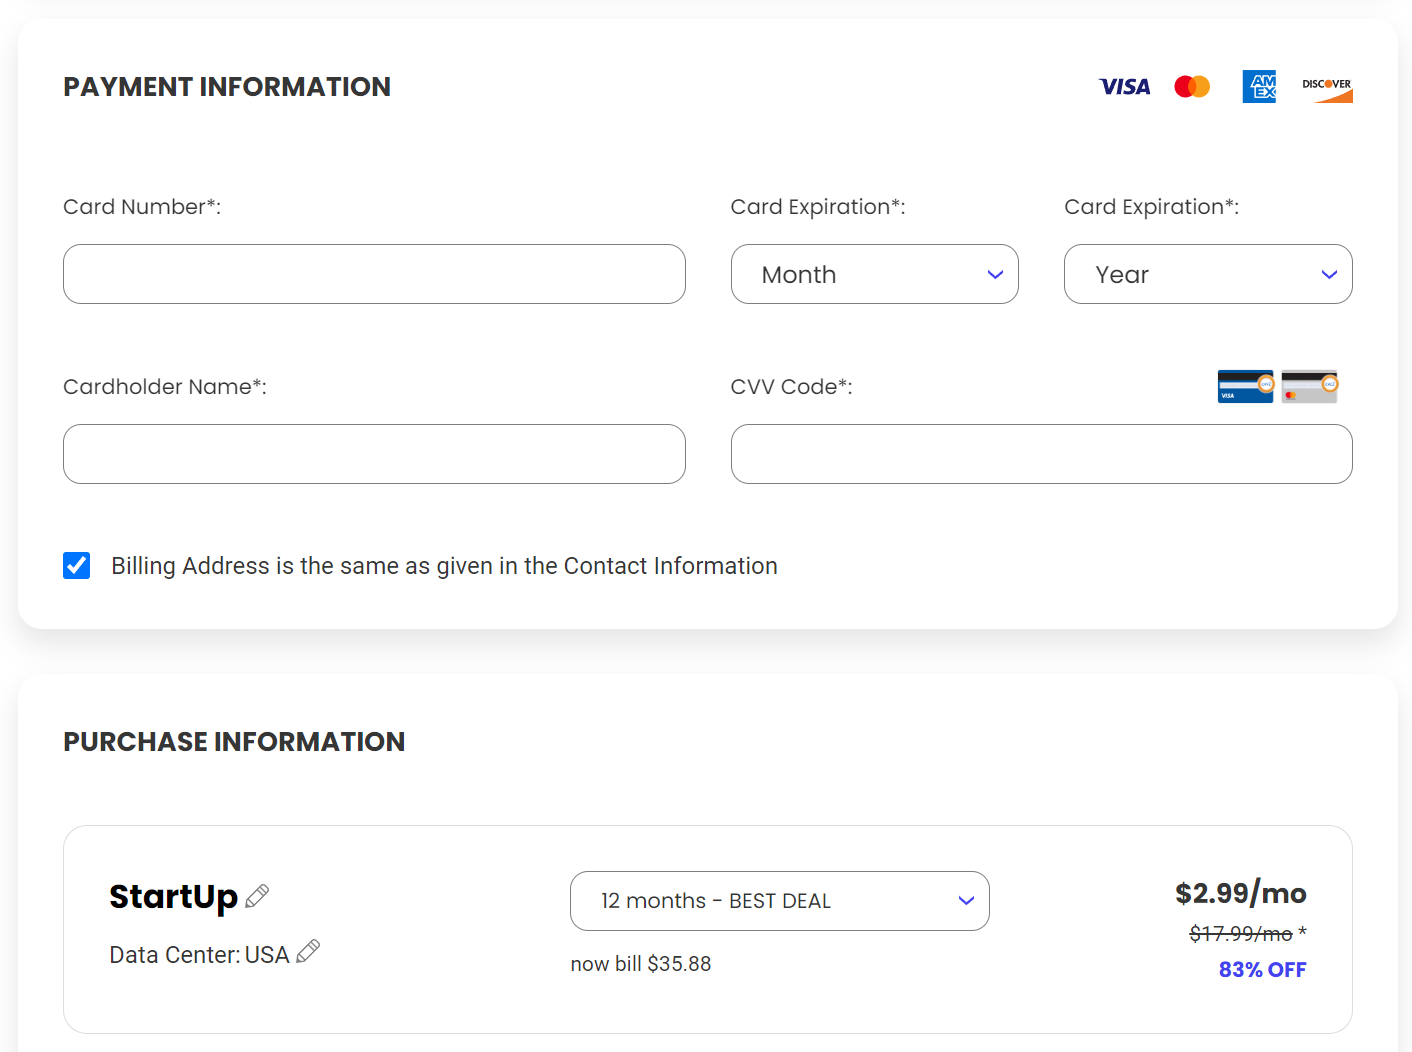
Step 5: Add your payment details and choose the duration of your subscription. The 12-month option typically offers the best value.
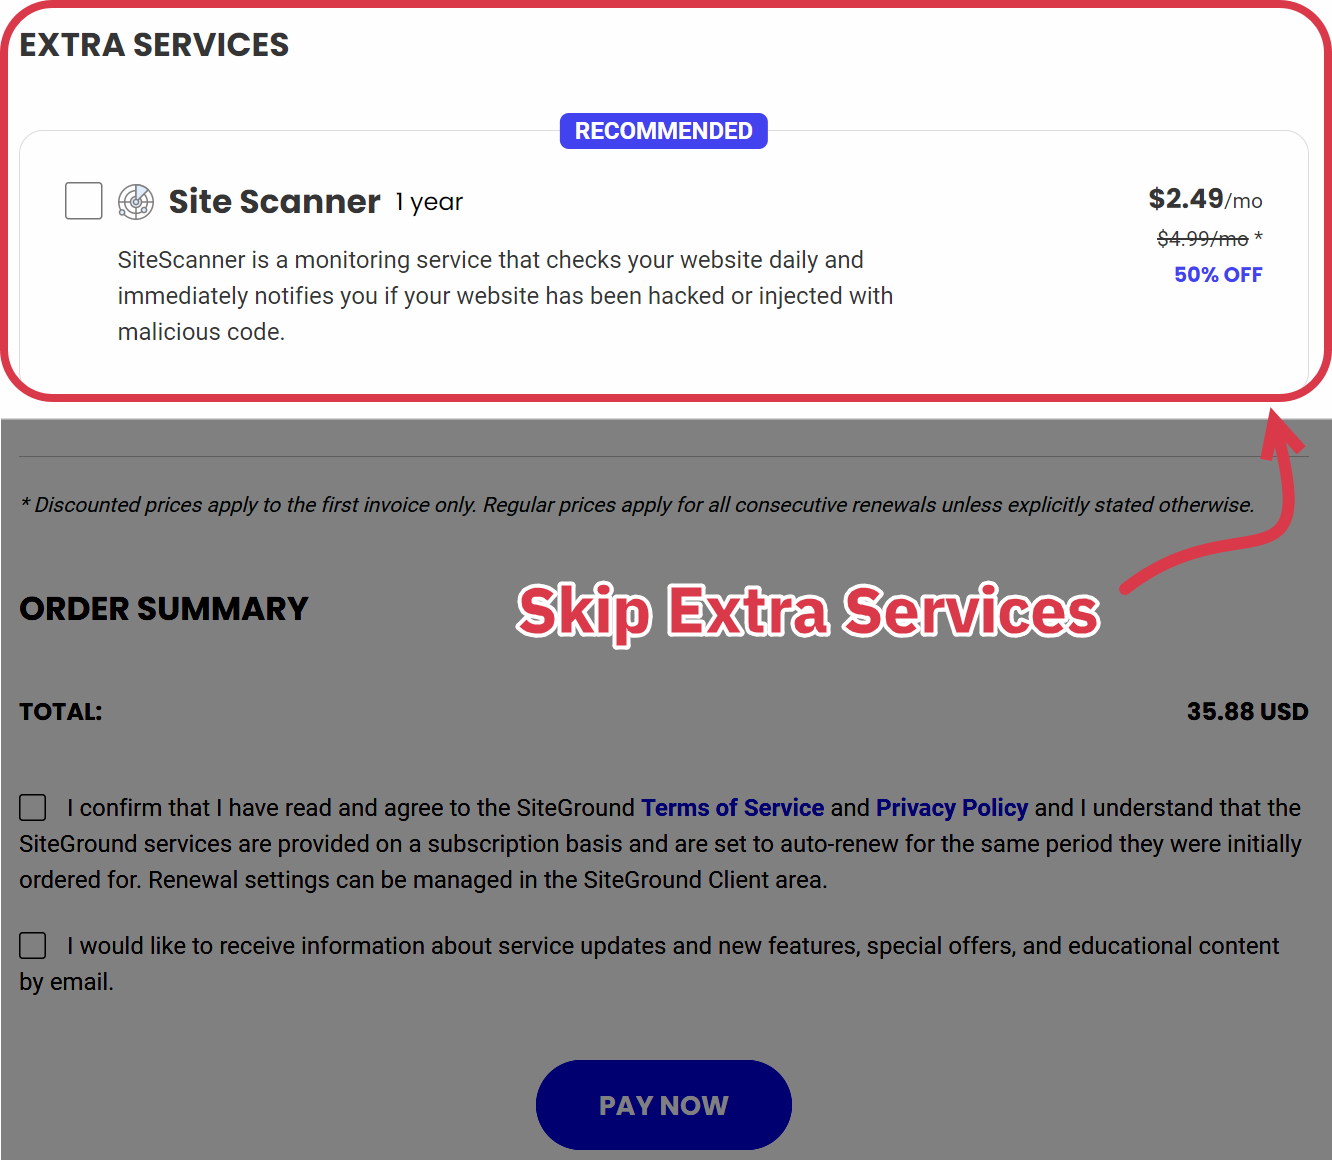
Step 6: Ignore all the extra services — you won’t need them to start a new art blog.
Step 7: Point your domain to Siteground. If you bought your domain from Namecheap, or a different registrar, you’ll need to do this through the DNS settings. Get in touch with Siteground if you need any help with this step.
5 Choose a Theme for Your Art Blog
Next up is choosing your WordPress theme. A theme is a set of code files, style sheets, and templates that dictate a website’s structure and appearance.
Your new theme should align with the general feel of your WordPress site and brand. For example, if your blog focuses on urban photography, you might choose a gritty, modern aesthetic, while a watercolor blog might be better suited to a more laid-back and warmer feel.
There’s nothing wrong with choosing a free theme to start, but I recommend going with a “freemium” theme that lets you seamlessly upgrade to a premium version. Free themes have significant limitations that limit your ability to grow once your blog grows.
Design and price are some of the most important factors to consider when picking a theme, but there are also other considerations:
- How fast does it load?
- Is it responsive? If not, your site won’t display correctly on different devices.
- Was it built by a highly regarded theme builder?
- Can you customize it easily?
- What’s the customer support like?
These freemium themes tick off all of the boxes mentioned above:
Once you’ve chosen a theme, you’ll need to install it. Here’s the process:
Step 1: Log in to your WordPress dashboard.
Step 2: From the left sidebar, click Appearance > Themes.
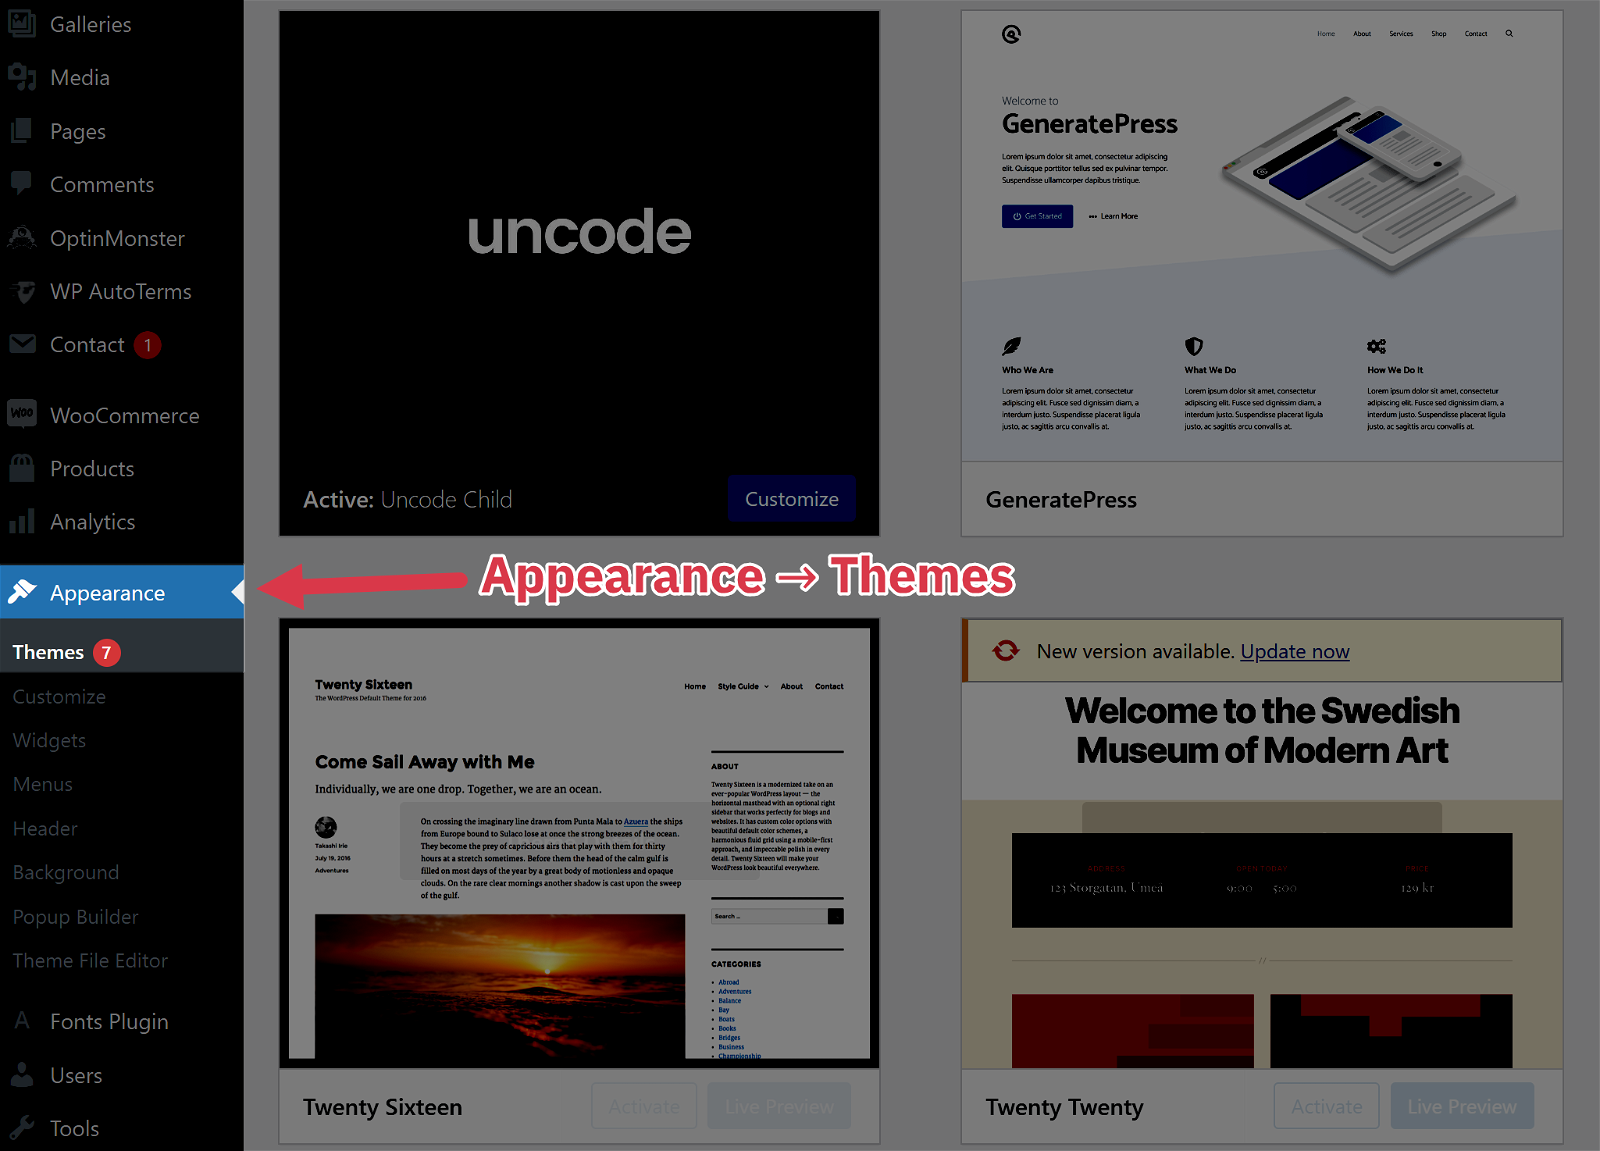
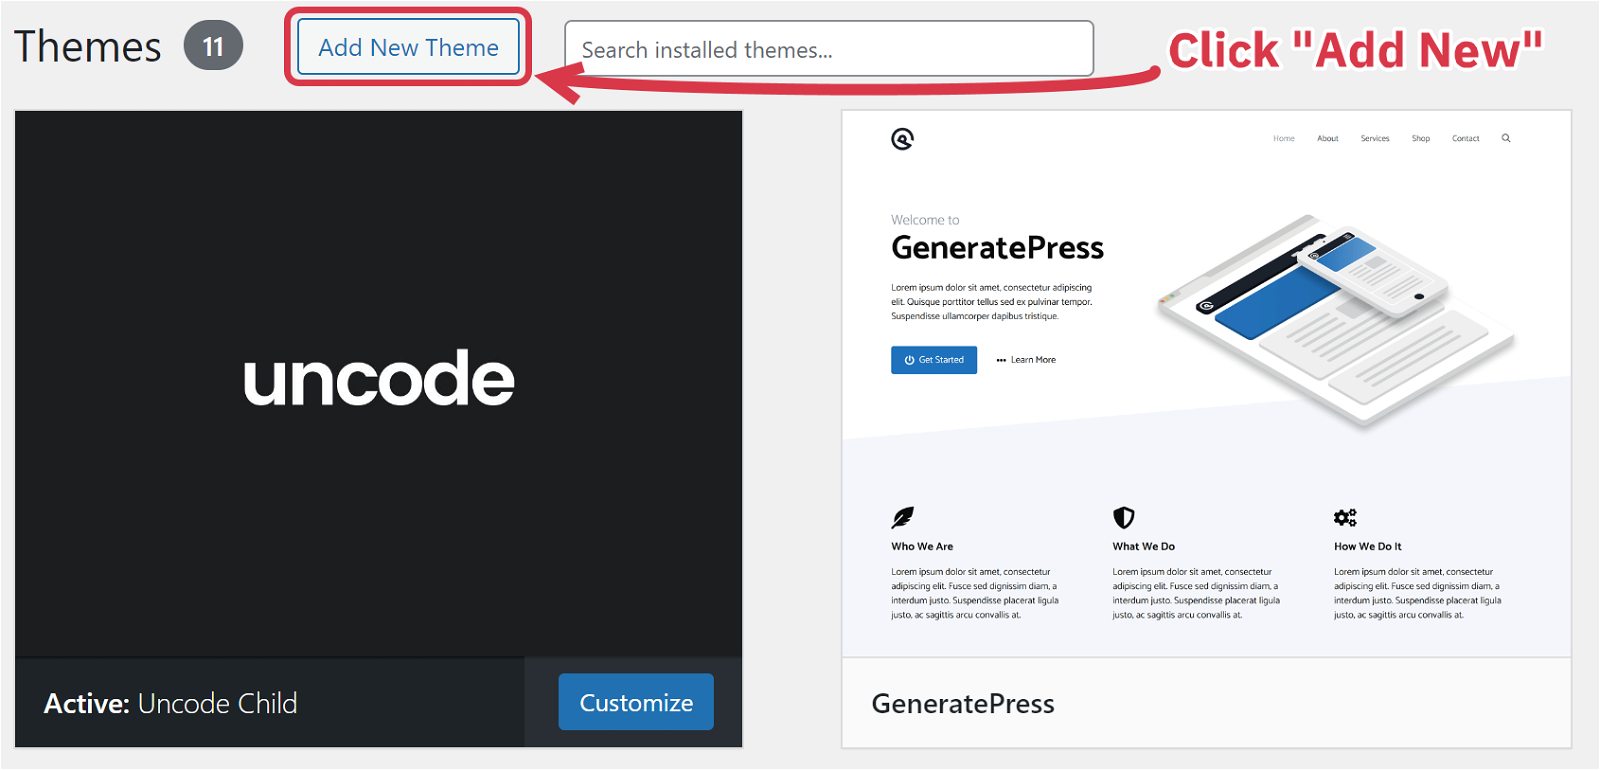
Step 3: Click “Add New”.
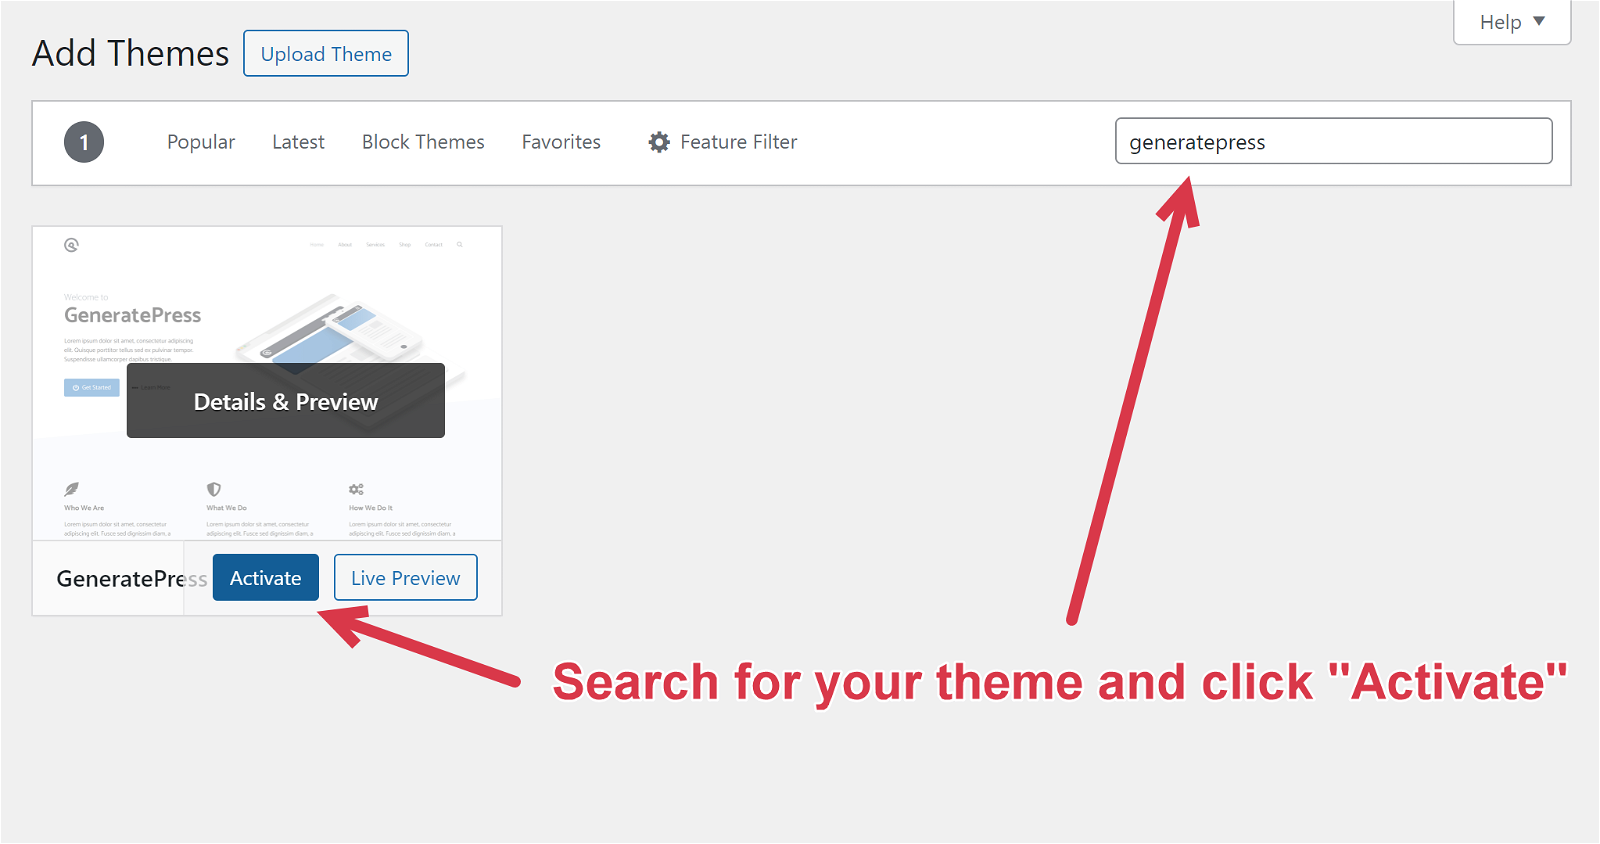
Step 4: Find your theme and click “Activate”.
You’re now free to customize your theme to your heart’s content, so get busy tweaking the fonts, colors, images, copy, and anything else that tickles your fancy.
6 Decide On Design & Branding
We’ve already discussed the importance of building a strong, memorable brand. It’s time to bring your ideas to life with key design and branding-related decisions.
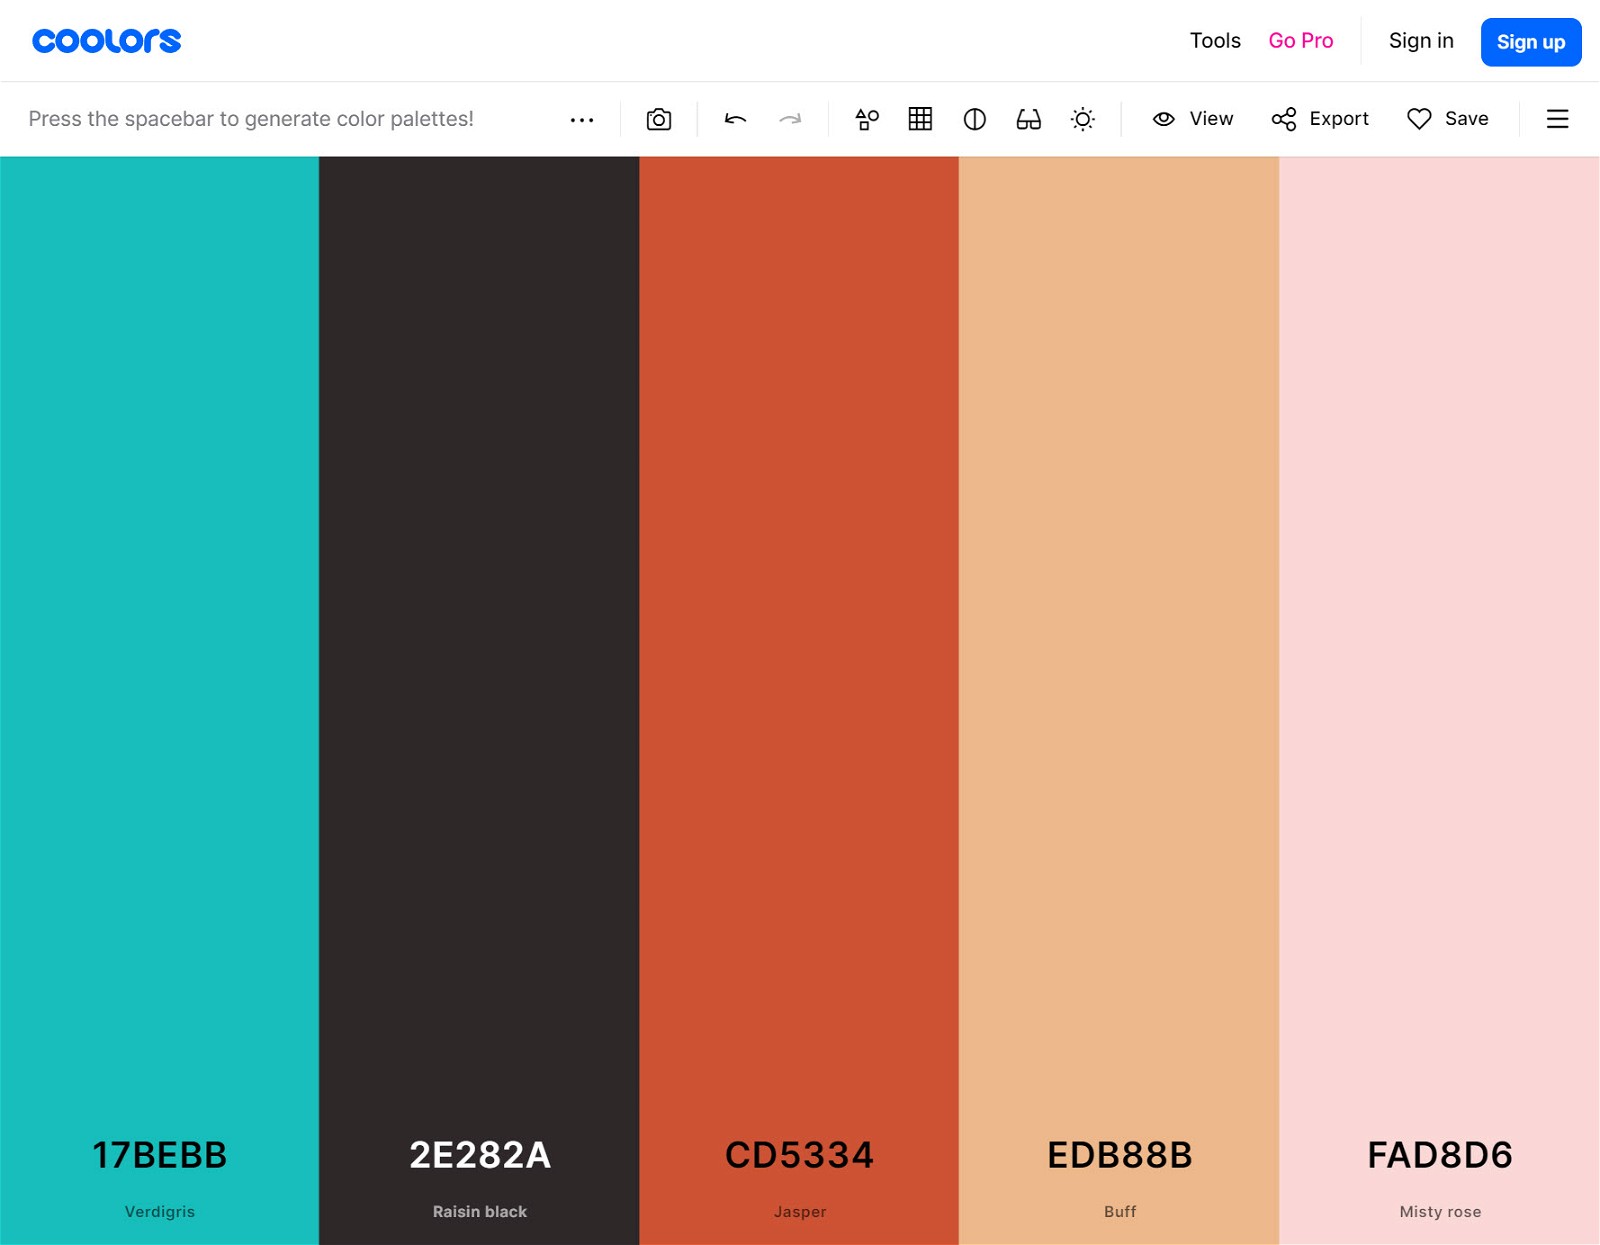
The first step is picking a color scheme. Don’t worry – you don’t need a degree in color theory. The Coolors tool makes it easy to create a complementary palette.
Next, you’ll need to create your website’s logo. This is a crucial step because it’ll often be the first thing visitors notice about your art blog.
If you’re not a graphic designer, this process can feel intimidating. But there’s no need to worry – Canva has a vast library of logo templates for dozens of different niches, including art and design.
Once you’ve found one you like, customize it by adding your art blog name and brand colors.
7 Create Essential Pages
At this point, your art blog exists, but it’s got nothing much on it. Let’s change that by adding some key pages.
Homepage
The homepage should explain who you are and what you do. It should also make it easy for visitors to find the information they’re searching for.
About Page
Think of this as a biography setting out your art blogger credentials: why were you drawn to your specific art niche? What experience do you have? What types of work have you created? Pepper your About Page with personal anecdotes to build a connection with your audience.
For inspiration, check out our list of great About Me page examples.
Contact Page
Give your community a way to reach you by adding a page with a contact form, email address, and links to your social media accounts.
Privacy Policy + Terms & Conditions Pages
These pages explain how visitors can use your site and what information you collect from them. Rather than writing them from scratch, generate them through PrivacyPolicies.com.
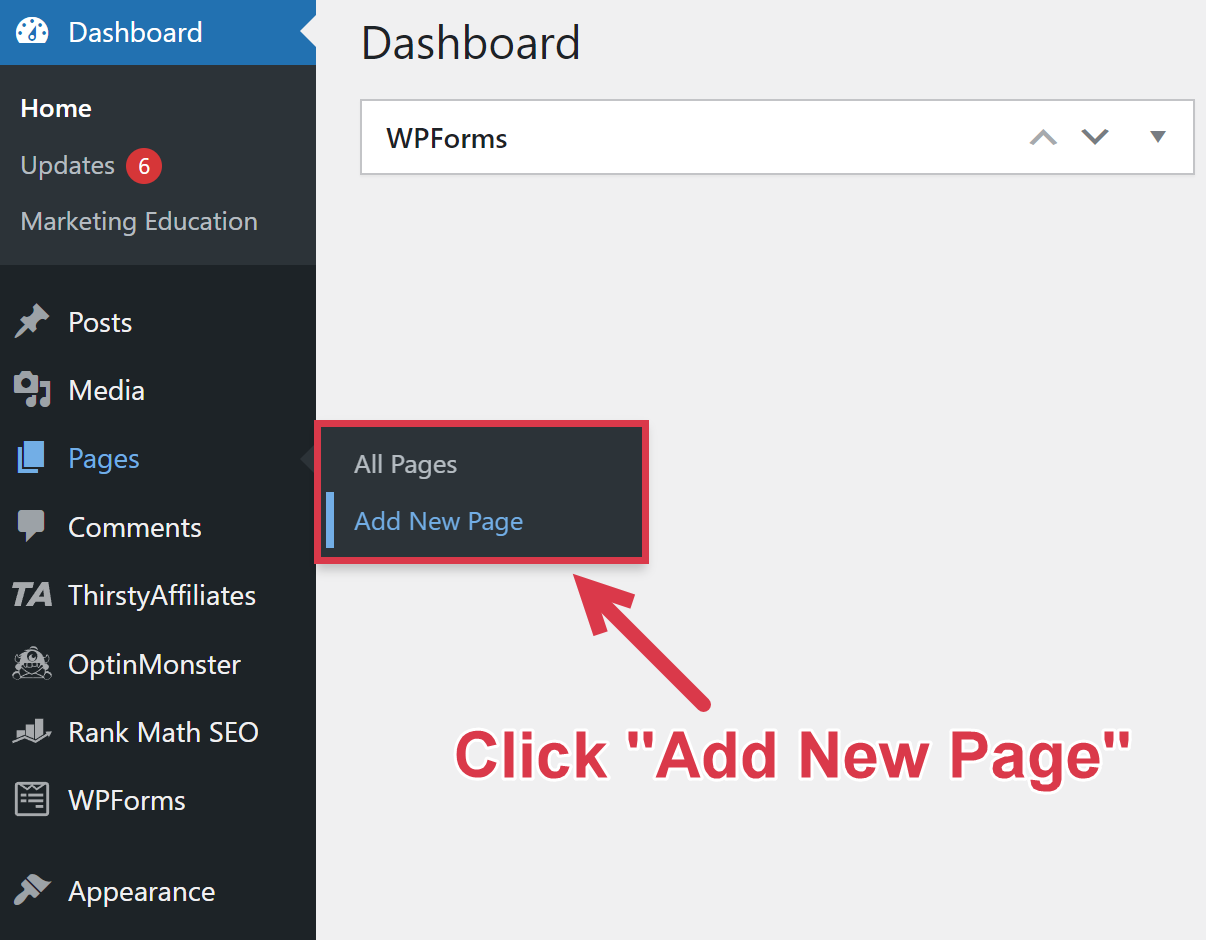
Fortunately, creating new pages on WordPress sites is super simple — just log in to your dashboard, then click “Pages” and “Add New.”
8 Start Creating Content
It’s finally time to write your first art blog post.
While it’s tempting to write about the first topic that comes to mind, I recommend taking a keyword-focused approach to your content strategy.
This involves writing blog posts about phrases people type into search engines like Google. If the search engine algorithm likes your content, your posts will appear in relevant searches, and people will click on your posts.
It’s also tempting to immediately write about the most popular keywords. However, this isn’t a smart move for a new blog. The more people search for a given keyword, the more websites will target it, and the harder it is for a new blog to rank.
For that reason, you should target less-competitive, niche-specific terms that still have decent search volume.
The best way to find that precious low-hanging fruit is to use the Ahrefs Keyword Explorer. Enter a relevant seed keyword — say, “calligraphy” — and see what matching terms appear:
| Keyword | Search Volume | Keyword Difficulty |
|---|---|---|
| calligraphy basics | 20 | 21 |
| calligraphy writing | 150 | 10 |
| calligraphy videos | 100 | 17 |
| calligraphy guide sheets | 70 | 19 |
| how to do calligraphy | 2,000 | 26 |
| types of calligraphy | 600 | 16 |
| calligraphy letters a to z | 700 | 12 |
You can use this approach to keyword research to plot your first 10 blog posts. For instance, the terms in the table above could translate to blog post ideas like:
- “5 Must-Try Calligraphy Projects for Kids”
- “Top 10 Calligraphy Supplies for Your Next Project”
- “25 Best Calligraphy Sets for Beginners”
Armed with a list of blog post titles, it’s time to start writing. Follow these best practices to ensure your first blog posts are the best they can be:
- Think about your audience. Who will be reading this article? And what are they looking for from your content? A total newbie will want different information than a seasoned art veteran.
- Understand the search intent. Consider the context behind the user’s search. For instance, someone searching for “how to write calligraphy” is probably a beginner, so don’t confuse them with complex terminology or advanced tips. Matching the search intent ensures you’ll create a helpful article that ranks better.
- Give your content a personal touch. Share real-world stories that highlight your experience and breathe life into your content — it’ll help you stand out from other art bloggers.
- Use images. Art is a visual niche, so you’ll want to pepper your blog posts with lots of imagery. If you’re sharing work from other artists, be sure to credit them and link to their work. Sometimes, you may even need consent from whoever owns the image to post it on your site. Make sure to follow fair use laws and avoid any legal trouble.
- Explain techniques with visual elements. It’s hard to describe artistic techniques with words alone, so use step-by-step images, gifs, and videos to support your written content.
- Add internal links. Once you’ve built up a library of content, you’ll likely find opportunities to link between posts. For instance, you might write an article on how to get started with calligraphy and link to a guide on the best calligraphy sets for beginners. Not only does this help you get more eyes on your content, but it’s also great for SEO.
Above all else, your goal is to be as helpful as possible. If you can give visitors the information they’re looking for in a way that’s easy to understand and read, they’ll keep coming back, and the search engine algorithms will keep sending you new readers.
9 Promote Your Art Blog
Ranking your posts on Google is effective, but it can take a long time for your content to start driving organic search traffic. To gain some initial traction, I recommend jumpstarting your blog by promoting your content. Here are my favorite methods:
Grow an email list. If a visitor loves your latest blog post, ask them to sign up for your email list to receive all your new posts straight to their inbox.
Team up with other artists. Collaborate with other art bloggers, art stores, and galleries. Often, they’ll be happy to promote your art blog if you do the same for them.
Post in online art communities. From forums to Facebook groups to subreddits, there’s no shortage of places where art enthusiasts hang out online. Share your content in these communities — just don’t breach their guidelines, or you’ll get banned.
10 Monetize Your Art Blog
Even if making money isn’t your primary reason for art blogging, your efforts deserve some financial reward. Use one or more of these strategies to monetize your blog without spoiling your site’s user experience:
Affiliate Marketing
Recommend your favorite art supplies, materials, software, and equipment. Earn a commission each time one of your readers clicks on an affiliate link and buys something.
Why It’s Great: You’re providing a useful service to your readers and getting paid for it, plus you don’t have to handle any of the back-end sales stuff yourself.
Get Started: Read our guide on how to start affiliate marketing and check out our list of the top art affiliate programs.
👉 See also: Is Affiliate Marketing Worth It?
Display Ads
Work with sponsors or ad networks to run paid advertisements on your blog.
Why It’s Great: You make money every time a visitor engages with an ad on your site.
Get Started: Join an ad network like Ezoic or contact individual sponsors in your niche. The ad network approach is quicker and easier, but working one-on-one with sponsors gives you more control over the ads shown and a higher earnings ceiling.
Sell Your Own Products
Create and sell physical or digital art or online resources like art guides and tutorials.
Why It’s Great: Turn your passion and knowledge into a tangible product your audience can buy.
Get Started: Understand what your audience wants. Would they pay for video tutorials? Step-by-step guides? Physical art? See what else is out there by researching on platforms like Etsy for physical goods and Teachable for online courses.
Summing Up
Starting an art blog is one of the best ways to turn your passion and expertise into a dedicated following and a steady income stream.
However, while we’ve laid out a great roadmap for starting an art blog, there’s so much more to learn if you want to take your website to the next level. And if you’re new to the blogging industry, it can be hard to figure out what those steps are.
To make your path to blogging success as simple as possible, we’ve put together a free training. In this training, you’ll learn 7 proven tactics to make your new blog 83% more successful.
FAQ
Are Art Blogs Profitable?
Art blogs can be highly profitable. Leveraging multiple monetization channels — like affiliate marketing, display ads, and selling your own courses — can turn your passion into a job replacement income. In fact, our affiliate marketing survey found that affiliate marketers in the arts and crafts niche earn an average monthly income of $1,041.
How Do Bloggers Get Paid?
Bloggers get paid through various methods, but the most common strategies include earning commissions by recommending products, displaying ads on their websites, selling their own products and services, and creating sponsored content for brands.