Starting a history blog provides a great opportunity to share your knowledge, grow a following, and earn some cash.
You can trust us to guide you — some of our 15,000+ blogging students have built successful history blogs, and we have a proven track record of success in turning new blogs into substantial passive income streams.


We know what it takes to create a history blog that actually gets traffic and earns money, and this post will walk you through the 10 crucial steps to history blogging success.
Why Start a History Blog
History lovers are always hungry for more information about the subjects they love. As a fellow history buff, you can help feed that need by sharing your unique insights and favorite history resources.
But there are other compelling reasons to start a history blog, too.
First of all, since you love history, starting a history blog gives you yet another excuse to dig in and learn more about the past.
As you learn and share more about history, you’ll also have the chance to interact with other bloggers, history buffs, and even accomplished historians. Building a community of people interested in the same areas of history as you are can be extremely rewarding.
And, of course, starting a history blog allows you to make money doing what you love. You can use affiliate links to promote your favorite history books, run ads on your site, or even sell ebooks or other products you create.
Examples of Successful History Blogs
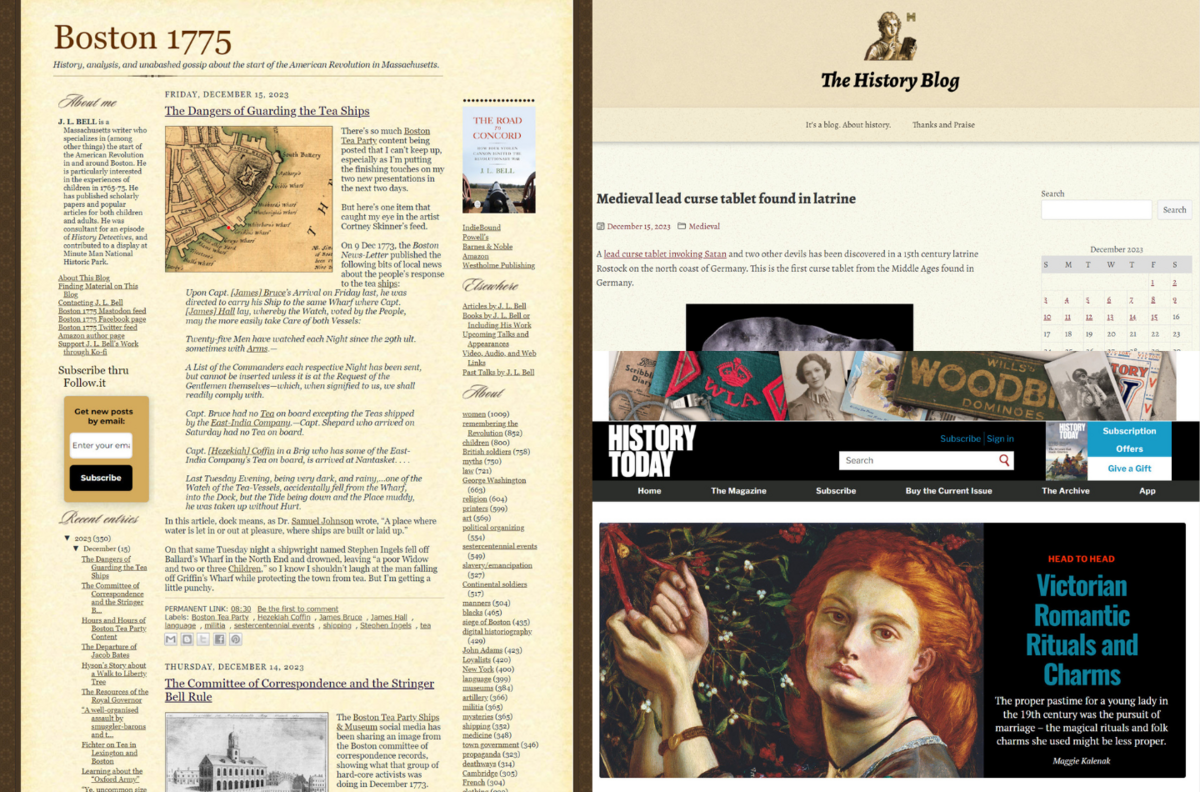
Before you start, it’s smart to study what other successful history bloggers are doing. Here are three examples to learn from:
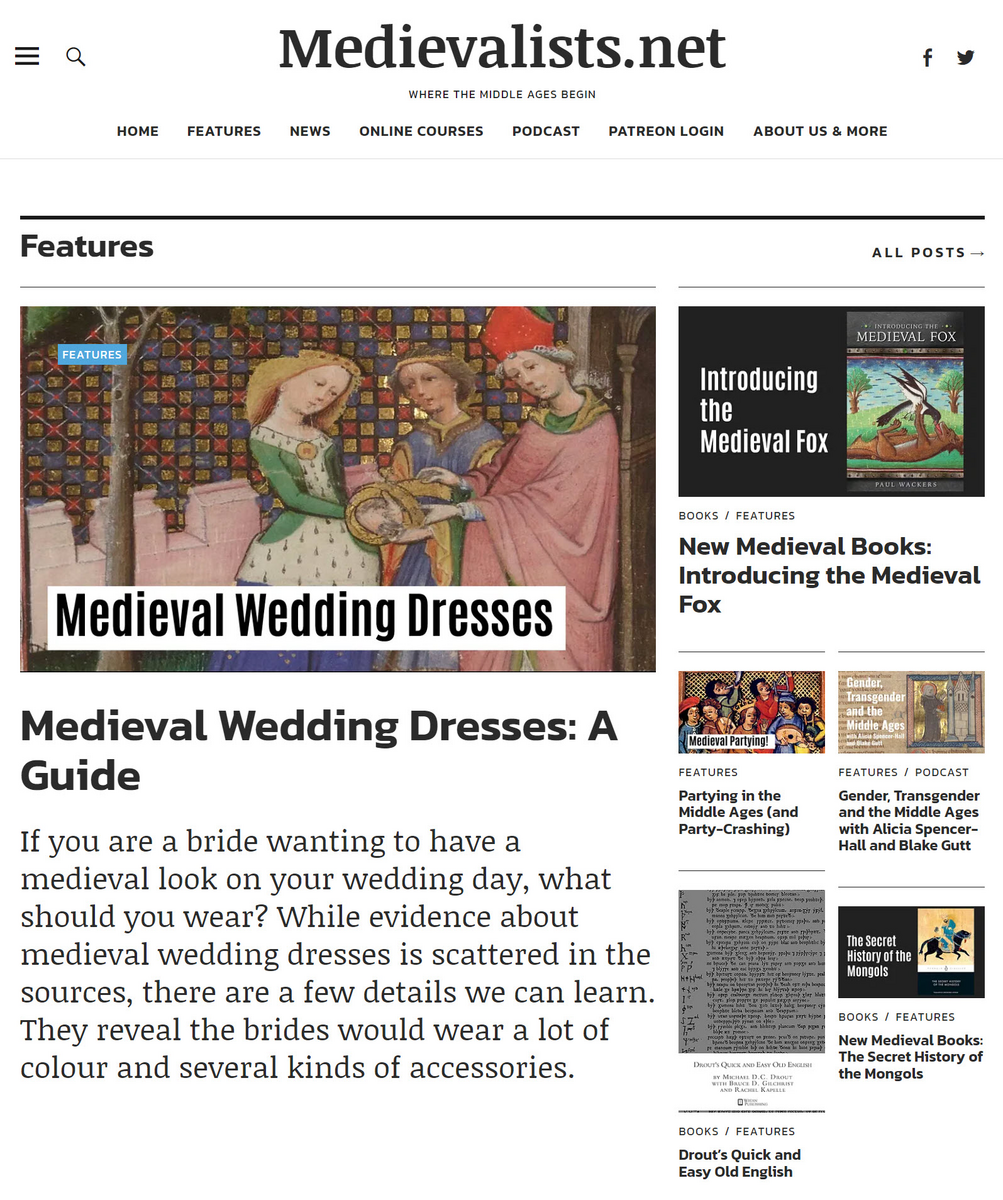
Medievalists.net
As the name suggests, Medievalists.net is focused on all aspects of the Middle Ages, or medieval times. This site proves you don’t have to write about trending topics to build a successful blog.
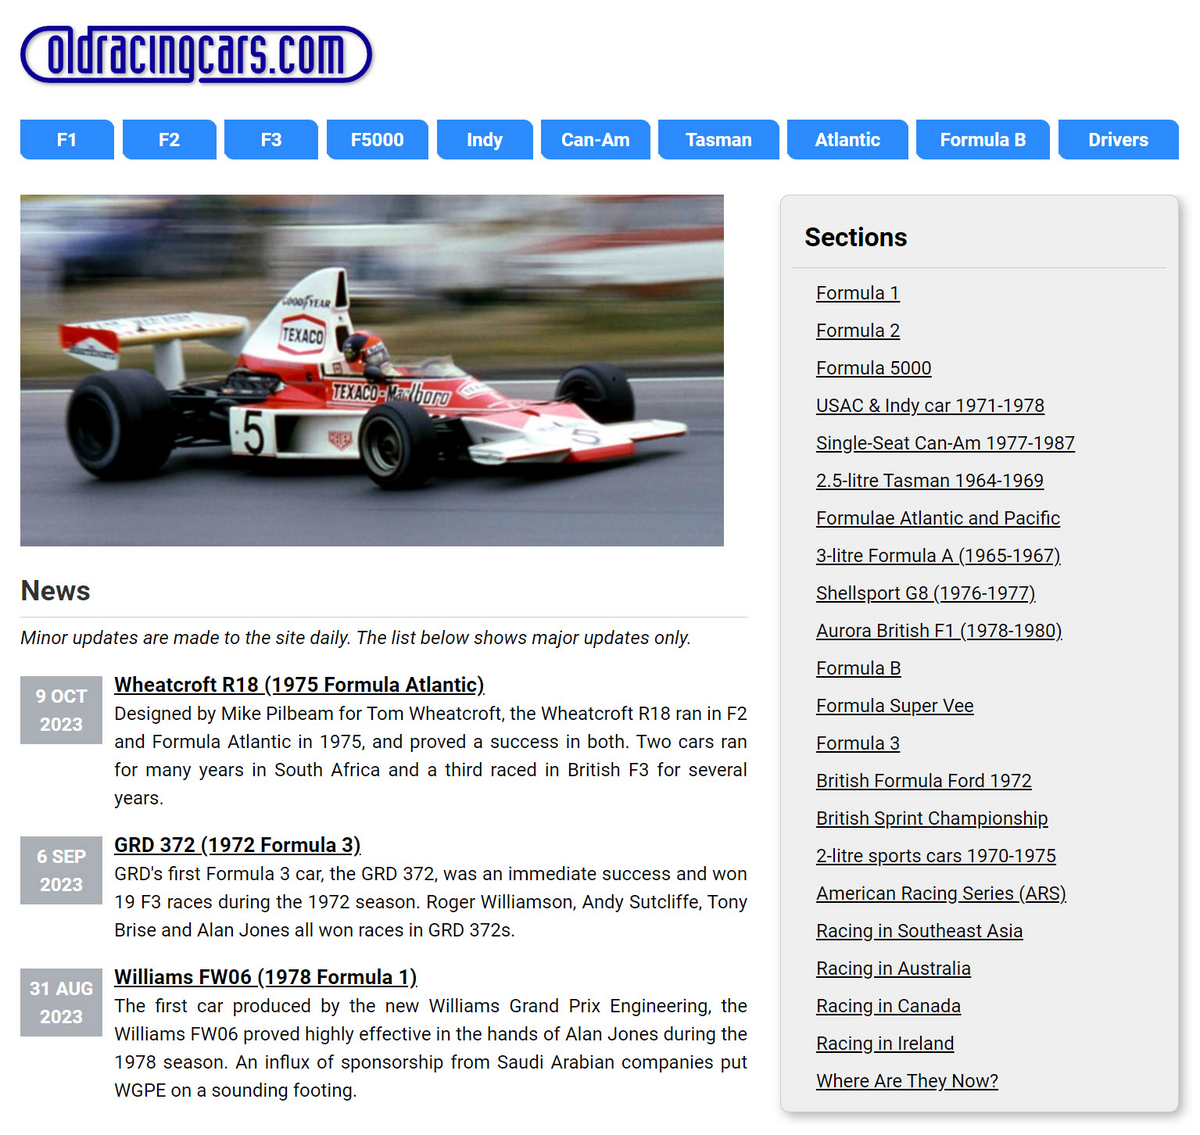
Old Racing Cars
Old Racing Cars takes a unique approach by telling the history of racing with a focus on the cars. This makes for engaging posts that their audience of diehard old-school racing fans love.
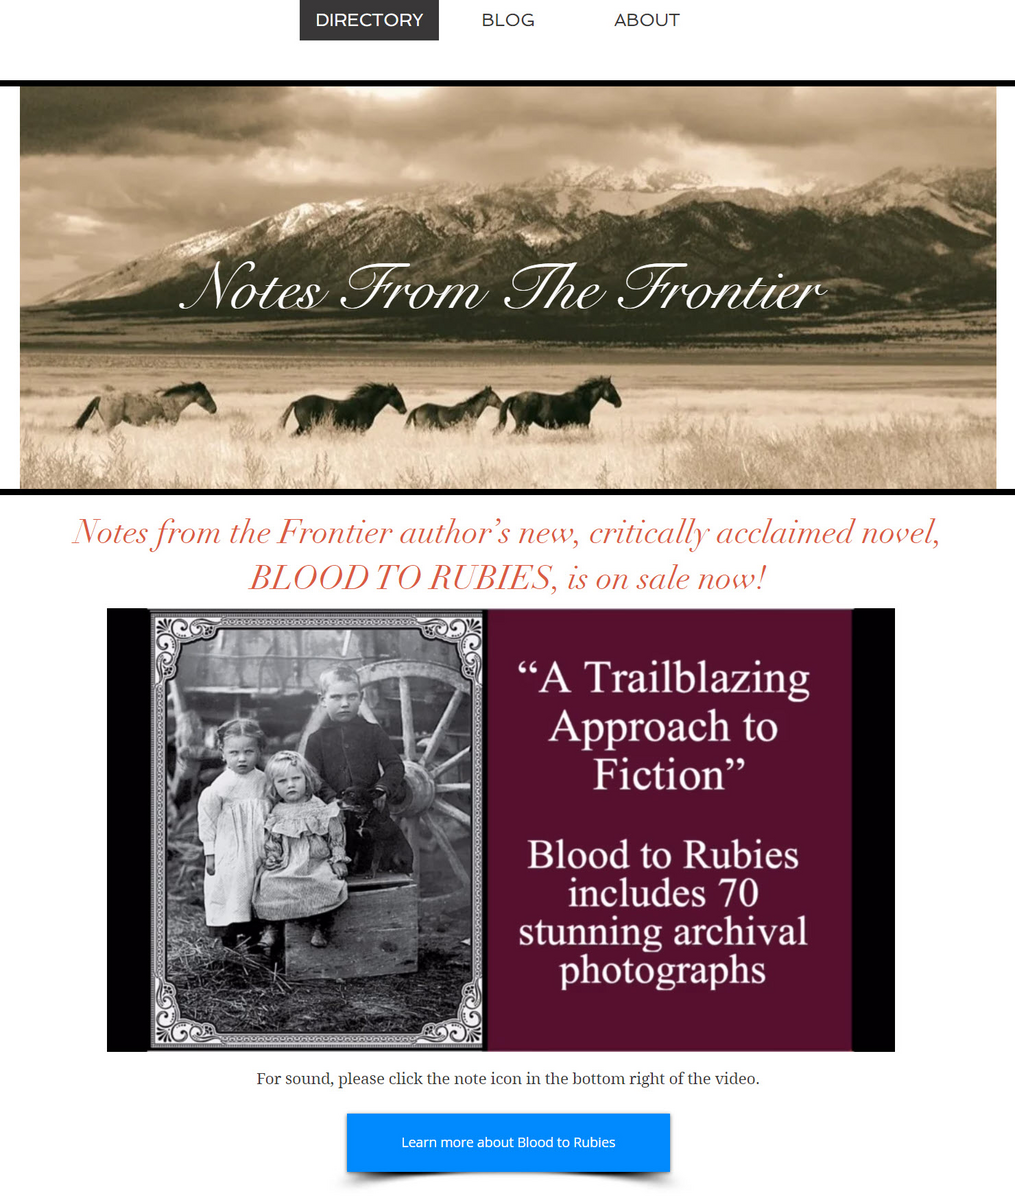
Notes from the Frontier
Notes from the Frontier dives into the history of the American frontier, spanning from the Midwest’s forests to the old West’s rough-and-tumble cowboy days. The creator also uses this blog to promote her books.
How To Start a History Blog in 10 Steps
Now that you’ve seen some inspiring examples, here is a step-by-step guide to starting your own history blog.
1 Narrow Down Your History Niche
History is one of the broadest possible niches to blog about. After all, it deals with almost every topic under the sun across recorded time. It doesn’t get much more broad than that!
But history buffs are looking for content focused on their specific interests. For instance, someone interested in the Roman Empire probably won’t care about a blog focused on sports history, the American frontier, or World War II.
That’s why you must narrow the focus of your blog to target a specific area of history. Without this focus, your blog will be too broad to capture anyone’s interest.
Here are just a few of the many sub-niches you might consider for your new history blog:
- Roman History
- Civil War
- American Frontier
- State History
- Ancient History
- Sports History
- History of Scientific Discovery
- Military History
- Art History
It’s important to have a passion for the sub-niche you pick to stay interested and motivated for the long haul. But you also need to ensure that your choice is popular enough to build a following and make money.
The best way to qualify your niche is to identify niches that already have profitable sites. Here is our recommended strategy for finding sub-niches with a history of supporting successful blogs:
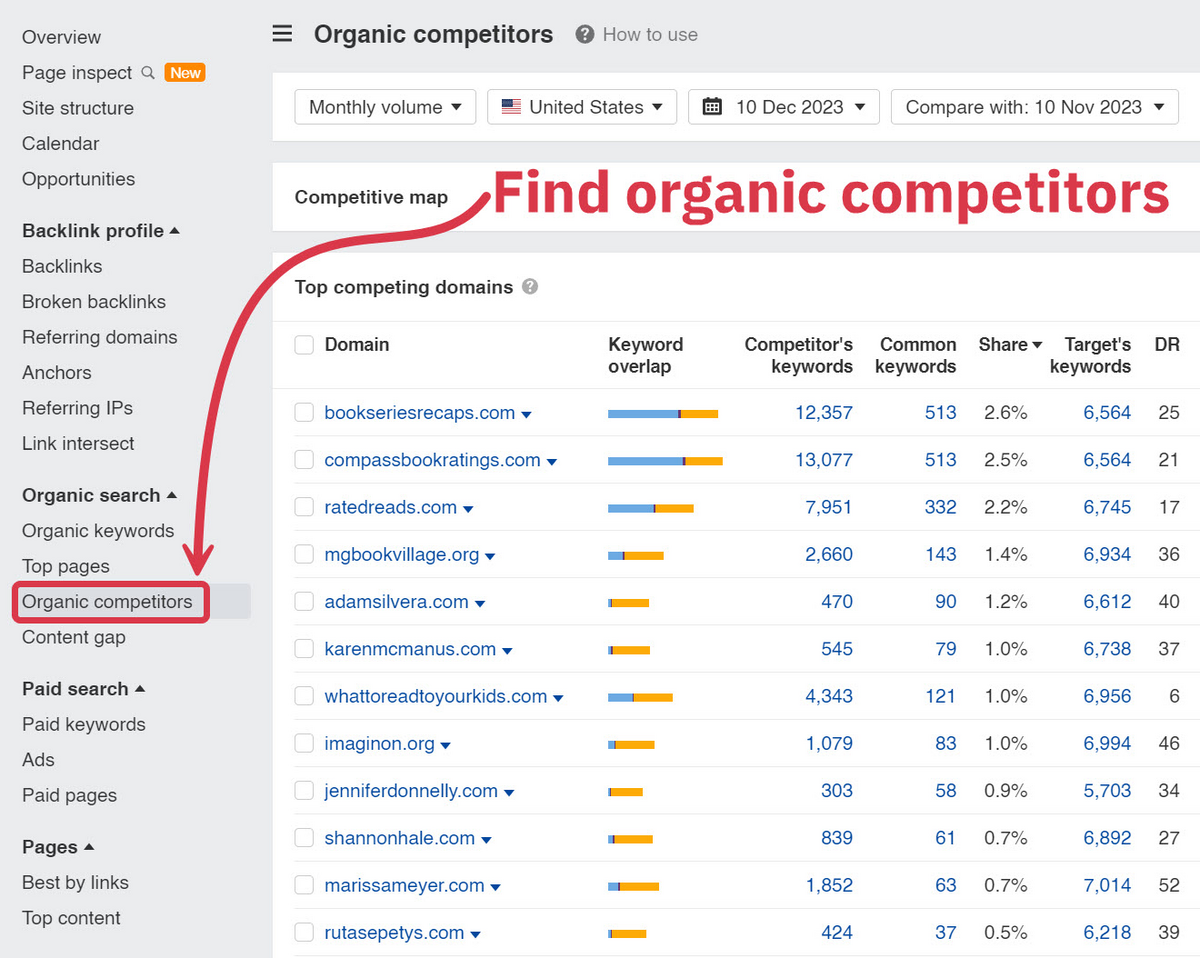
Make a list of successful blogs in your niche. You can use a blog aggregator like Feedly to find a list of popular history sites. You can also search Google for keywords related to history or use the “Organic Competitors” tool on Ahrefs to find websites that are similar to a history blog that you enjoy:
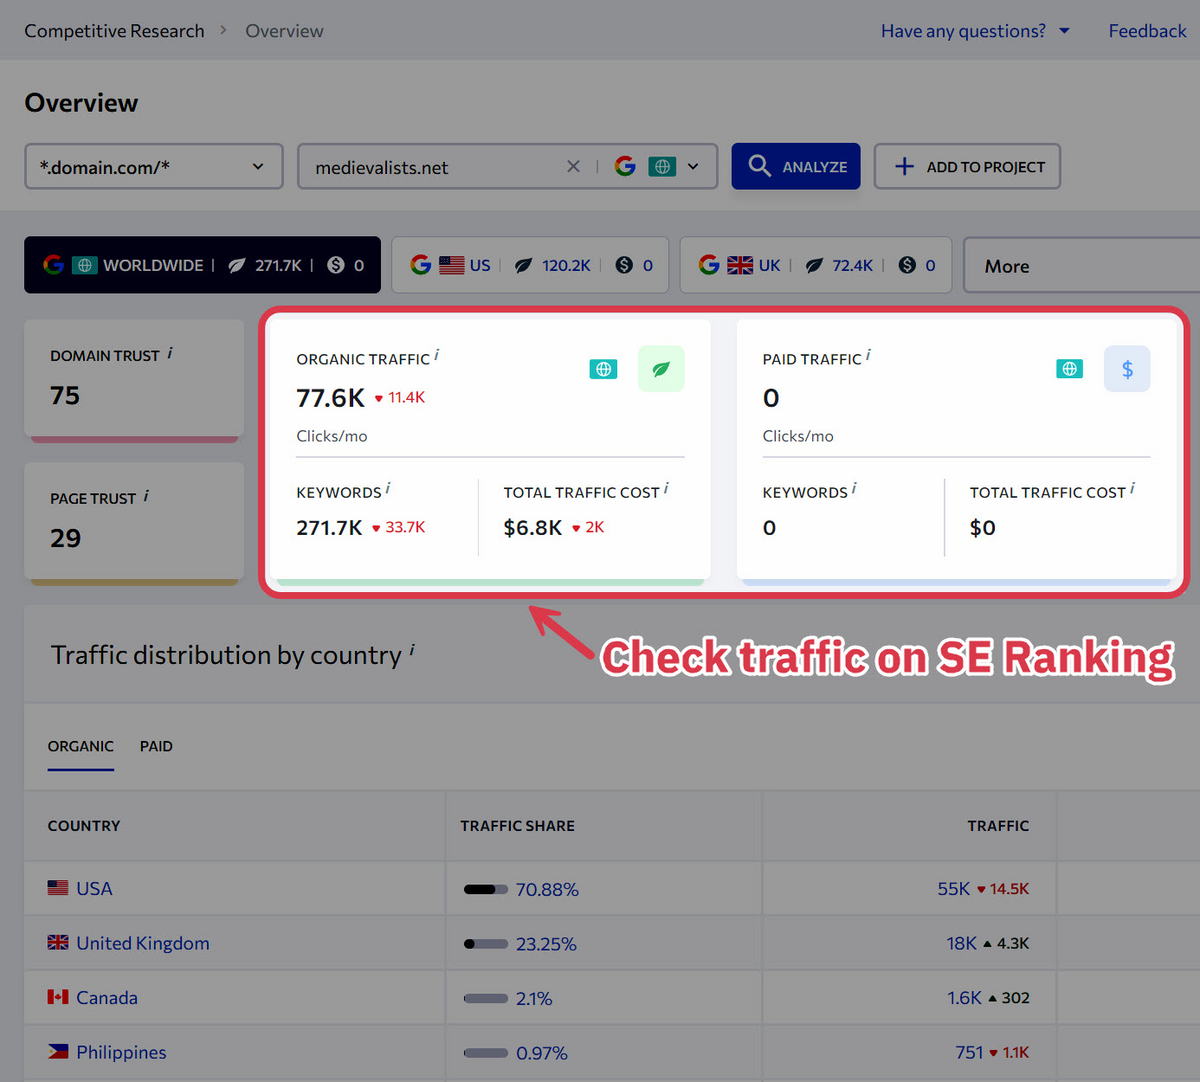
Check traffic levels. One of the best indicators of a profitable blog is high levels of traffic month after month. You can use a free trial of SE Ranking to analyze the traffic for each blog you identified above.
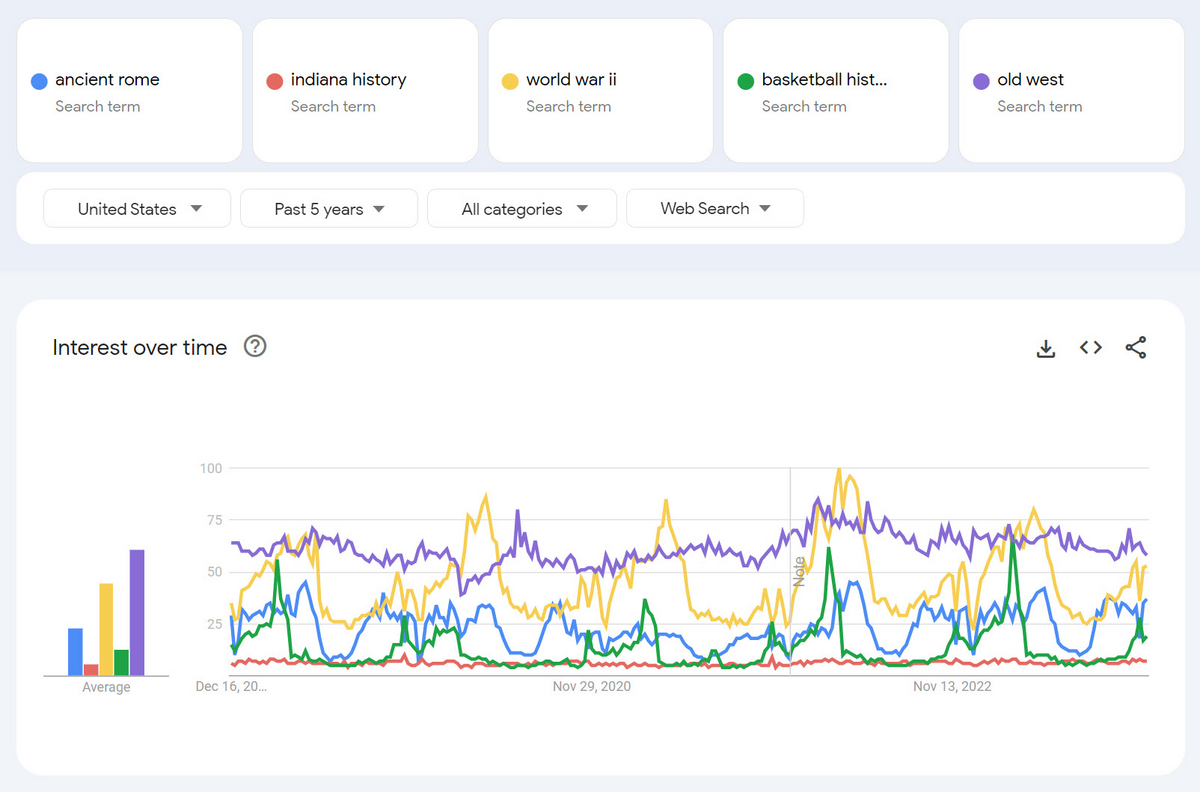
Compare prospective sub-niches with Google Trends. If you’re not sure about which sub-niche you want to be the focus of your history blog, you can use Google Trends to compare relative traffic levels:
If you’re still having trouble deciding between sub-niches, our detailed niche selection video can help you choose.
You’ve collected a lot of information and have plenty to think about, so feel free to take a day or two to select your niche. But don’t get too bogged down – it’s better to make a choice and move on than to stall before you even get started building your history blog.
2 Choose a Blogging Platform
Now that you’ve picked a niche, it’s time to choose a platform for your history blog.
A blogging platform is an online service you use to manage your blog content and serve it to site visitors.
Social blogging platforms like Medium and Blogger are popular free options, but they come with some serious limitations:
- You don’t have much control over the layout and style of your blog.
- You may not be allowed to post some types or forms of content.
- These platforms are hard to monetize.
If you want to break free of those restrictions and give yourself the best chance to make real money with your blog, the best option is to host your own website.
Here are some of the benefits of building a self-hosted blog:
- You have full creative and editorial control over your blog content and design.
- No one can shut down your blog or delete your posts.
- It’s relatively easy to make money with affiliate products and display ads, at least compared to the free platforms.
- You can use search engine optimization (SEO) and social media to drive traffic.
- You can build an email list so you’ll always have a direct audience, even if Google changes its algorithm.
The best platform for most bloggers is WordPress, specifically WordPress.org (not to be confused with WordPress.com).
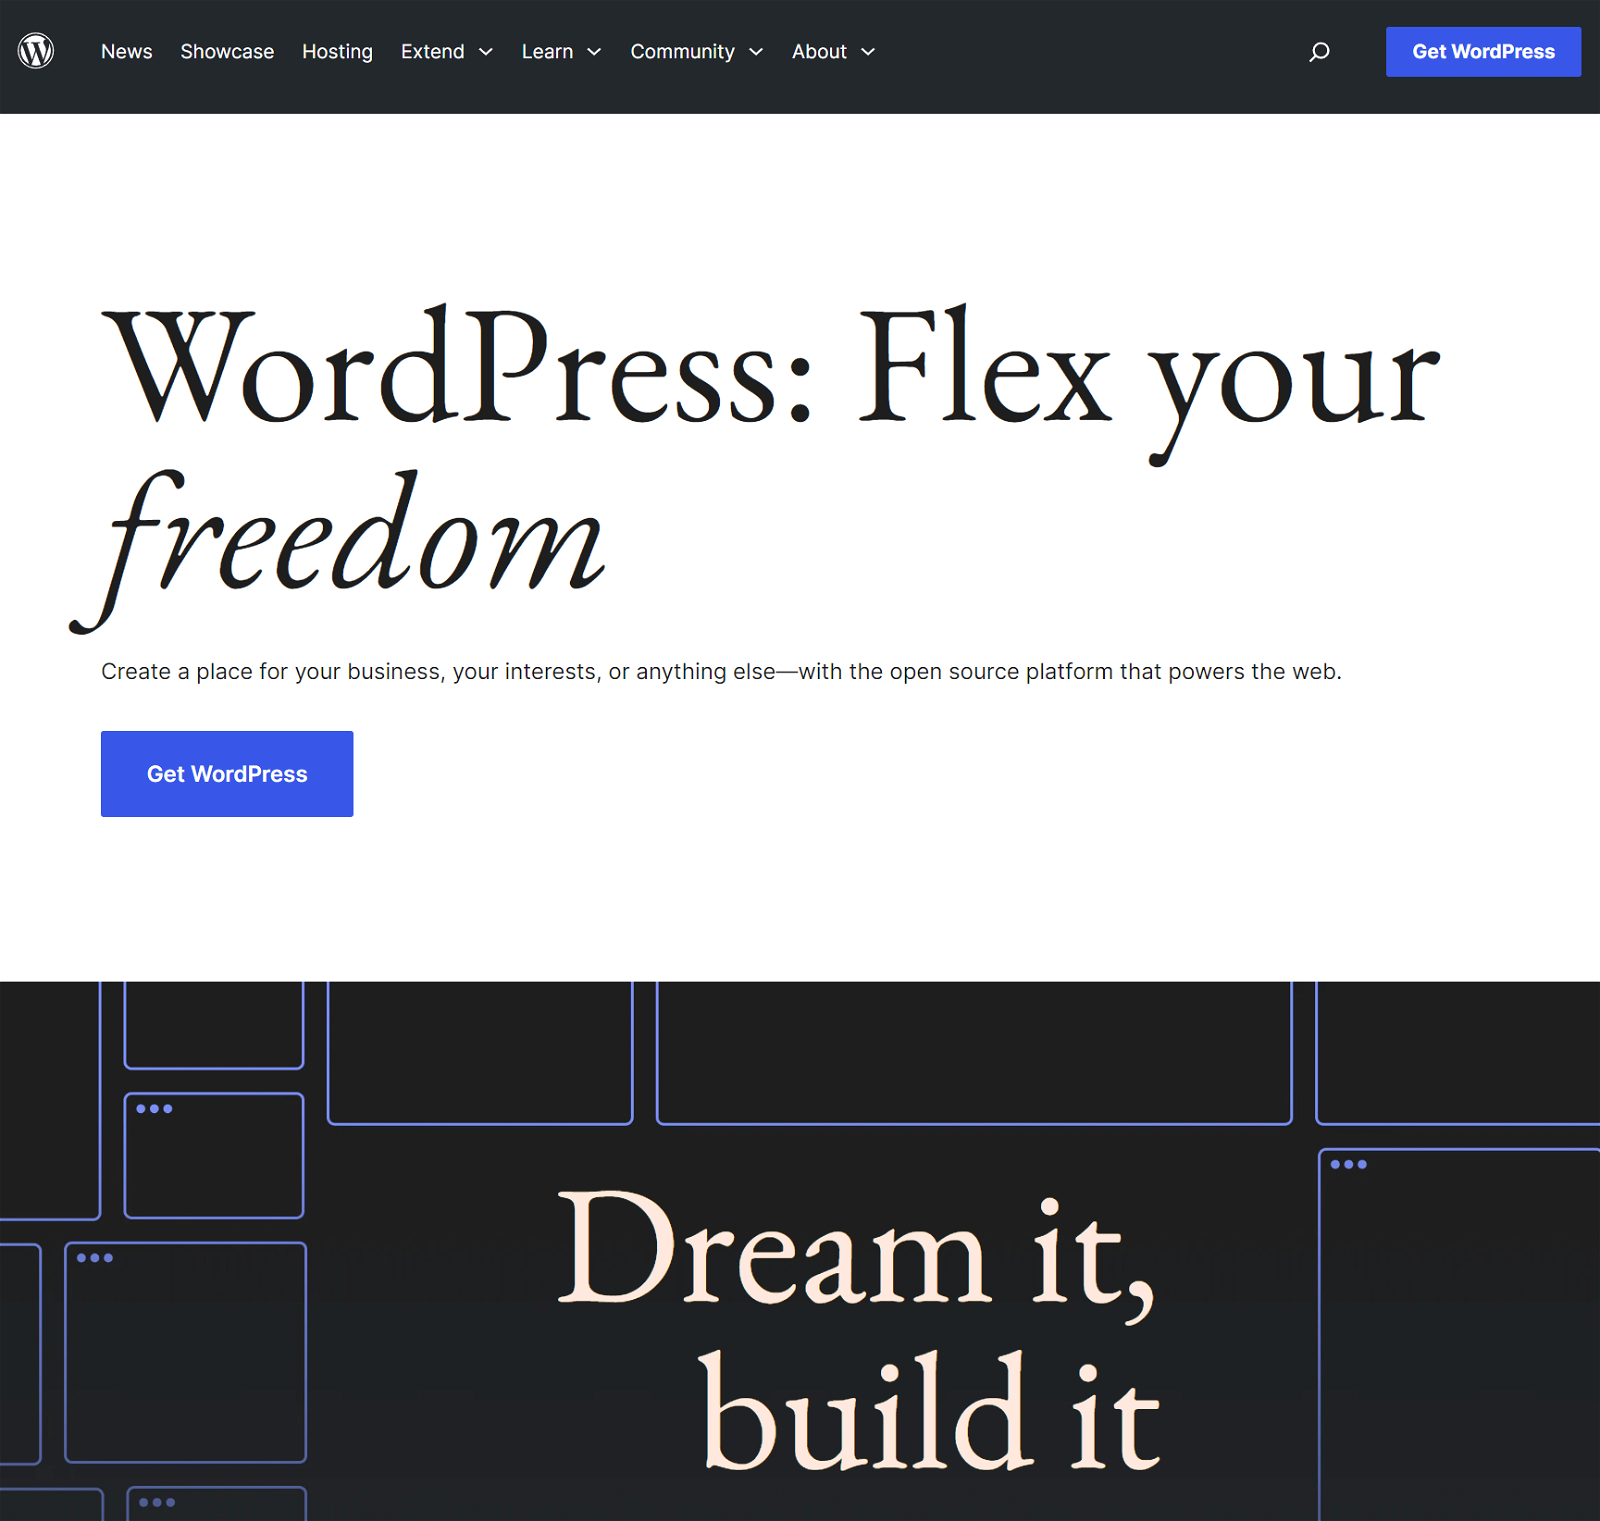
WordPress.org is free and offers access to thousands of themes and plugins you can use to customize your blog.
Even though WordPress is the best choice, it’s not the only option. See our article about the best blogging platforms for a complete list of alternatives.
3 Choose Your Domain Name
Once you choose a sub-niche and platform, it’s time to pick your domain name.
A domain is the web address for your blog. It includes your domain name and an extension, like .com or .net.

Choosing a good domain name is important because it’s a key part of your brand. It should help your readers remember your site and connect with the type of content you offer.
Here are some tips for picking an awesome domain name:
- Choose a .com domain. This is the most recognizable and trusted of all extensions. Even so, other possibilities might work for some blogs. See our post on .com alternatives for other possibilities.
- Match it to your niche. Your domain name should let readers know what your site is all about. For example, HistoricalHoops.com might work well for a basketball history blog.
- Keep it broad. Don’t pick a domain name so specific that you can’t expand into other sub-niches down the road. You might start out blogging about the Civil War, for example, but then decide to move on to other 19th-century military topics.
- Keep it short. Short domain names are easy to type and remember. Keep your name to 3 words or less.
- Make sure it’s not trademarked. Check potential domain name ideas on the USTPO Trademark Database to make sure no one else owns the name you want.
If you’re struggling to find a good name, try using an AI domain generator like Brandsnap.
Once you choose a domain name, you need to buy it. You should be able to grab a .com name from a registrar like Namecheap for about $10 per year.
4 Buy Web Hosting
Now that you have a domain name, you need to choose a web hosting provider.
A web host provides the servers and network to store and manage your site and serves your blog to visitors on the internet.
Although Bluehost is a popular option for many beginning bloggers because it’s cheap, it’s also quite slow and unreliable. We recommend using SiteGround – it offers superior speed, reliability, and support for the same price.
Here’s a step-by-step guide to getting started with Siteground hosting:
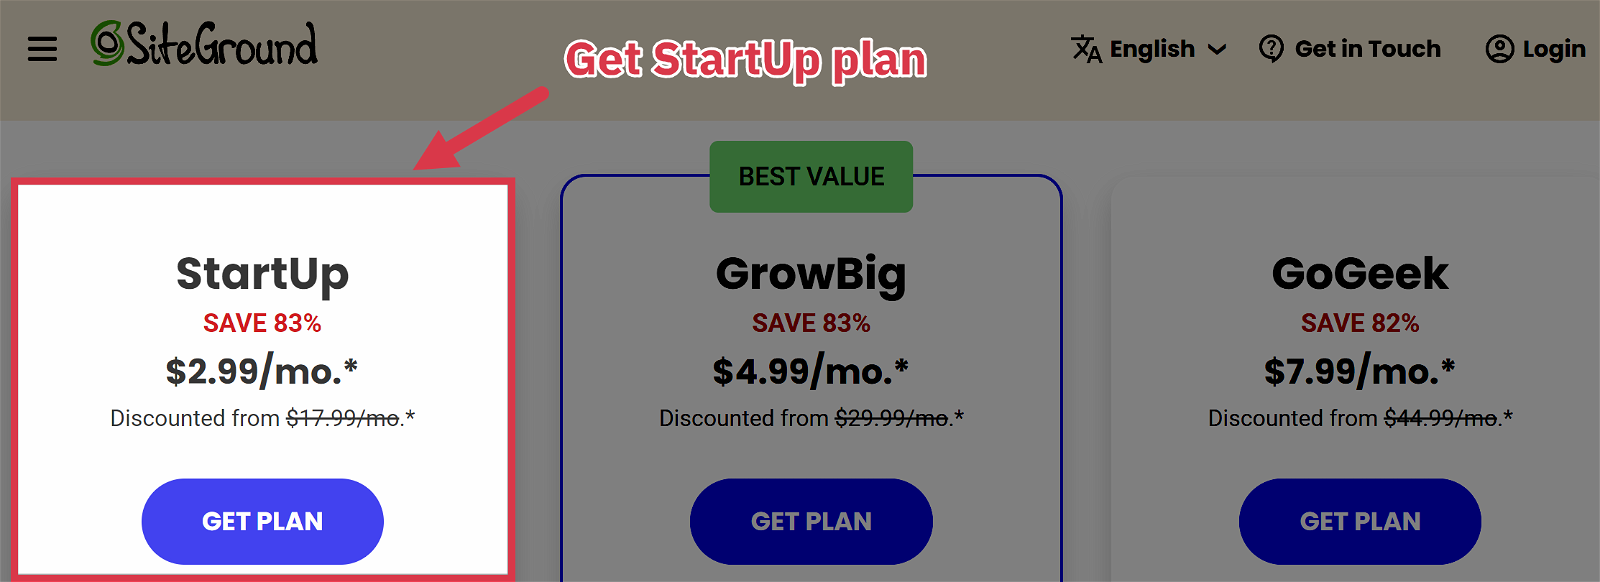
Step 1: Go to Siteground’s WordPress hosting page.
Step 2: Pick the StartUp plan. It’s the least expensive and has everything you need to start your own blog. Note that the price increases after the first year.
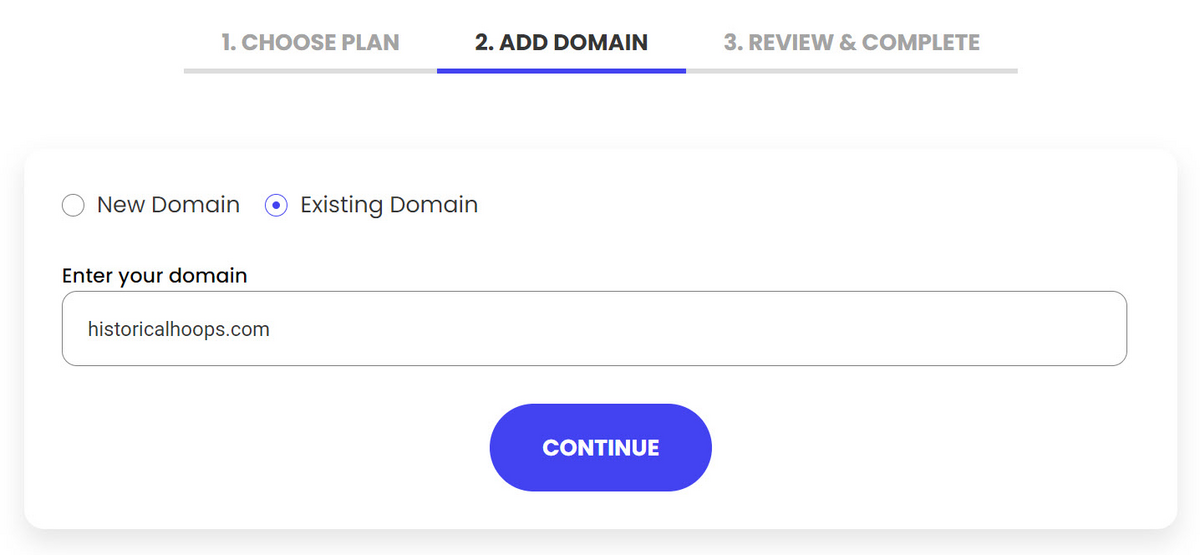
Step 3: Select “I already have a Domain” (unless you didn’t buy one from Namecheap) and enter your domain name:
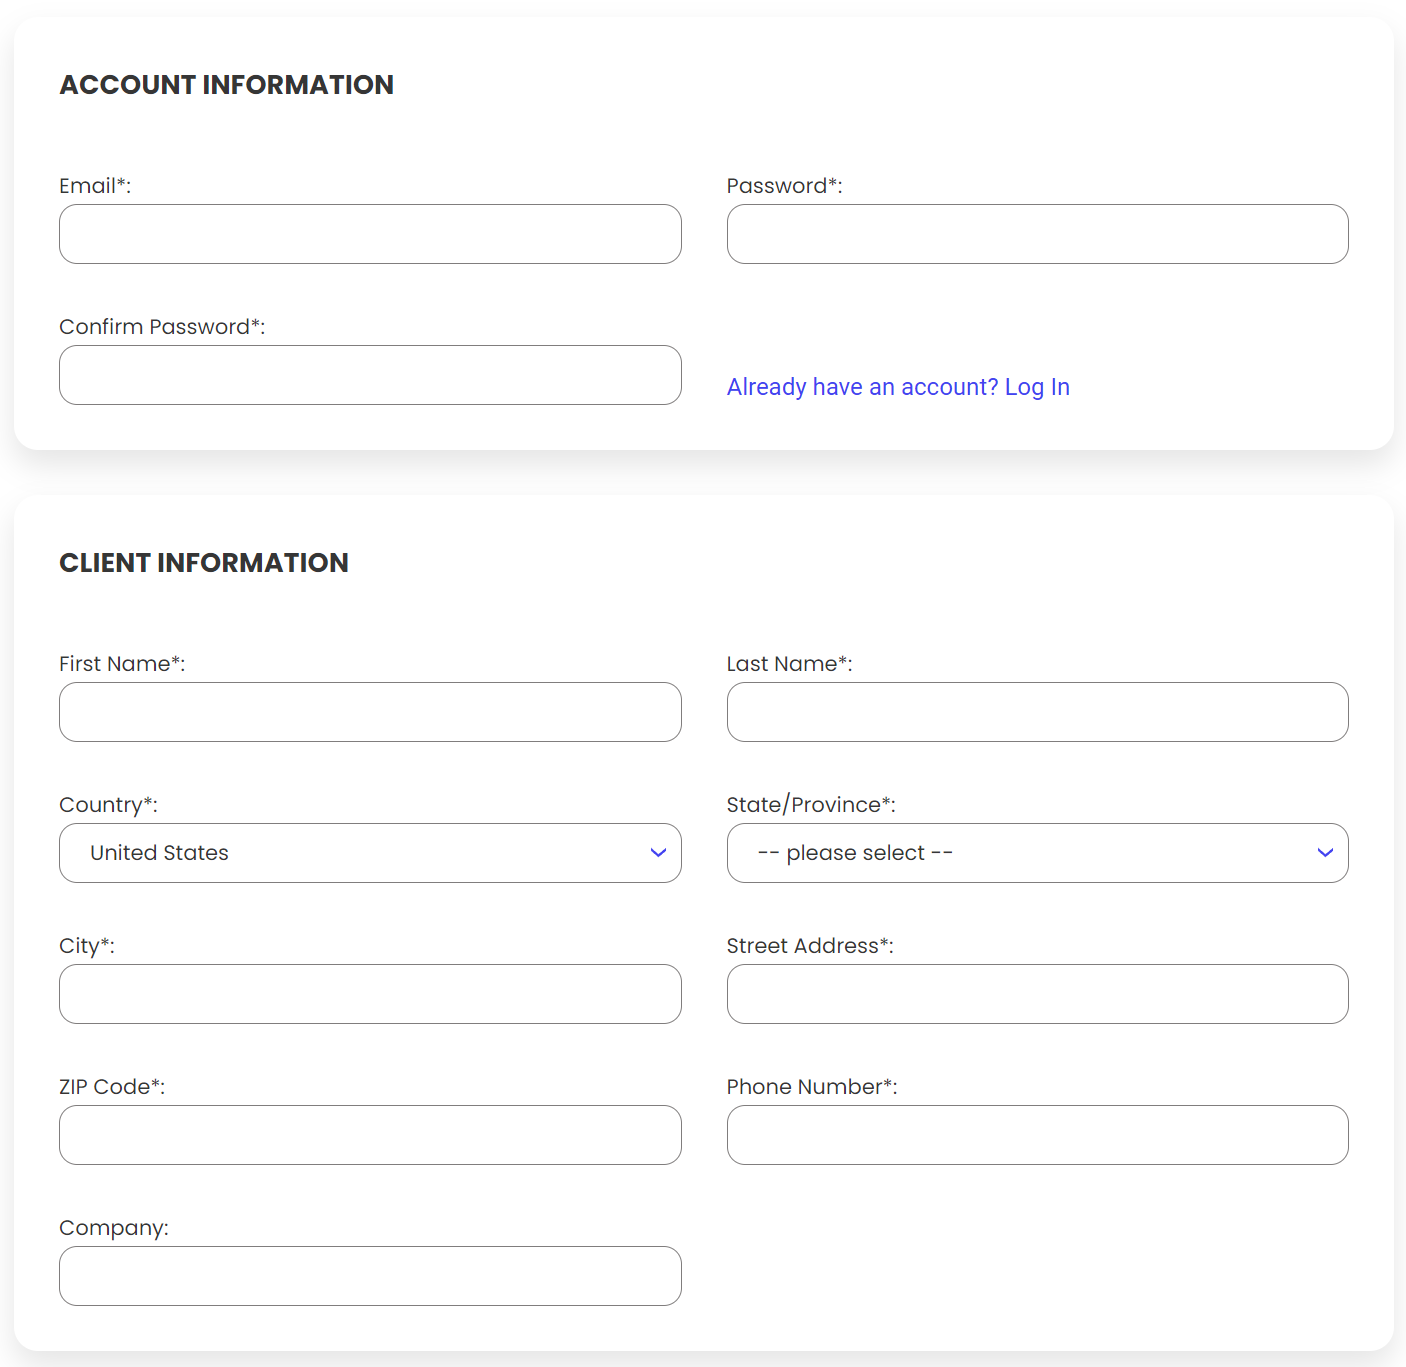
Step 4: Fill in your account details:
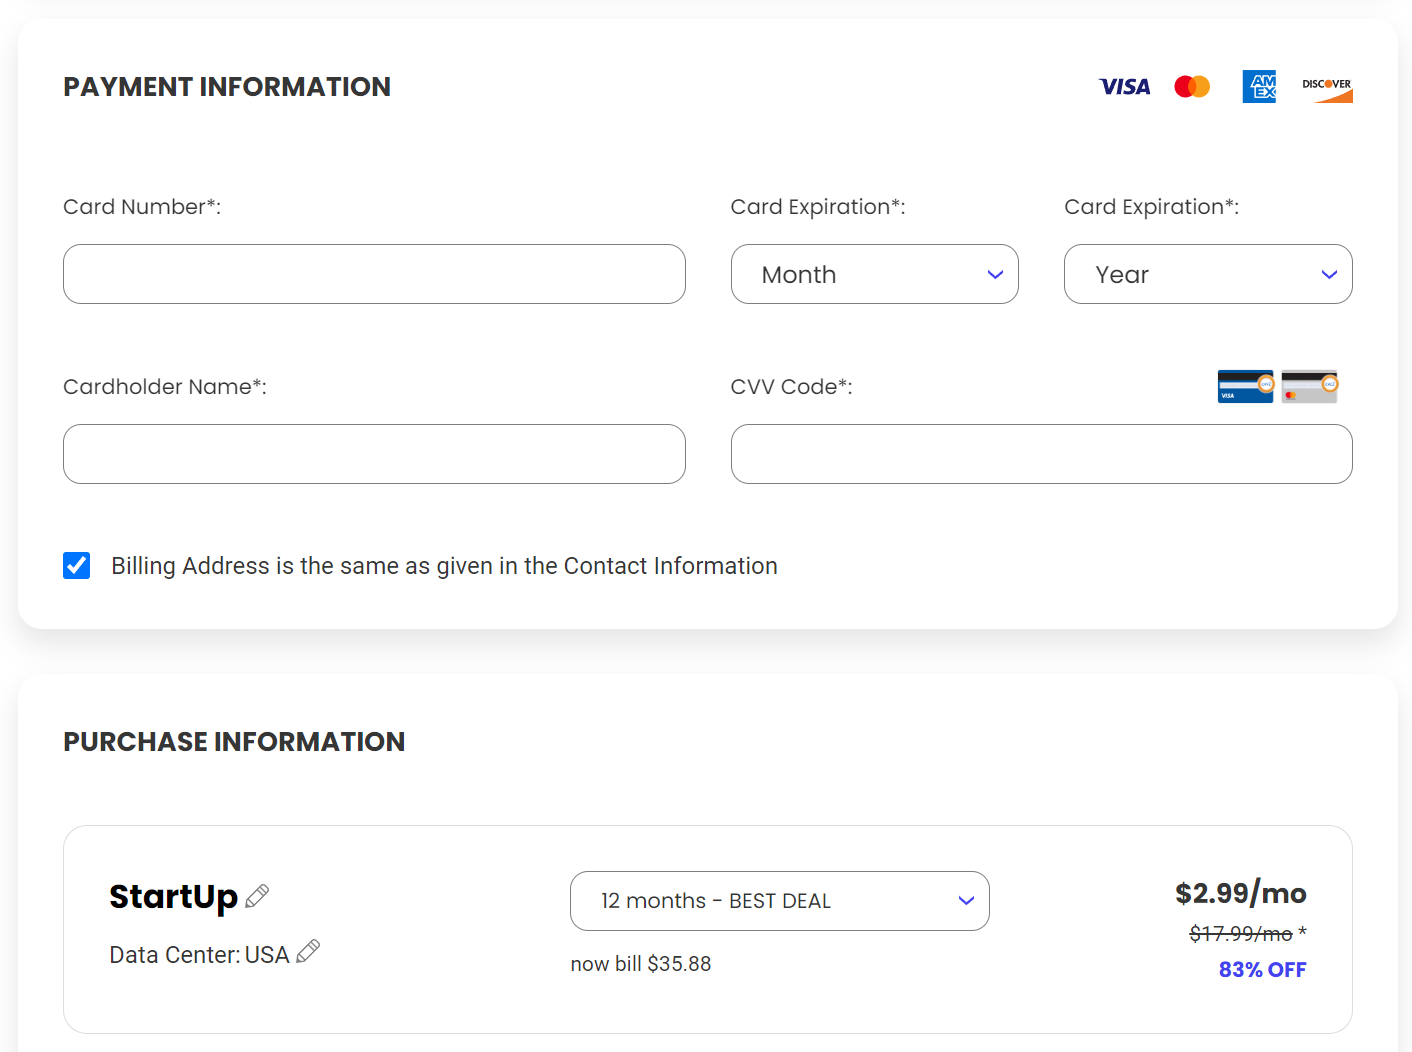
Step 5: Enter payment details and choose the subscription length you want. The best deal is usually the 12-month option. Note that their introductory pricing increases after the 12-month period.
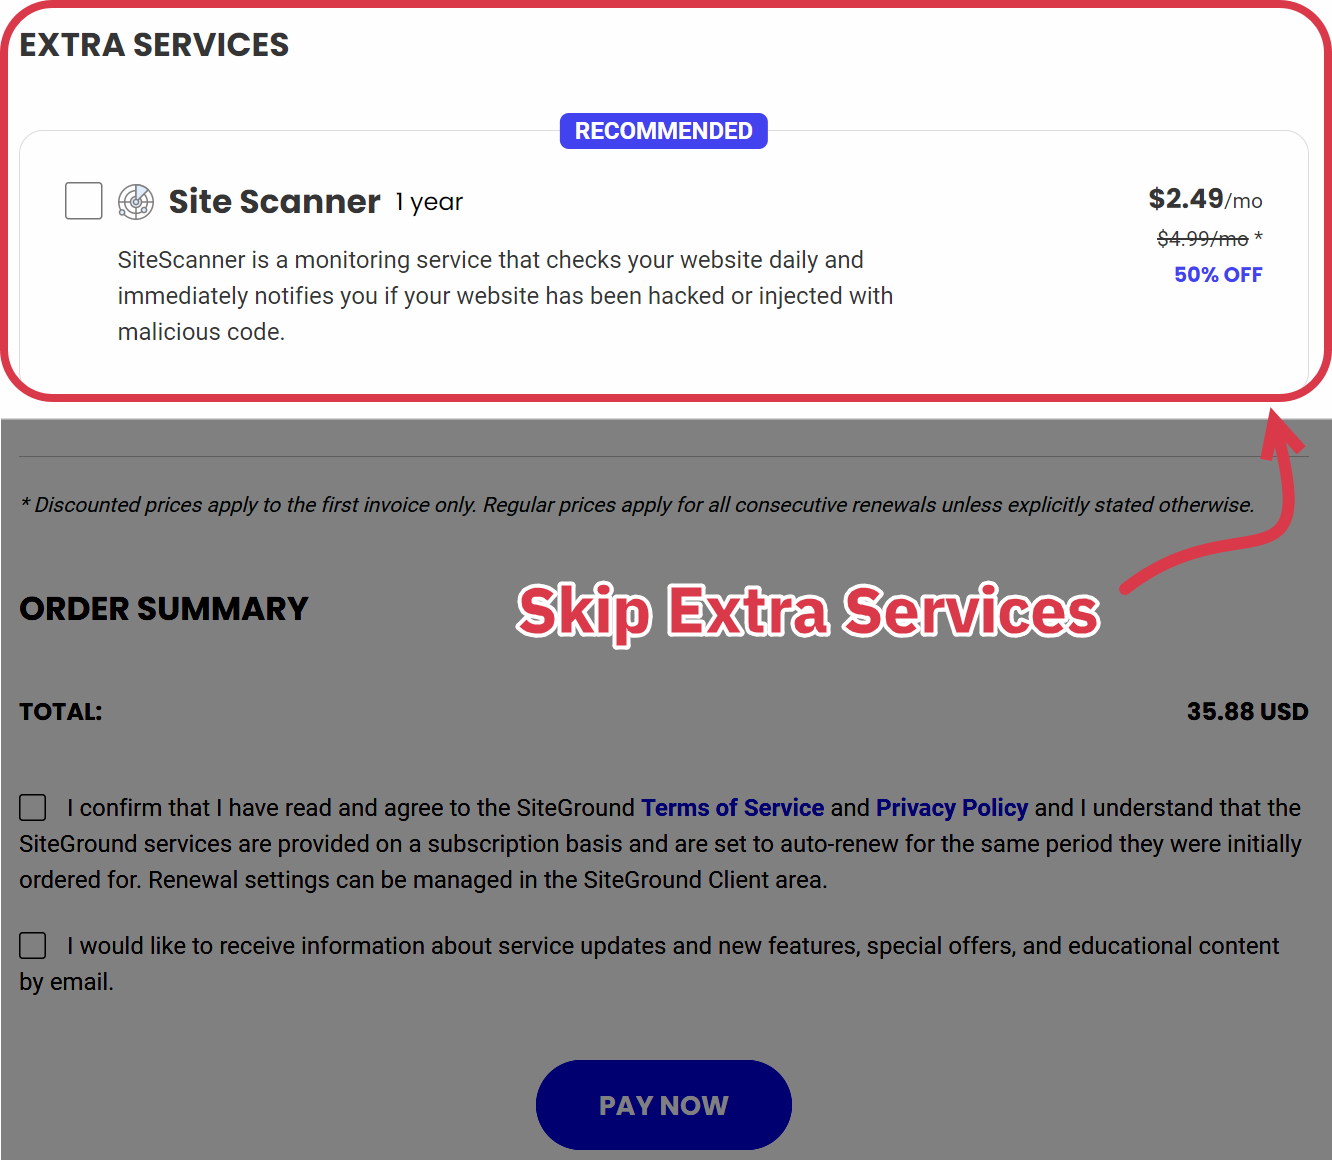
Step 6: You won’t need any extra services for a new blog, so you can skip them for now.
Step 7: Point your domain to Siteground. You need to change the DNS settings to point to Siteground if you bought your domain from Namecheap (or another registrar). Siteground support can help with this.
And you’re done! You now have a hosting account and can move on to building out your new blog.
5 Choose a Theme for Your History Blog
With web hosting in place, it’s time to pick a WordPress theme for your history blog.
A blog theme is the visual framework that gives your site structure and design. It should match the general look and feel of your blog topic and brand.
You can choose a free theme or pay for one with premium features. While free options will save you money upfront, their functionality and flexibility are limited, which will hold you back as your blog starts to grow.
It’s OK to start with a free theme, but just make sure you pick one that also lets you upgrade to a more premium paid version later on.
We have found that Astra, Kadence, and GeneratePress are all great themes for new blogs.
All of these themes have template libraries to help you set up your site quickly. They also have free plans with upgrade options.
Here’s a quick step-by-step process to install the theme you choose on your blog:
Step 1: Go to your WordPress dashboard.
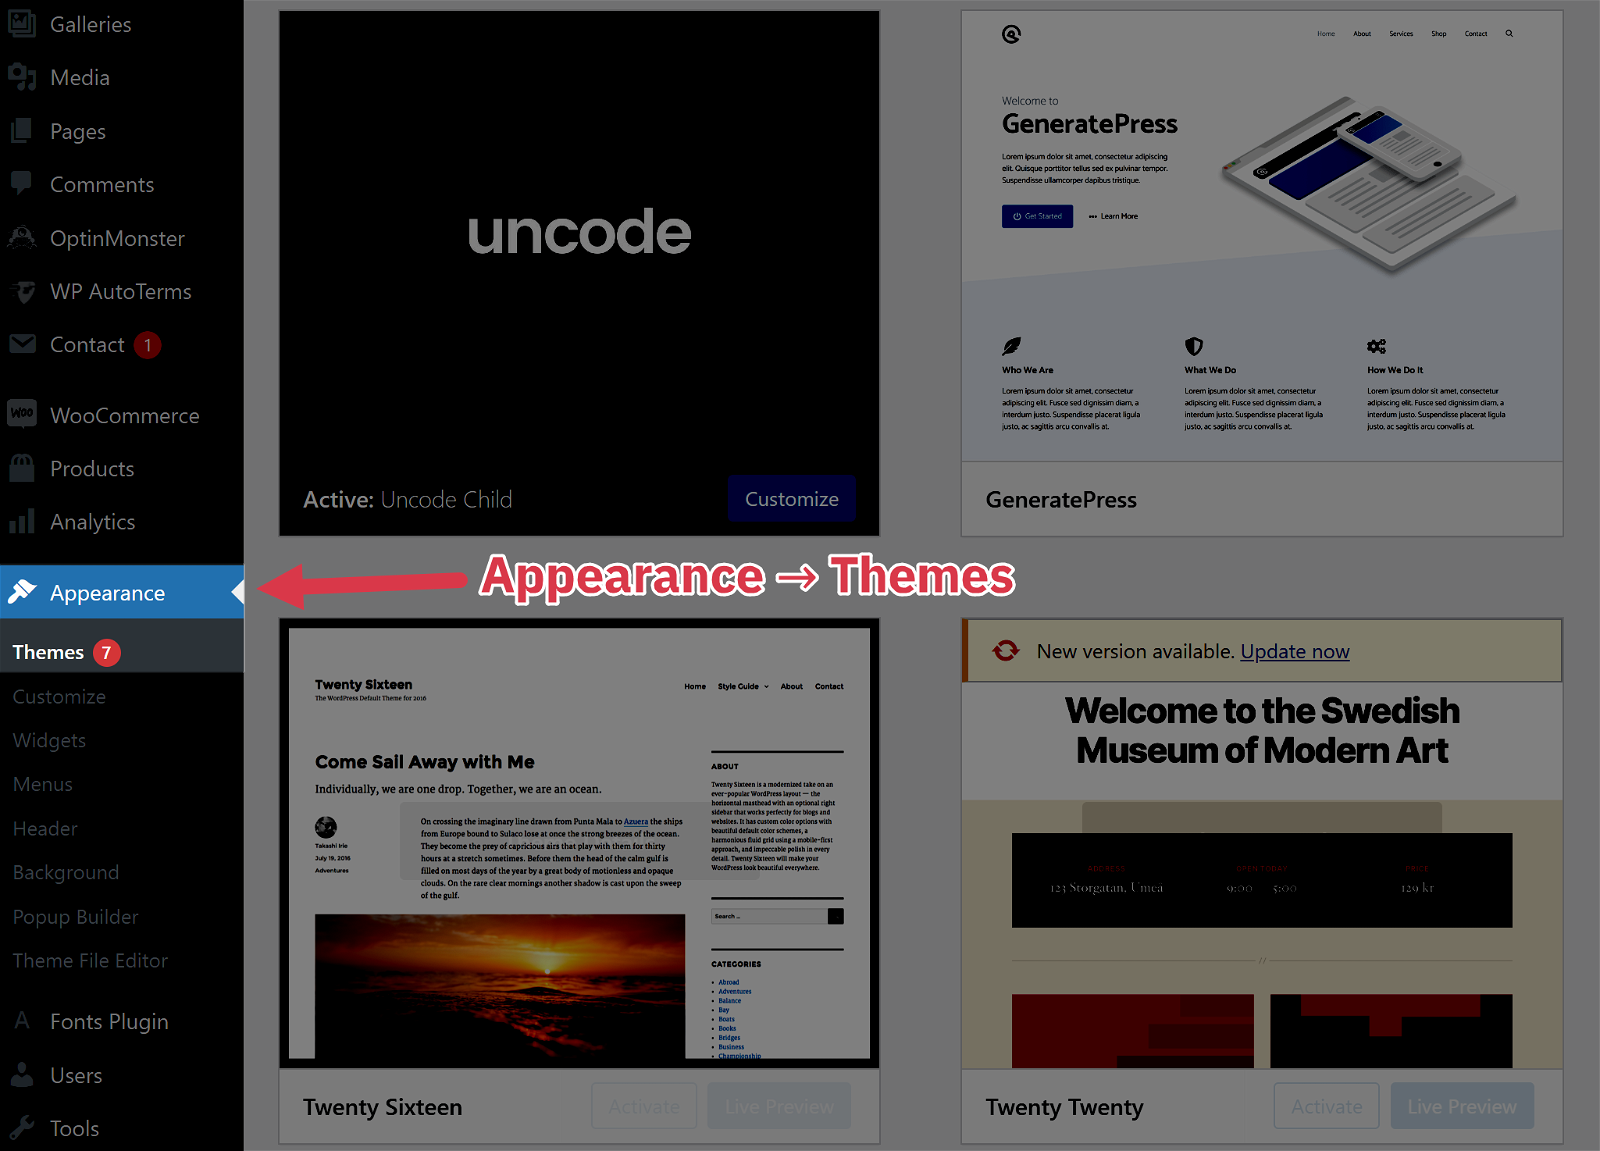
Step 2: Go to the left sidebar and select Appearance > Themes
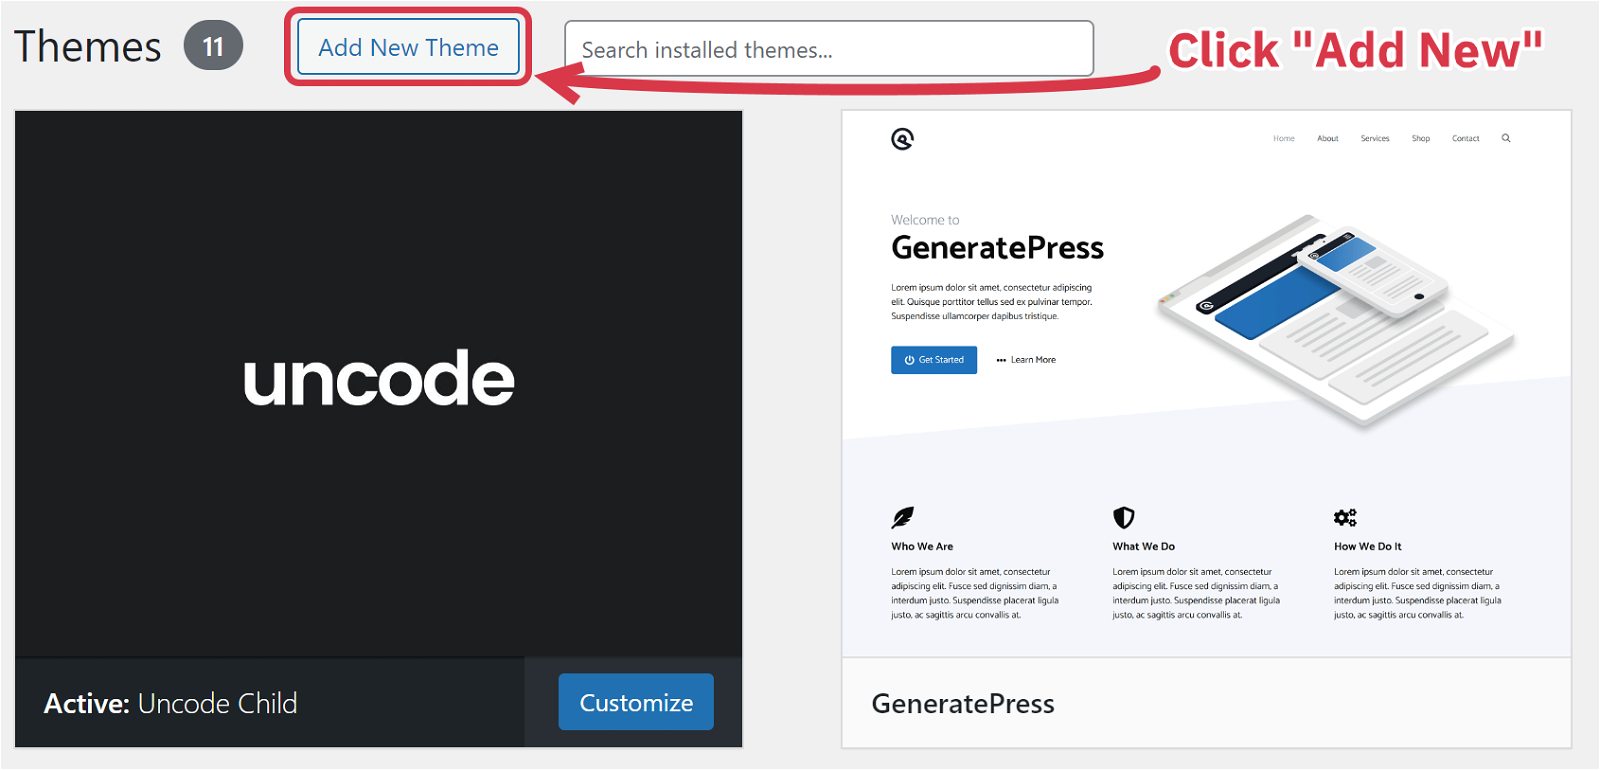
Step 3: Click “Add New”
Step 4: Search for your theme and click “Activate.”
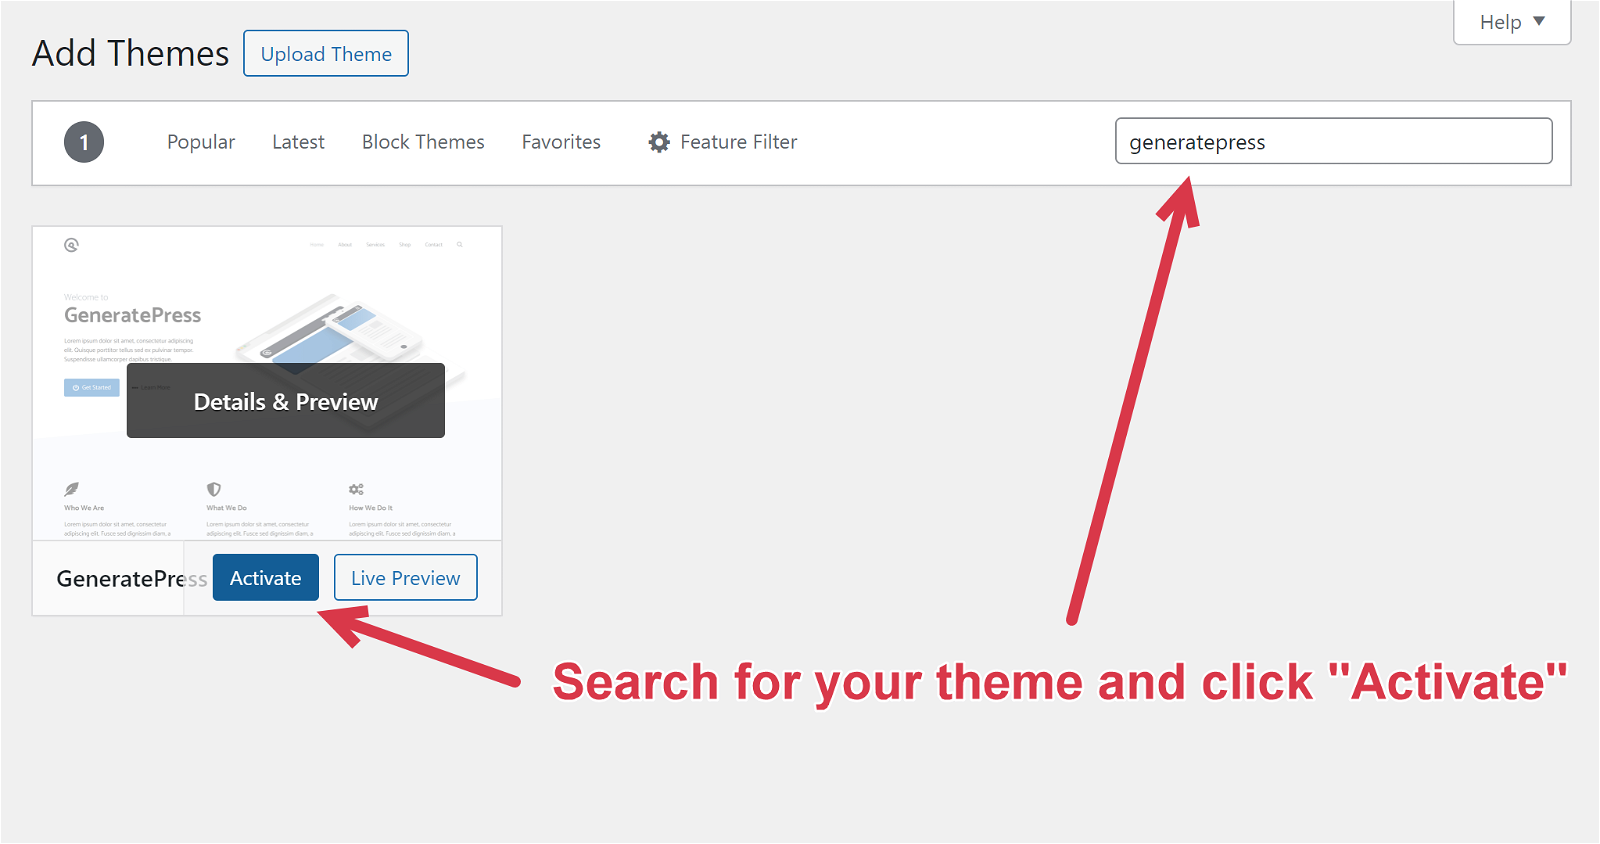
And that’s it! Now that your theme is installed, it’s time to start customizing your new website to match your niche and brand.
6 Decide on Design & Branding
Your new blog draws its basic design and layout from the theme you chose in the last step, but you’ll need to fine-tune your site with some more advanced branding decisions. In this section, we’ll choose our color palette and create a logo.
When planning your design, you should consider your niche and choose design elements that match your topic. For example, a medieval history blog might feature Gothic fonts and heraldic imagery, while a blog about Ancient Egyptian history can incorporate hieroglyphic-style graphics and a color palette of sand, stone, and gold.
Let’s start by choosing a color palette.
Luckily, you don’t need to be a design expert to nail your colors. You can use Coolors to create a harmonious, theme-appropriate palette with zero experience.

Once you pick your colors, it’s time to design your site logo. This is a key piece of your design because it’s one of the first things visitors will see when they land on your site.
History bloggers often use logos that show old-time drawings or books, imagery from their niche, and some stylized text. For example, a blog about ancient Egypt might feature the blog name over a pyramid in its logo.
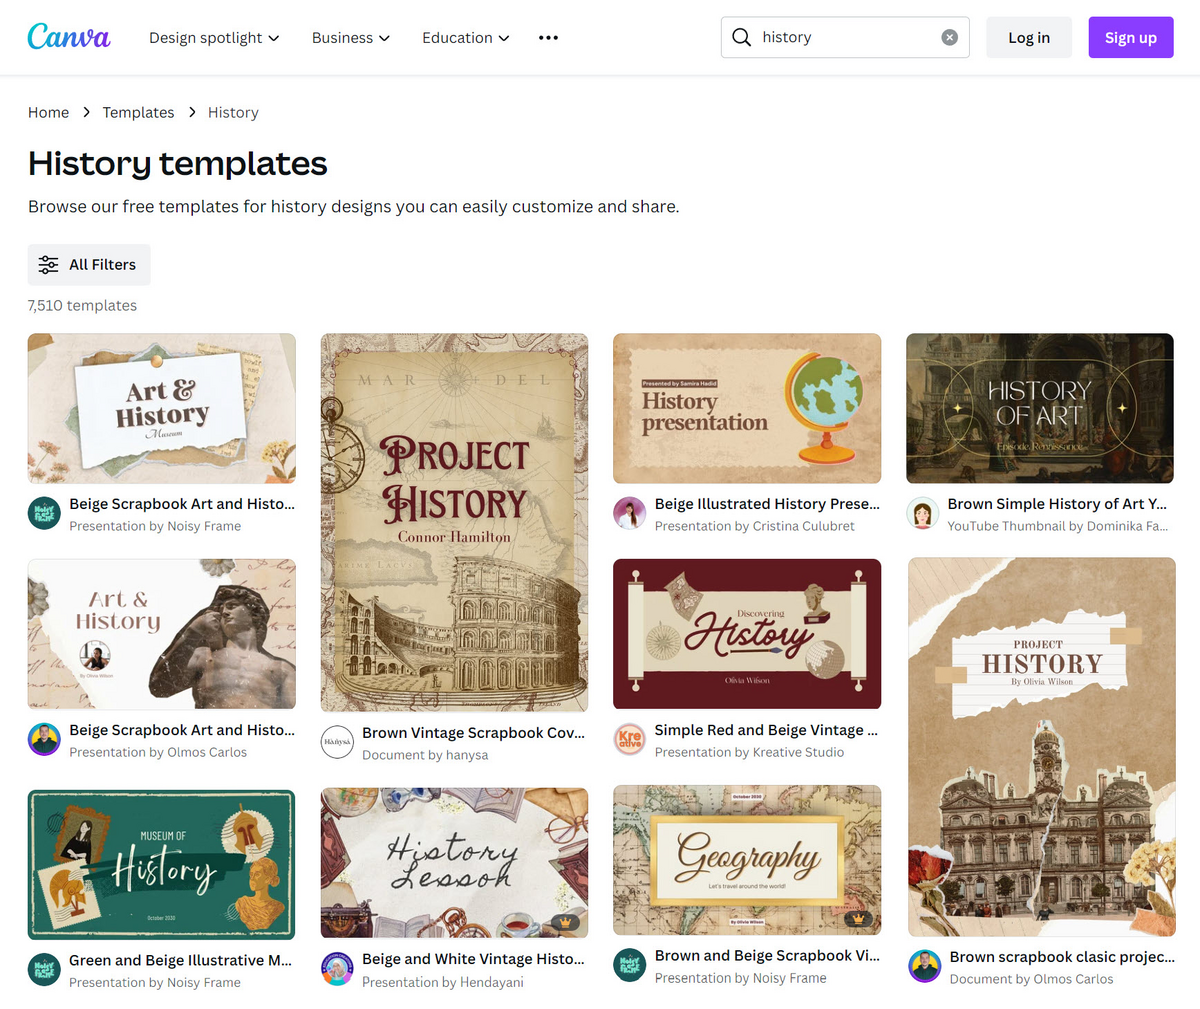
As with picking colors, you don’t need design experience to create a great logo. You can start with a Canva template and then customize it from there.
Here are some of Canva’s templates for history-themed logos:
7 Create Essential Pages
You have all the building blocks for your blog in place, so now it’s time to create a few essential pages that every site needs. Don’t leave any of them out!
Homepage
This is the main landing page for your history blog and should immediately signal to readers what your focus is. Use links, menus, and other navigation elements to help them quickly find what they want.
About Page
Here is where you tell your audience who you are and what your site is about. Discuss your history background and interests, explain why you took up history blogging in the first place, and tell your readers what to expect.
Contact Page
Use this page to tell readers how to get in touch with you. Include a contact form, email address, and any social media accounts associated with your brand.
Privacy Policy + Terms and Conditions
These legal pages explain what information you collect from readers and how they can use your site. Every site needs both, and you can easily generate them at PrivacyPolicies.com.
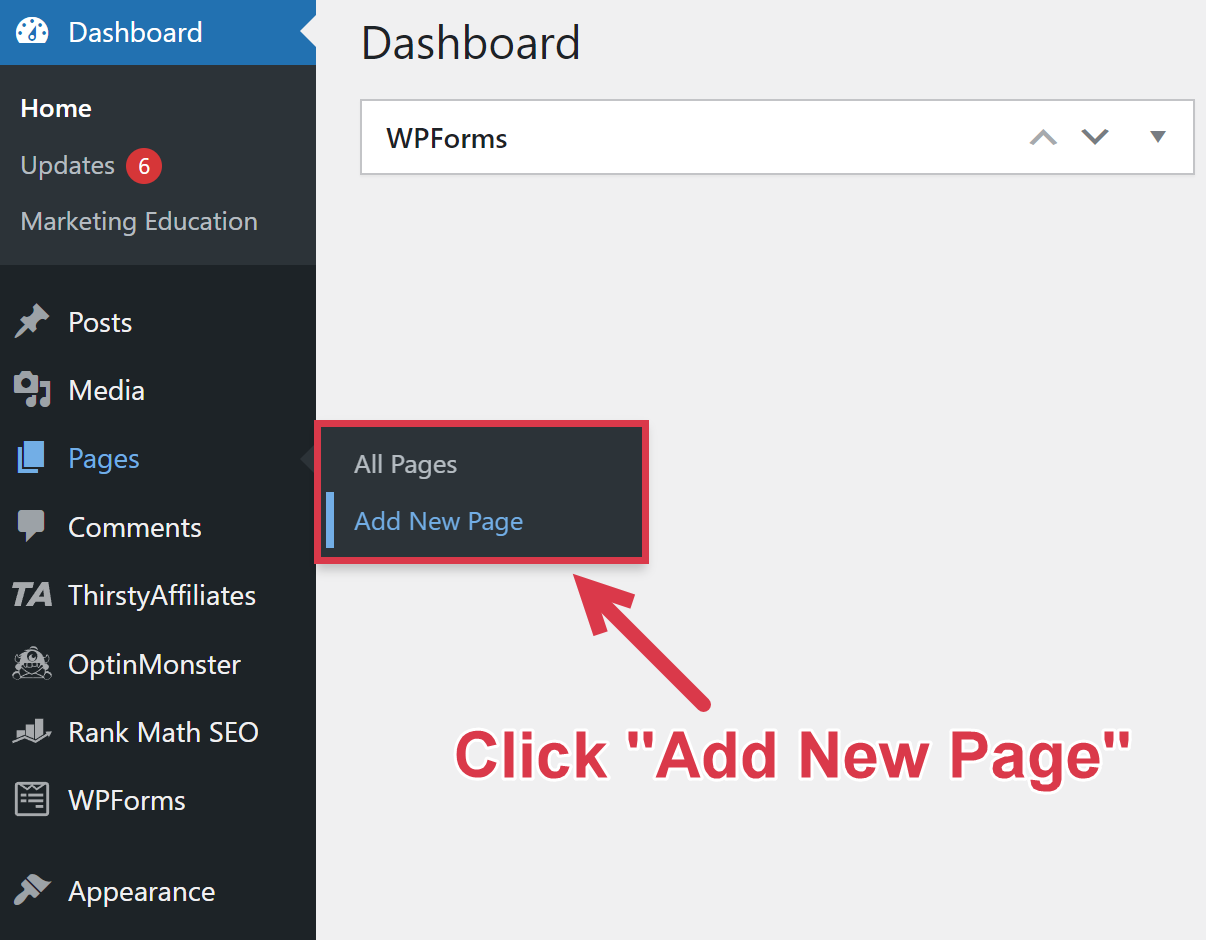
It’s easy to create a new page in WordPress. Log in to your dashboard, click the “Pages” menu, and then choose “Add New”.
8 Start Creating Content
You’ve done a ton of work to get your blog set up, and now you finally get to start doing some actual history blogging.
This is an exciting moment, and your first instinct may be to start writing about the first thing that comes to mind.
However, if you want to find lasting success, the smart approach is to create keyword-focused content. This involves writing blog posts about keywords people are looking for on search engines like Google.
More specifically, you should target terms that get a decent monthly search volume but don’t have much strong competition. We recommend using Ahrefs to find these low-competition, high-volume keywords for your article topics.
All you have to do is type a “seed keyword” into the Ahrefs Keyword Explorer, and the tool returns a list of related search terms along with their estimated search volumes.
As an example, when you type in “basketball history”, Ahrefs returns the following matching terms:
| Keyword | Search Volume | Keyword Difficulty |
|---|---|---|
| basketball history timeline | 250 | 5 |
| indiana basketball history | 150 | 9 |
| olympic basketball history | 100 | 20 |
| villanova basketball coaches history | 90 | 3 |
| women’s basketball history | 100 | 12 |
| duke basketball history | 100 | 9 |
Once you have a list of keywords you want to tackle, use those to write out compelling titles for your first 10 articles.
Here are some great post titles based on the basketball history keywords above:
- “A Complete Basketball History Timeline”
- “The 12 Greatest Coaches in Villanova Basketball History”
- “Olympic Basketball History: The Ultimate Guide”
Now that you have a few solid titles and know what keywords you’re targeting, it’s time to start writing. Here are some tips to help make your content as useful and engaging as possible:
- Consider your audience. Remember your target audience and write like you’re speaking directly with them. Depending on the area of history you’re blogging about, some audiences may expect a bit more formal or academic language.
- Stay on topic. History is a sprawling subject, and it can be easy to stray into historical topics that don’t address your post’s main point. Stay focused on your target keywords to keep your audience happy and engaged.
- Share personal stories. Show your readers that you know what you’re talking about and have expertise in the history topic of your post. Make sure you touch on any personal research experiences you have, too.
- Link to other posts on your blog. Sending readers to other relevant posts on your blog can help them learn more and enjoy their time on your site. Internal linking can help boost your SEO, too!
- Write with emotion. Even though you’re talking about cold, hard historical facts, there’s no reason your writing has to be boring. That’s a surefire way to lose your audience, so write like a real person excited about history – because you are!
- Use images and other visuals. Good images and other visual elements can help convey your point and keep your readers engaged. For a history blogger, images of books you’ve read or antiques you own can work well. You can also look for public domain images related to the topics at hand. Just check the copyright to make sure you are allowed to use images.
- Use history news sites and book lists for content ideas. History news sites like the Smithsonian and the History News Network are great sources for reading about new historical discoveries. They can be a rich source of blog ideas if you’re stuck. Many U.S. states also have historical societies that maintain websites, and Amazon bestseller lists in history categories are another solid source of ideas.
- Cover history-related news. Current events with a historical component can produce viral stories. For instance, when someone breaks an old-time sports record, you can capitalize by writing about a related topic in your niche.
Your content quality will ultimately determine your history blog’s success. Take the time to find keywords with solid search volume and low competition, then write the best posts you can that answer your readers’ questions.
9 Promote Your History Blog
Writing content focused on keywords with strong user intent is vital to your blog’s success, but it’s not the only way to get the word out about your blog.
Once you have a new post ready for the world to read, you need a smart promotional strategy to ensure it gets seen as quickly and by as many readers as possible.
Here are some tactics you can use to promote your history blog:
- Share posts in history communities and on social media: Instagram is a favorite landing spot for history buffs, and some history-focused accounts have thousands or even millions of followers. Historical photos are also popular on Pinterest, and there are dozens of large history groups on Facebook full of people who might be interested in your content.
- Build an email list: Ask visitors to your book blog to sign up for your list in exchange for a history-focused giveaway, like a graphical timeline or a free ebook. Then, whenever you publish a new post, send a preview to your list.
- Collaborate with other history bloggers: Partnering with other sites allows you to share new content with your audience while getting your content in front of a new group of readers. This strategy works especially well with complementary sub-niches – for instance, a Civil War blogger could collaborate with a blogger focusing on the American frontier.
- Join or start a local history reading group. Tell your fellow readers about your blog and have them help you pick history books to review or topics to write about.
- Interview local authors and historians. Most communities have local historians and authors who would be happy to have you shine a light on their work. In exchange, they’ll spread the word about your blog.
- Blog about local sites. Visit the places in your state or community with special historical significance, take pictures, and blog about them. You could even work with local newspapers to tell them about your projects.
10 Monetize Your History Blog
After all the work you’ve put in, it’s finally time to make some money from your blog!
Here are a few great ways to monetize your history blog without negatively impacting the reader experience.
Affiliate Marketing
Recommend history books and other history-related products. Include affiliate links to vendor sites to earn a commission when your visitors buy something.
Why It’s Great: You earn money for leading your audience to great history content. Amazon is a natural starting point for history sites because there are tons of books to promote that your readers will love.
Get Started: Check out our guide about how to start affiliate marketing and our Amazon Affiliate Program Review.
Display Ads
Place display ads on your website. This can be done via an ad network that automatically serves ads to your audience or through direct sponsorships.
Why It’s Great: Easy to monetize all your content, and your audience sees ads that align with their interests. The ad network does all the work for you.
Get Started: Sign up for a full-service ad network like Ezoic, which is a good option for beginners because they don’t have minimum traffic requirements. Direct sponsorships are another option for some blogs, and they offer more control and potential profit.
Selling Your Own Products
Create your own products and sell them directly to your site visitors.
Why It’s Great: You can create products your audience loves and keep all the profits instead of just a small commission.
Get Started: Identify your audience’s problems and questions, then figure out how to solve them. For a history blog, you might create guides to conducting genealogical or other historical research or a video tutorial on finding original source material. You could even write and sell ebooks related to your history sub-niche.
Summing Up
This post provides a basic history blogging blueprint, but there’s so much more to learn if you’re serious about building a history blog that earns serious money.
We put together a free training program to take your blogging knowledge to the next level. In this free training, you’ll learn 7 tactics that will make your new blog 83% more successful.
If you want to succeed, this is the next step.
FAQs
History blogs make money by monetizing their content. Here are three of the most popular and lucrative monetization methods used by history bloggers:
Affiliate marketing: earning a commission by promoting other people’s history books or other historically interesting items.
Advertising: using a network like Ezoic to run ads on each history blog post.
Digital sales: creating digital products like ebooks and courses and selling directly to blog readers.
Here is a quick outline of how to start a history blog even if you have no blogging experience:
Pick a niche based on your interests, good search volumes, and low competition
Build your site: buy a domain name, set up hosting, set up a theme, and create essential pages
Use keyword research to pick an initial set of blog topics and titles
Create and promote your first blog posts
Monetize your blog using affiliate marketing, ads, and digital product sales