If you want to learn how to start a craft blog, you’ve come to the right place.
At Authority Hacker, we’ve built many successful blogs – and earned quite a bit of money in the process.


We’ve also helped more than 15,000 students build profitable websites – including many in the craft niche – and we’ve distilled our knowledge into this 10-step guide to help you follow in their footsteps.
Why Start a Craft Blog
Whether you’re a casual crocheter or a seasoned slinger of the hot glue gun, there are plenty of reasons to start a craft blog.
Let’s start with earning potential. Craft blogs can generate income through various avenues, including affiliate marketing, sponsored content, and selling your crafts.
The sub-niche you choose impacts potential earnings, but you can make a weighty paycheck with your own blog. For example, our affiliate marketing statistics show that bloggers in the arts & crafts niche earn an average of $1,041 per month.
When you start a craft blog, you can also share your love for crafting with a like-minded community. It’s a great way to connect with fellow crafters, exchange ideas, and inspire others with your creativity.
Additionally, blogging can help establish you as an authority in your niche. It’s an opportunity to showcase your skills and gain recognition for your expertise.
Examples of Successful Craft Blogs
When you’re starting your own craft blog, it helps to learn from those who have done it right.
Here are some craft blogs that have won over their readers and built loyal followings and revenue streams.
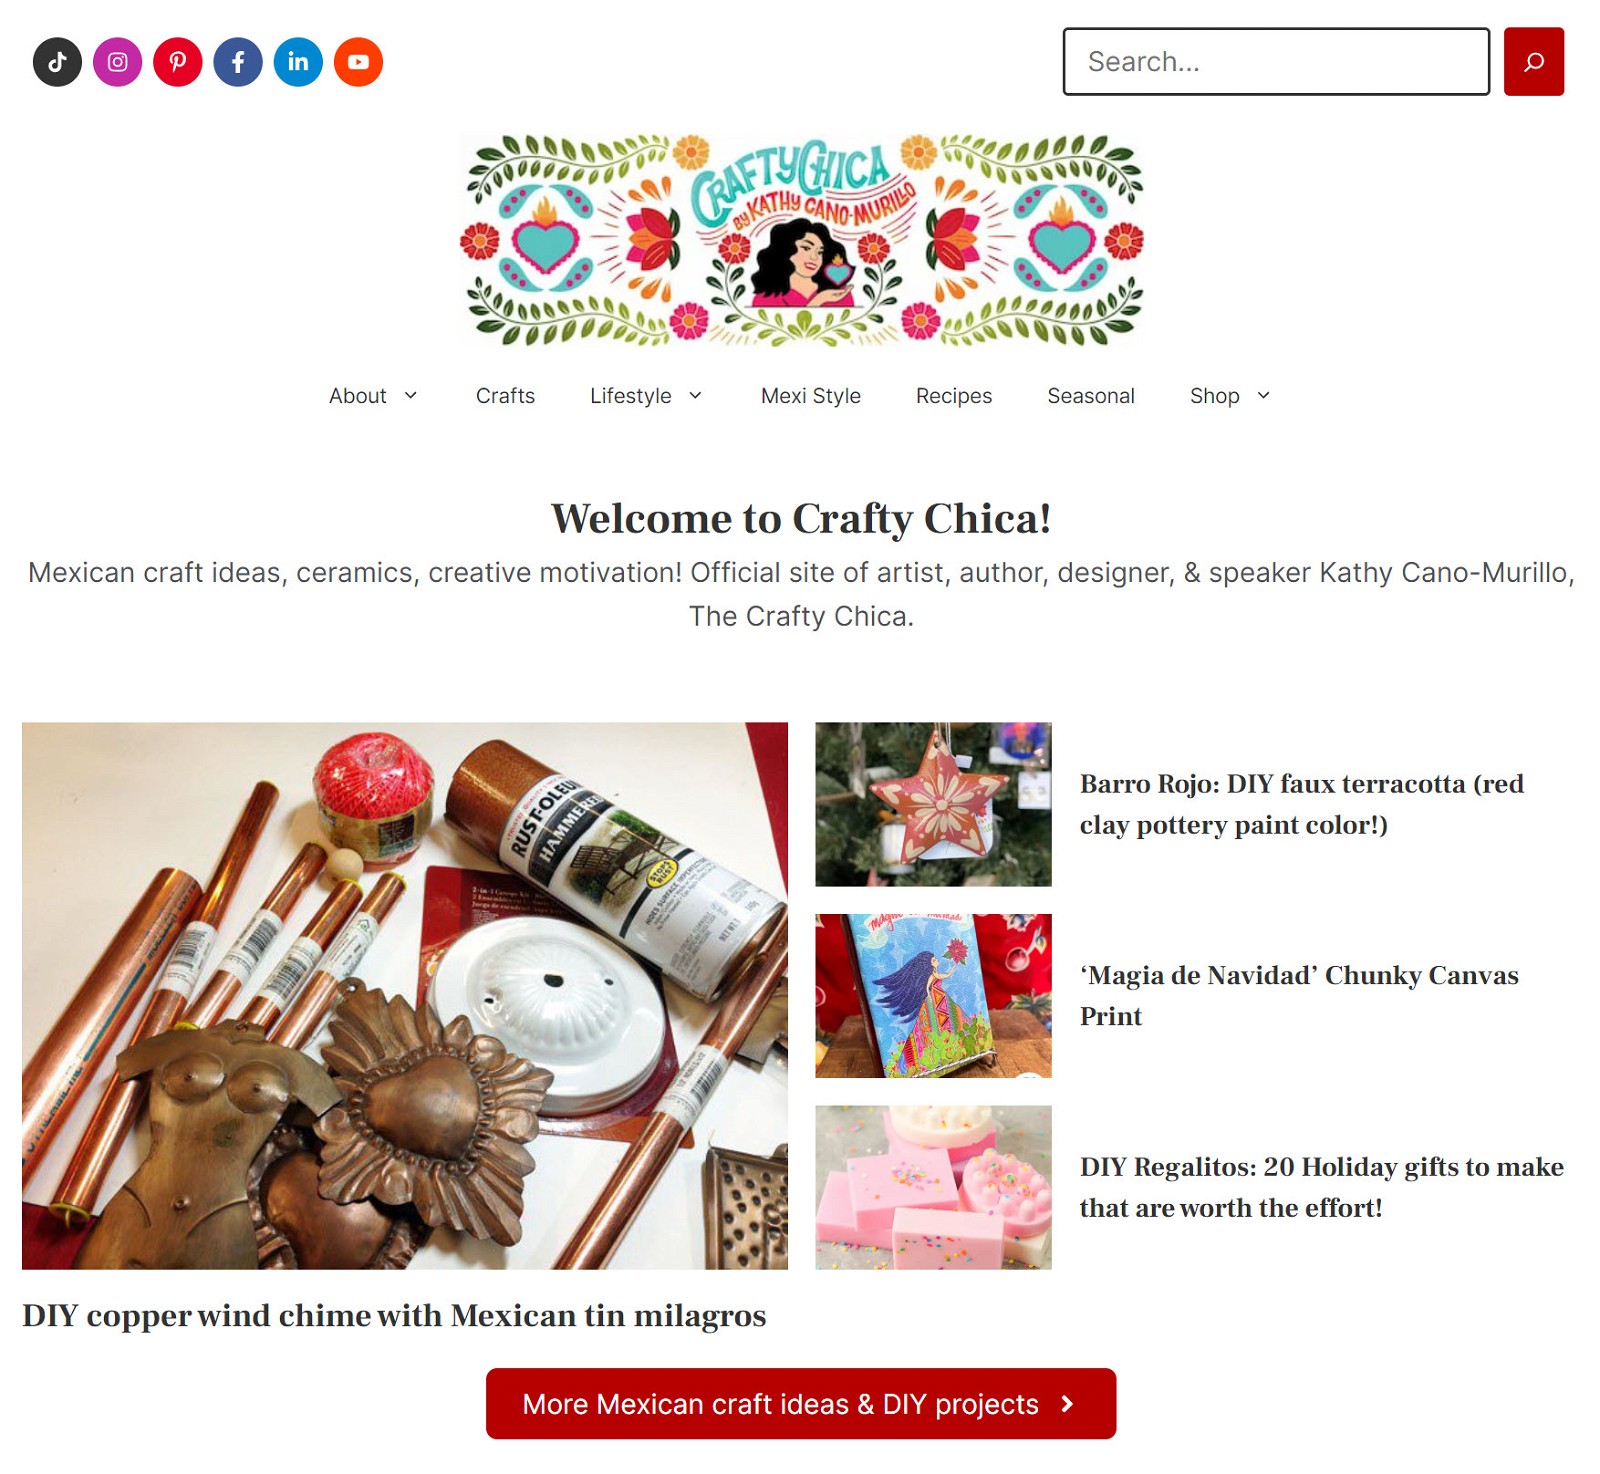
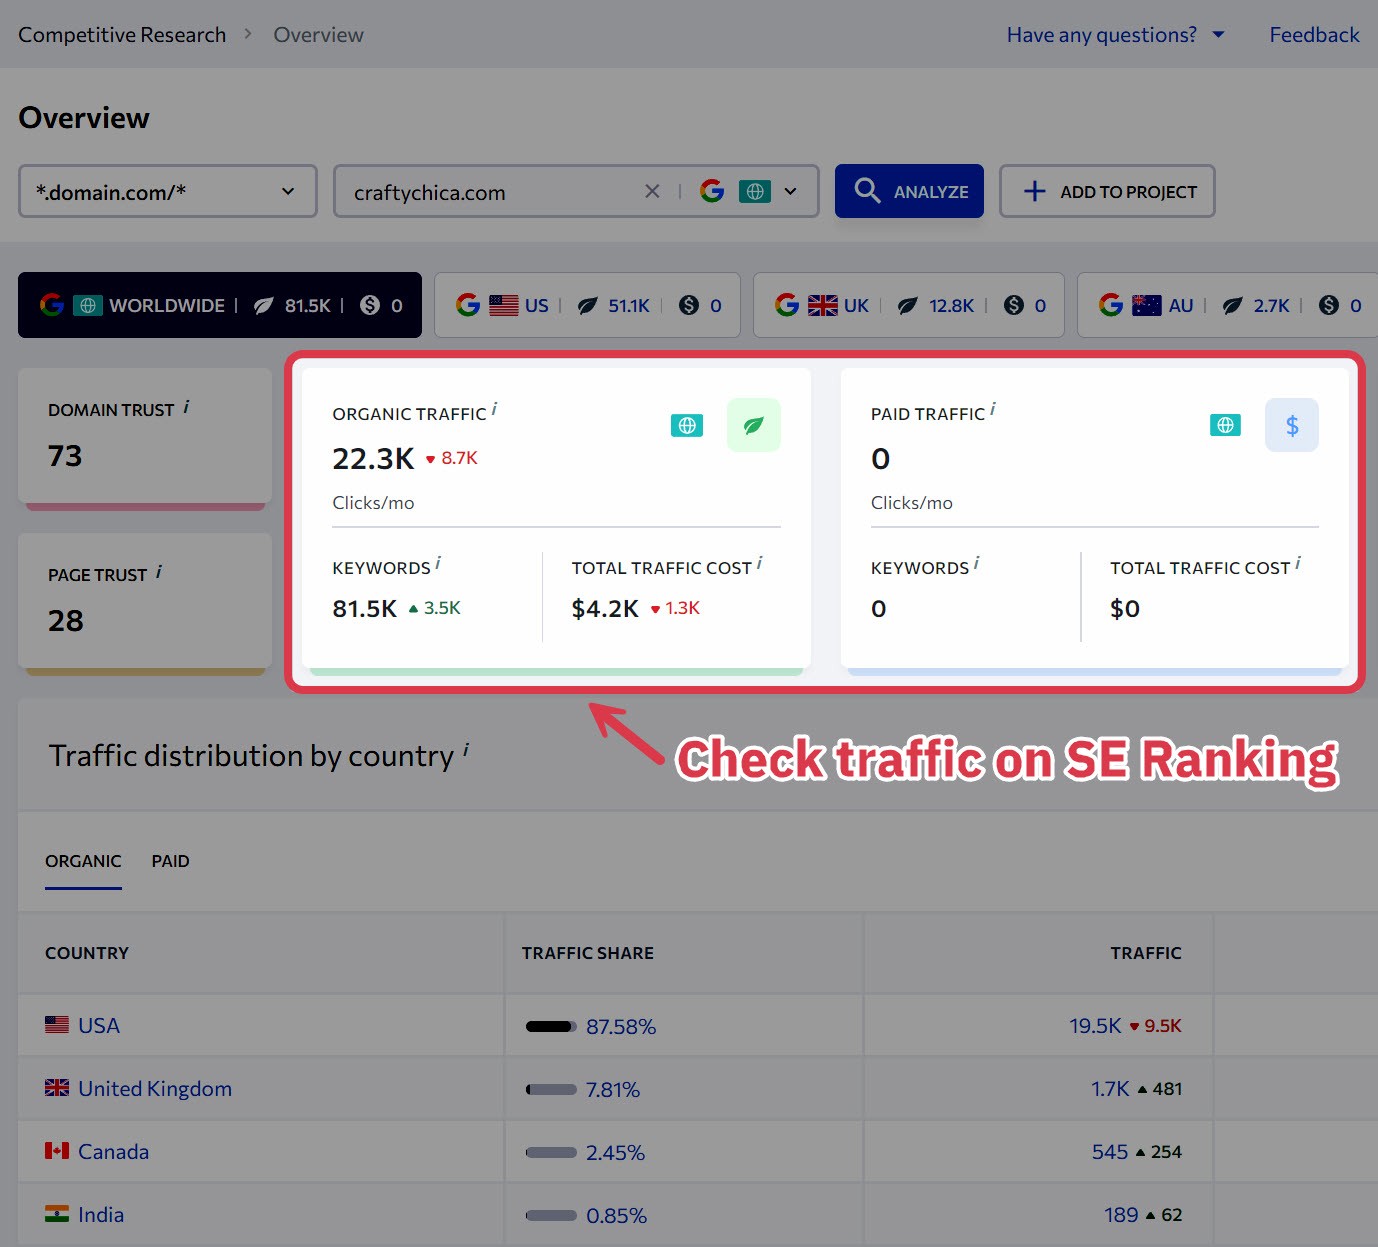
Crafty Chica
Created by artist Kathy Cano-Murillo, Crafty Chica shares DIY guides for original, Mexican-inspired crafts.
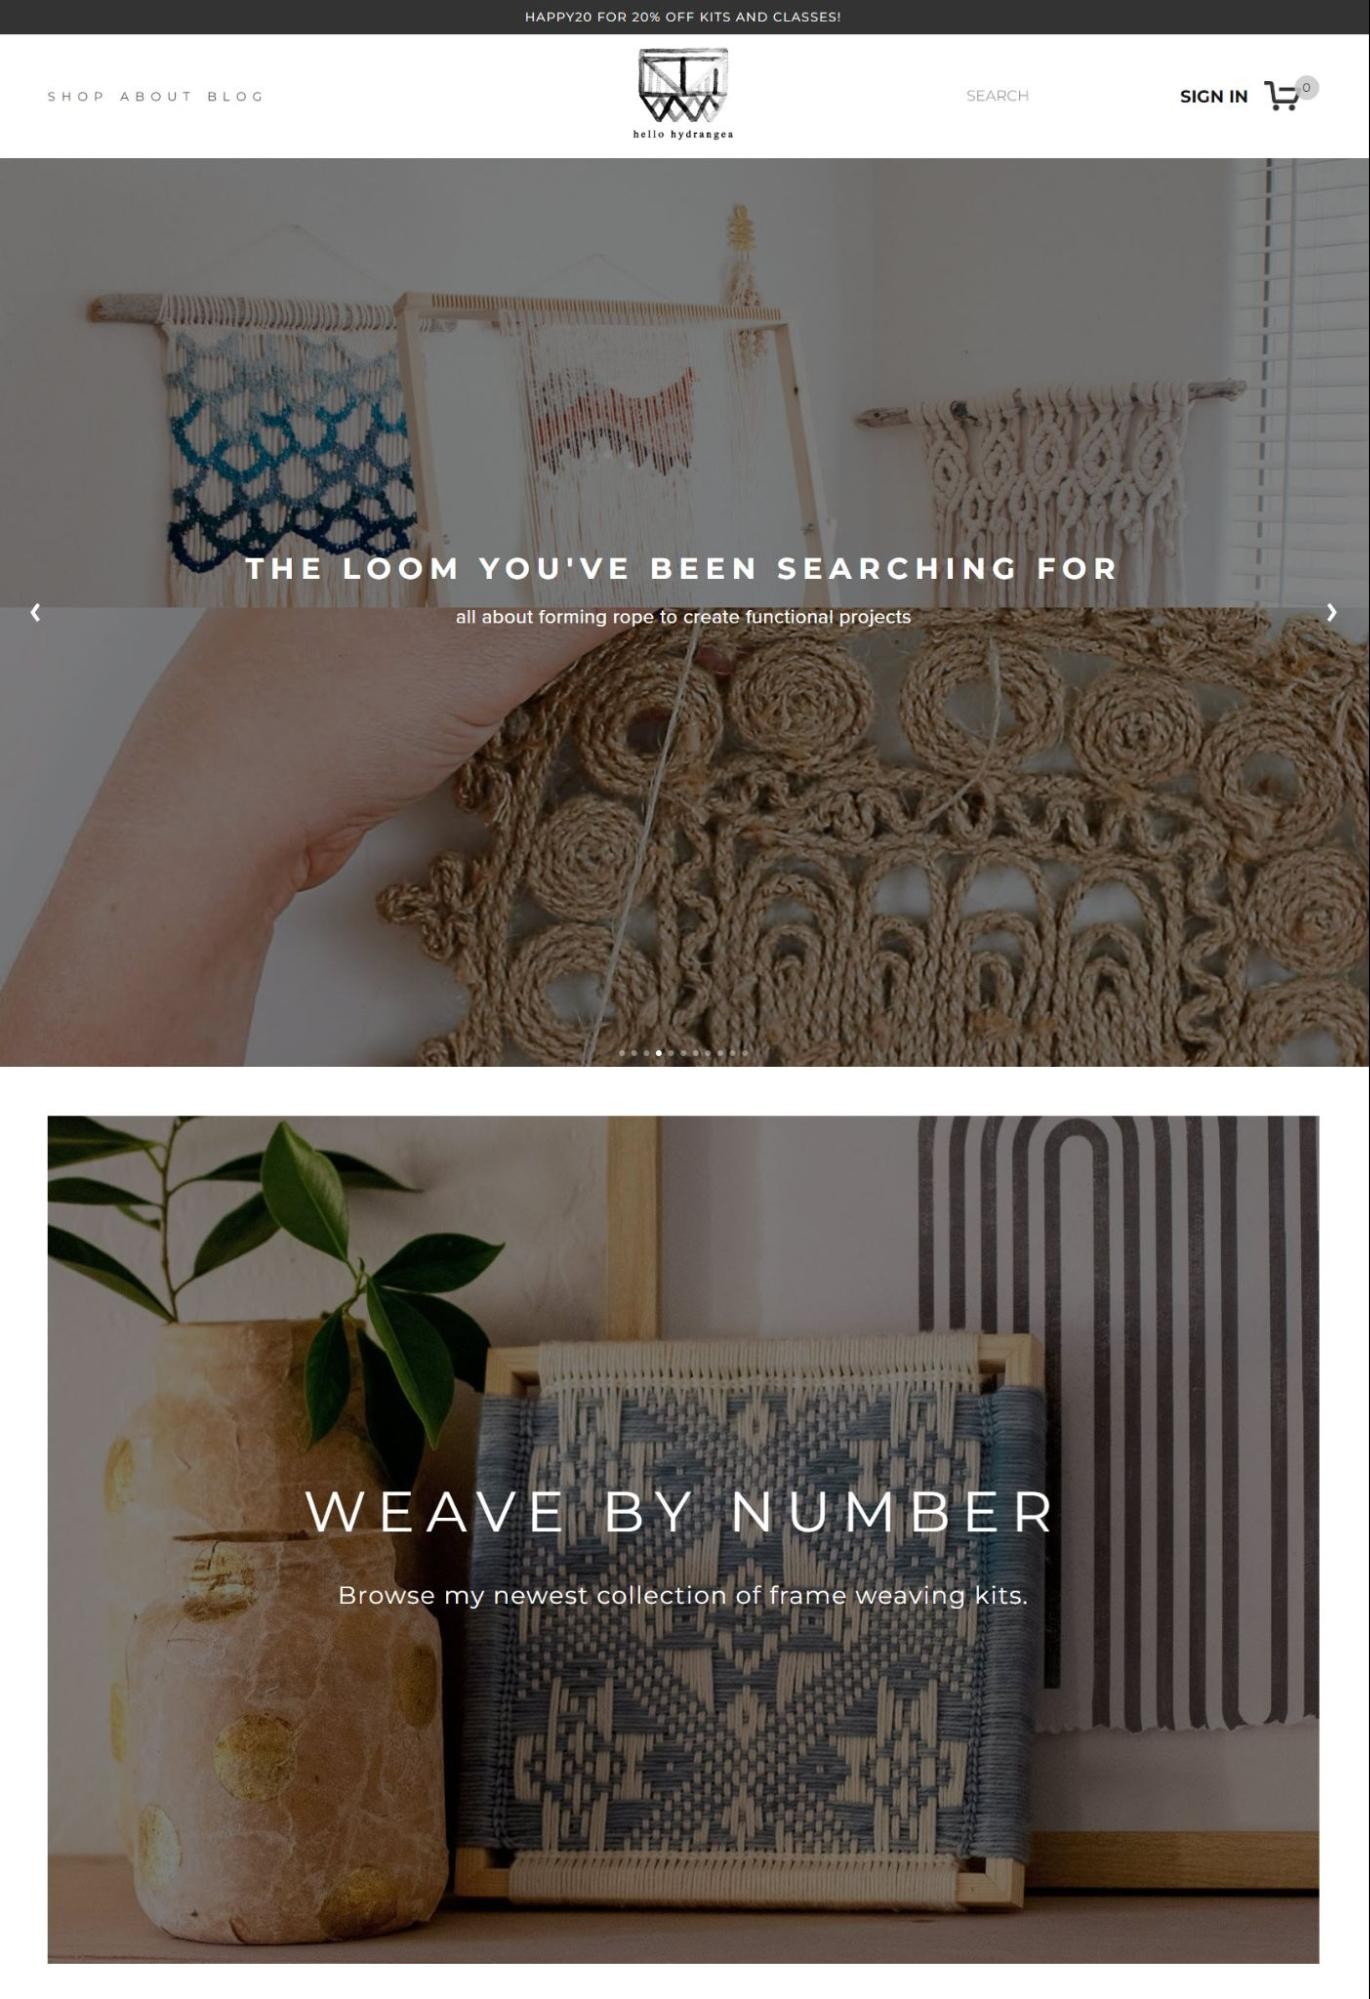
Hello Hydrangea
Hello Hydrangea shares free tutorials and craft inspirations for weaving and other textile arts. In addition to blog posts, you can learn from the founder through virtual workshops.
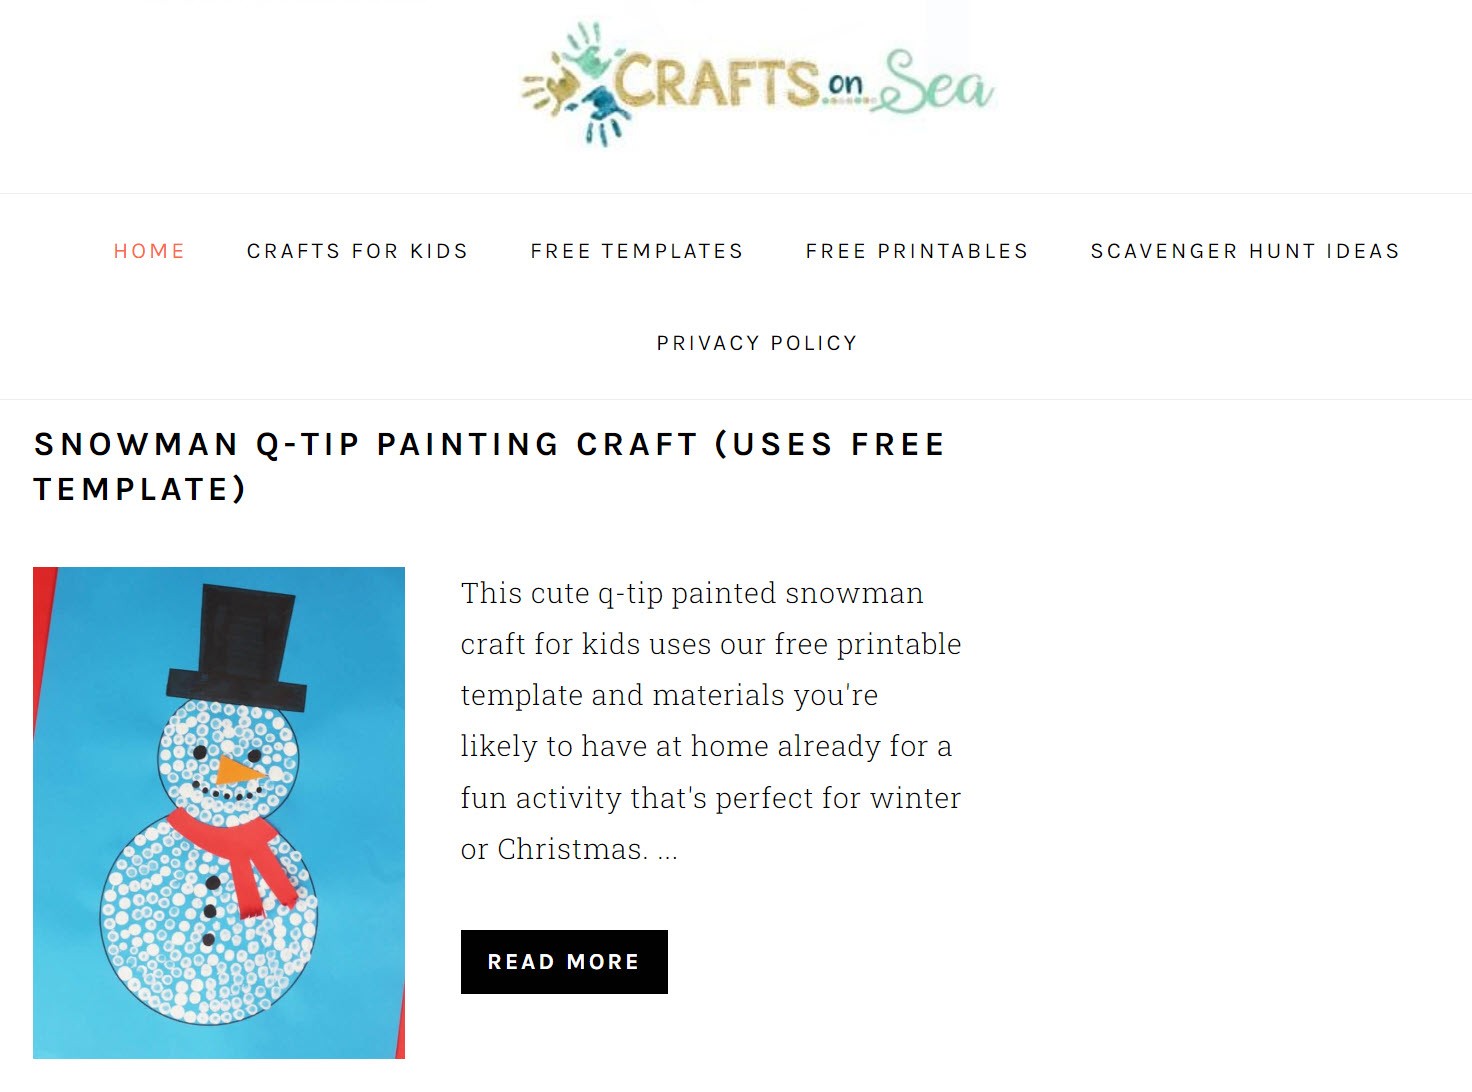
Crafts On Sea
This “crafts for kids” blog was founded to help parents celebrate the joy of crafting with their children. It offers a diverse array of arts and crafts projects for all skill levels.
How To Start a Craft Blog in 10 Steps
Here’s our 10-step guide to starting a craft blog.
1 Narrow Down Your Craft Niche
The first step in building a successful craft blog is choosing a specific sub-niche.
When my niece and I want to learn different painting techniques, we want a website that concentrates on painting techniques – not one that covers painting, drawing, and collage techniques all jumbled together.
To find your sub-niche, start by honing in on a specific aspect that resonates with your passion and expertise.
Passion keeps you motivated, but expertise is important for creating high-quality content and establishing yourself as an authority.
Here are some potential craft blog sub-niches to get your creative juices flowing:
- Knitwear & Sewing Creations: Dive into the world of knitting patterns and tutorials.
- Handmade Jewelry: Design one-of-a-kind jewelry pieces.
- Paper Crafts: Explore the intricate world of paper crafting techniques.
- Upcycled Treasures: Transform ordinary items into artistic wonders.
- Kids’ Crafts: Come up with imaginative projects for children.
However, your preferences and skillsets aren’t the only things to consider. You should also ensure your niche ideas have enough audience interest to generate substantial traffic and revenue.
If you pick a topic that few people are interested in, you won’t get many readers or make much money.
Here’s a systematic approach to pinpointing niches with a proven track record:
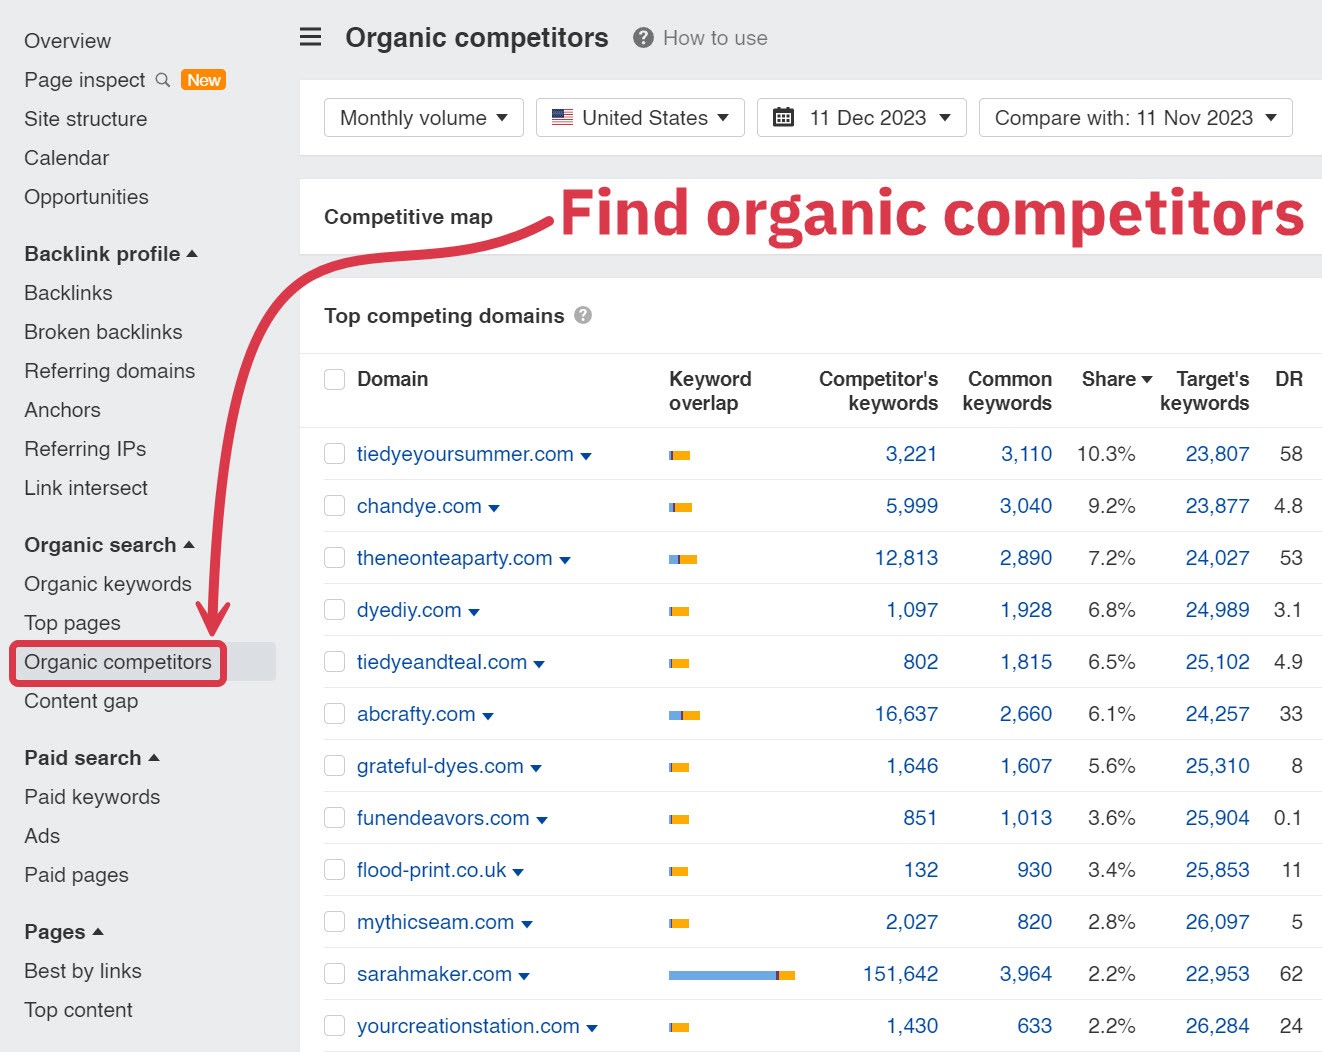
Compile a list of existing blogs in your potential niches. You can discover these blogs using a blog aggregator like FeedSpot, searching Google for niche-related keywords, or using Ahrefs’ “Organic Competitors” tool to identify websites with similar content.
Analyze traffic levels. An easy way to determine if a blog is successful is by looking at how much traffic it gets. You can sign up for a free SE Ranking trial to check site traffic.
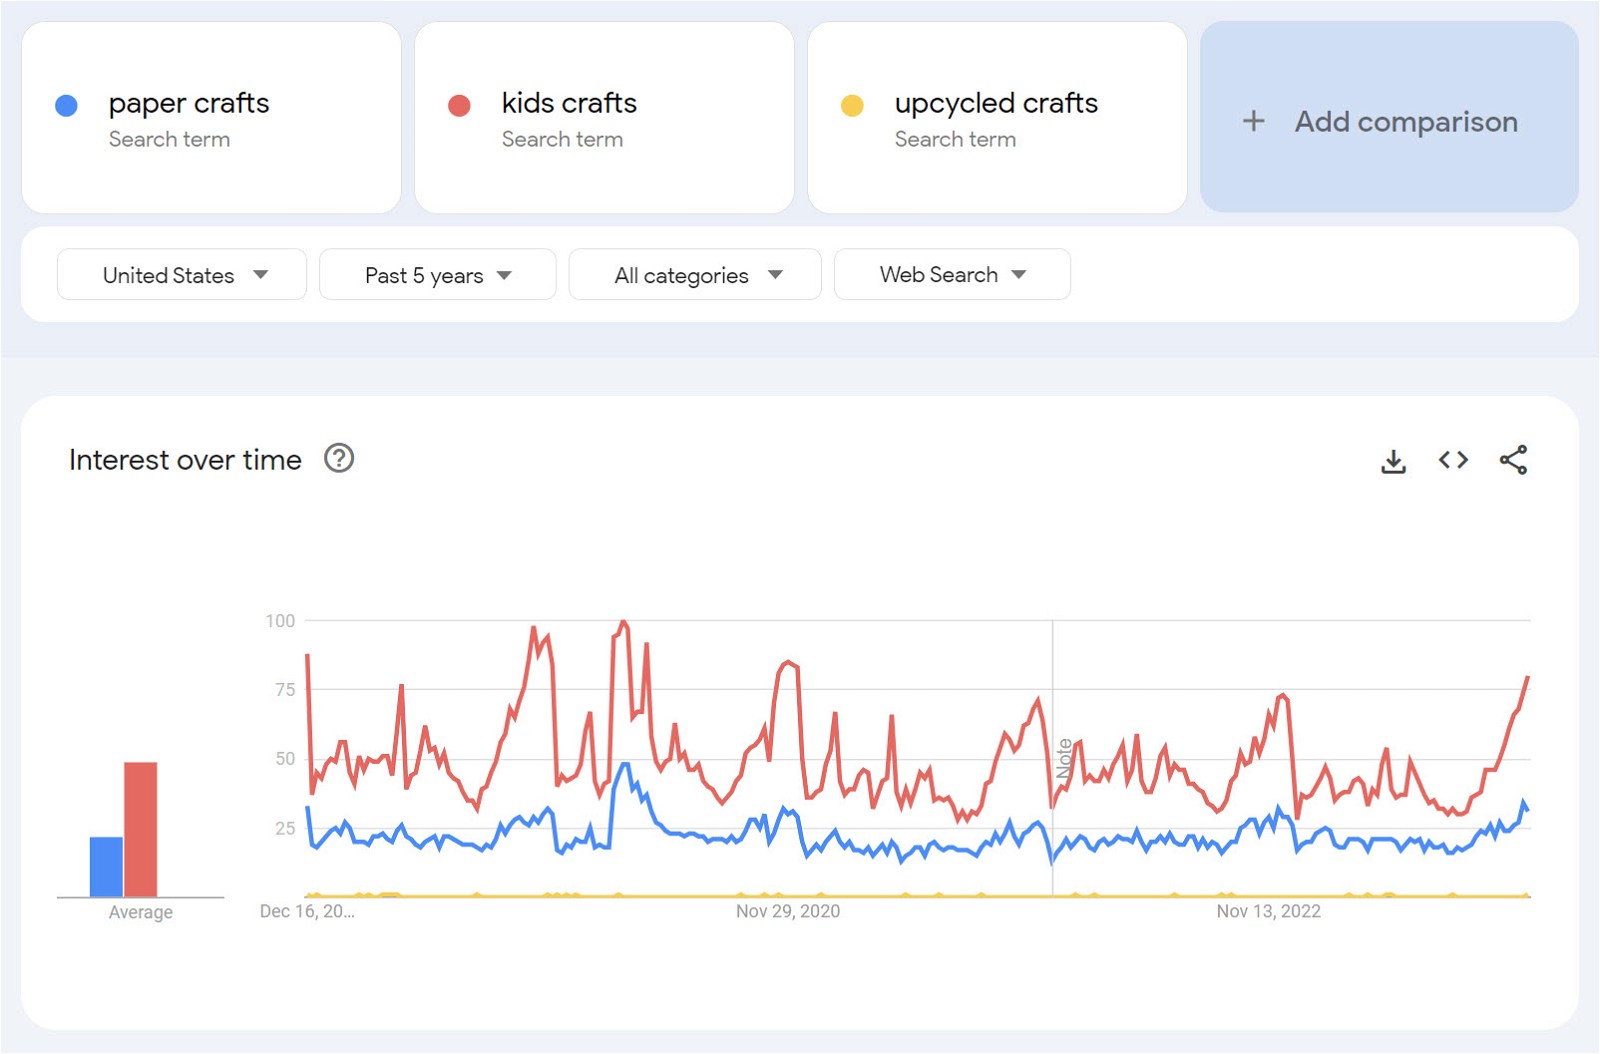
Use Google Trends. If you’re stuck between a few sub-niches, compare their search traffic using Google Trends to see which has a higher ceiling.
For more assistance with niche selection, watch our video on picking the perfect niche:
Don’t get too caught up in niche analysis. It’s important to choose something so you can move on to the next step and keep the yarn ball rolling.
2 Choose a Blogging Platform
You can’t start a craft blog without choosing a blogging platform to host it.
A blogging platform is the software or hosting service you use to publish your blog posts and manage your blog’s content.
When choosing a platform, you have several options – but not all are created equal.
For example, there are free social blogging platforms such as Medium and Blogger. However, these have considerable limitations, and I recommend building your own website instead.
Here’s why:
- You have complete control over your own blog and its content.
- No one can shut you down – it’s your space on the internet.
- It’s much easier to monetize your blog with methods like affiliate marketing, display ads, and selling your own crafts or craft-making courses.
- You can leverage search engine optimization (SEO) to target crafting keywords and drive traffic to your website.
- You can build an email list to diversify your traffic sources and protect your blog from the impact of algorithm changes.
I recommend WordPress.org (not to be confused with WordPress.com) for building a website. It’s free to use, user-friendly, and offers a wide range of themes and plug-ins for customization.
While WordPress is the best platform, there are some decent alternatives. You can check them out on our list of the best blogging platforms.
3 Choose Your Domain Name
Now, it’s time to choose your domain name.
A domain name is your blog’s unique web address, comprising the website name and an extension like .com.

It’s also your blog’s online identity and plays a pivotal role in your blog’s success. The right domain name impacts your blog’s branding, visibility, SEO, and memorability.
Here are some tips for choosing a great domain name:
- Keep it short and simple. Shorter names are easier to remember and type.
- Portray your niche. Your domain name should give visitors a sense of what your craft blog is all about.
- Avoid complex spellings. Steer clear of complicated or hard-to-spell words that could confuse your audience.
- Use keywords wisely. Incorporate relevant keywords to improve your blog’s SEO, but do so naturally.
- Check for trademarks. Perform a trademark search and ensure your chosen name doesn’t infringe on anything.
- Think long-term. Choose a name that you won’t outgrow as your blog expands.
Need help? An AI domain generator like Brandsnap can assist you in discovering a unique domain name.
Once you’ve chosen a domain name, you need to buy it. Thankfully, this is easy and cheap. You can get a new domain for around $10 per year on Namecheap.
If your desired .com domain is already taken, don’t worry. We have a list of .com alternatives you can use to find a different extension for your name.
4 Buy Web Hosting
With a domain name in place, it’s time to buy web hosting.
A web host is a service provider that offers the necessary infrastructure to store, manage, and deliver your blog to online audiences.
While Bluehost is a popular option, we’ve found that SiteGround offers superior value. Their reliable and feature-rich hosting environment provides ample speed, performance, and support.
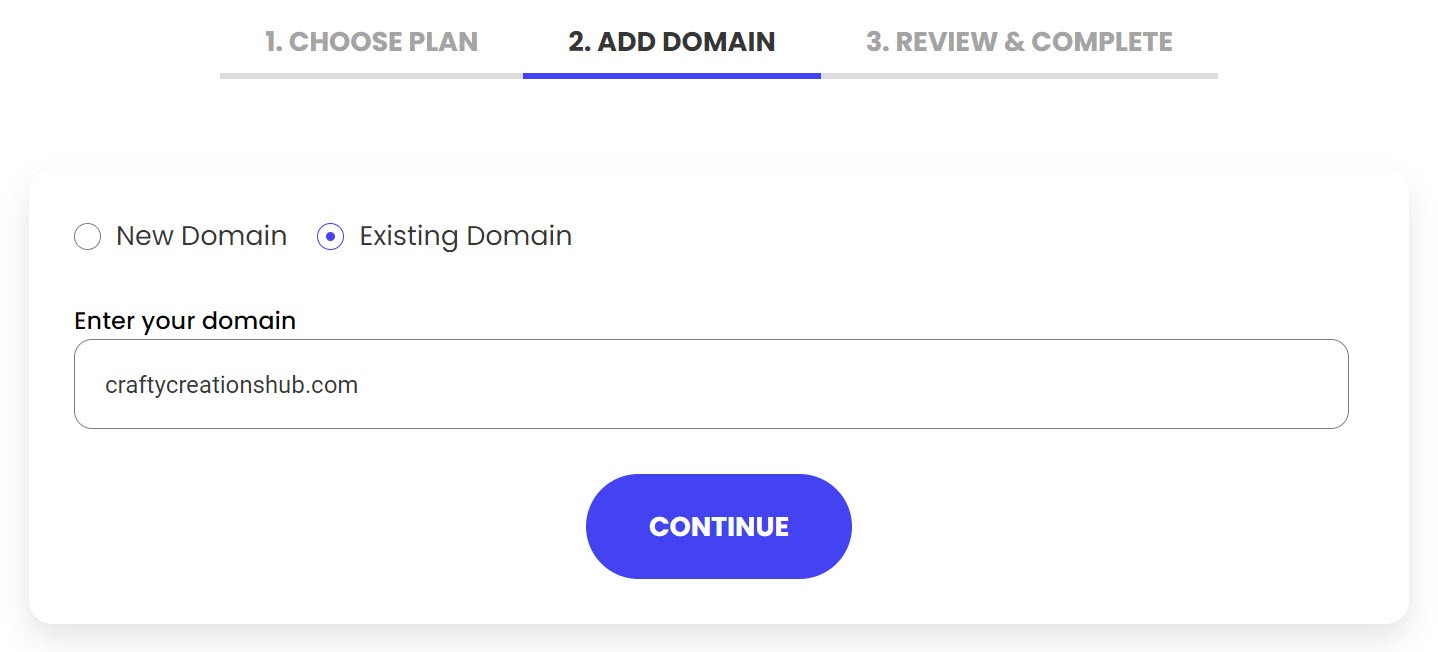
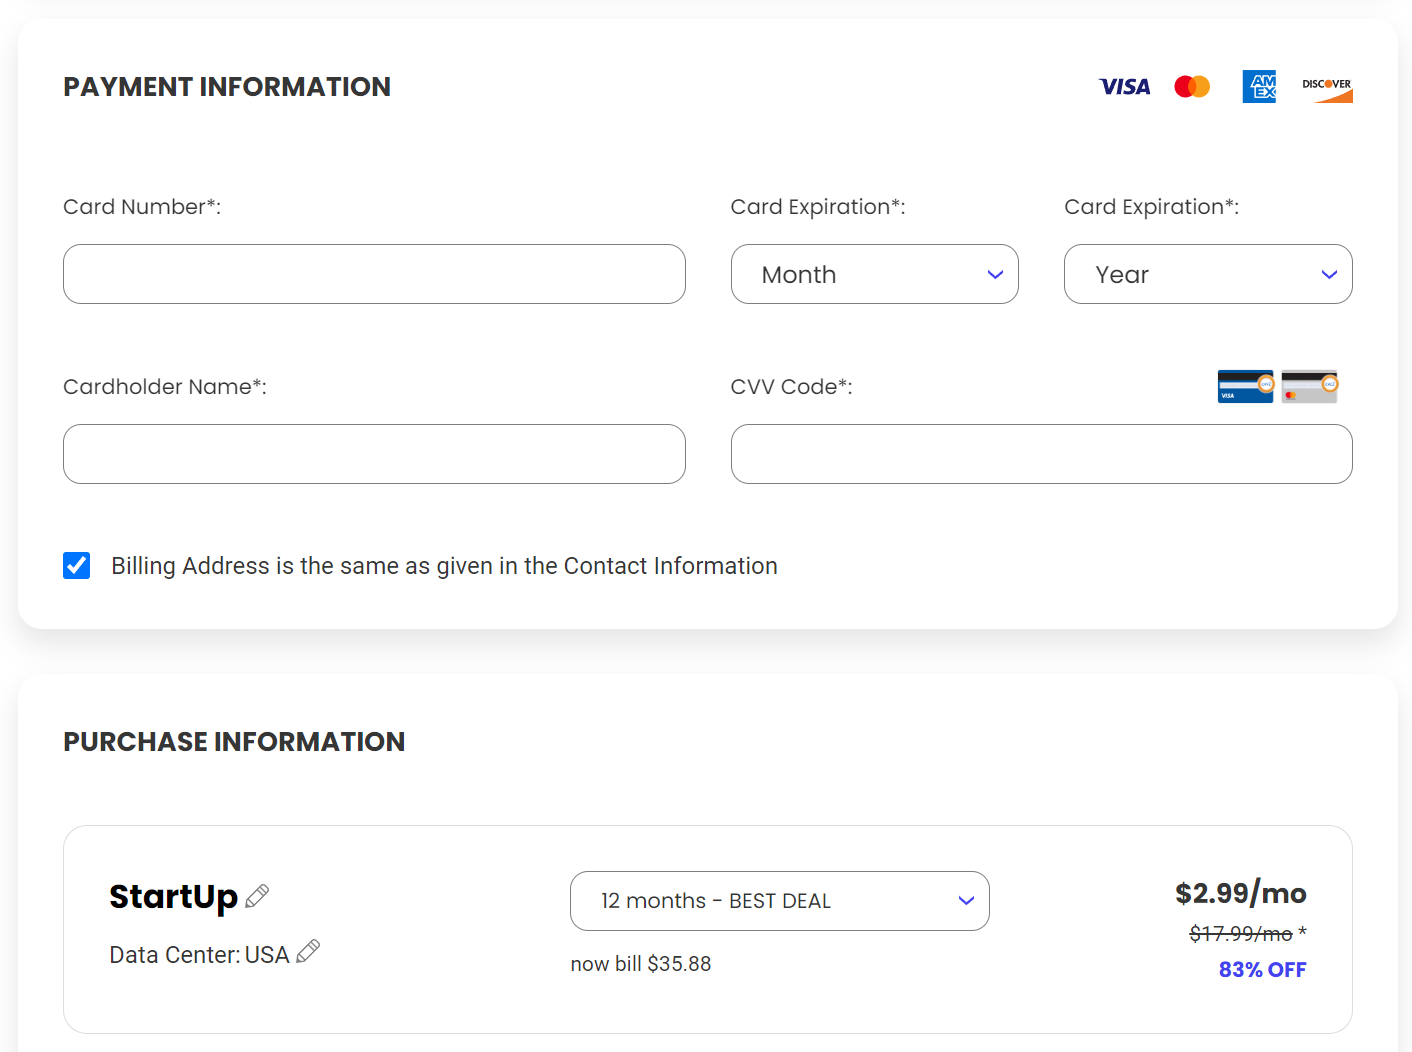
Here’s a step-by-step guide to getting hosting for your blog on SiteGround:
Step 1: Go to SiteGround’s WordPress hosting page.
Step 2: Select the StartUp plan. It’s budget-friendly and includes all the essentials.

Step 3: Enter your domain name. If you purchased a domain, select the “I already have a domain” option.
Step 4: Fill in the required account details.
Step 5: Add payment info and choose the subscription length. Typically, the 12-month option offers the best value. Note that the price increases after your first year.
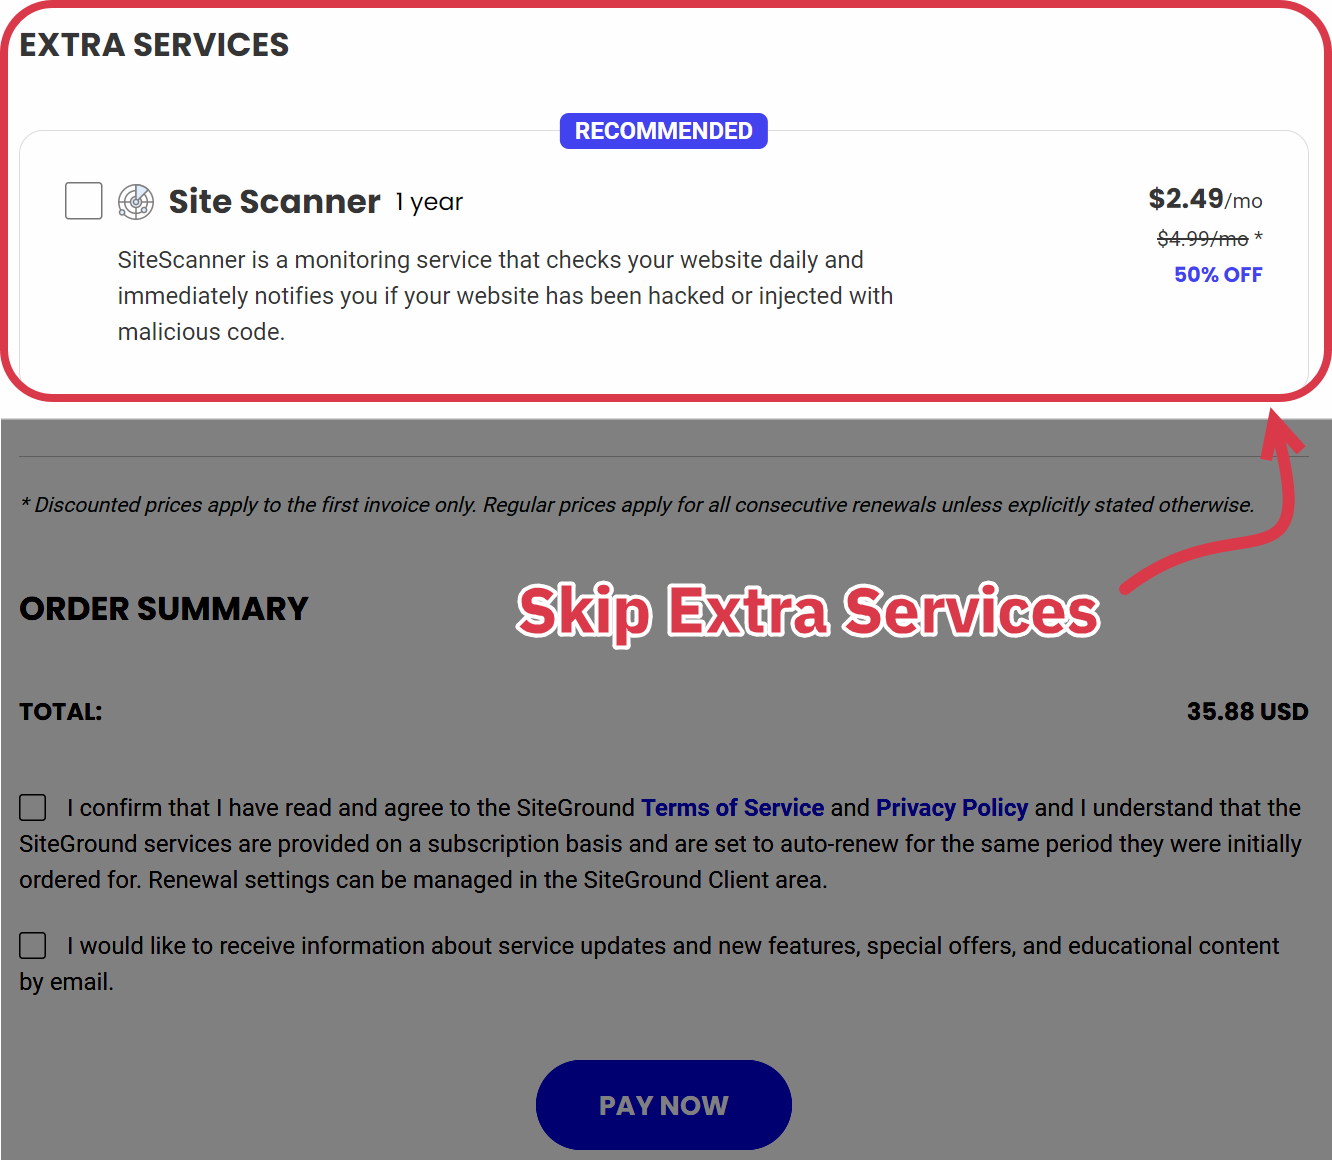
Step 6: Skip the extra services – new blogs don’t need them.
Step 7: If you bought your domain from a registrar like Namecheap, you must configure the DNS settings to point your domain to SiteGround. Follow this guide or contact SiteGround support if you’re unsure how to do this.
And there you have it! You’ve successfully secured hosting for your blog. Now, you’re ready to start building your site.
5 Choose a Theme for Your Craft Blog
The next step is to choose a WordPress theme for your new craft blog.
A theme is the artistic framework that defines your blog’s visual identity and structure.
Your chosen theme should align with the vibe of your website and the image you want to convey to your readers. Whether you blog about scrapbooking, origami, or using green materials, the theme should resonate with your niche and brand.
We’ll discuss specific design and branding decisions in the next step. For now, your job is to get a theme that enables you to customize your website however you want.
I advise opting for a free WordPress theme with a premium upgrade option when starting.
A free theme is suitable for beginners – it certainly was for me when I started. However, once my blog started to grow, I encountered limitations that were hindering its full potential.
To avoid my mistakes, use one of my top three theme recommendations. Each has fabulous template libraries and offers free versions with premium upgrades:
You can easily install WordPress themes in four simple steps:
Step 1: Go to your WordPress Dashboard.
Step 2: On the left sidebar, click on “Appearance,” then select “Themes.”
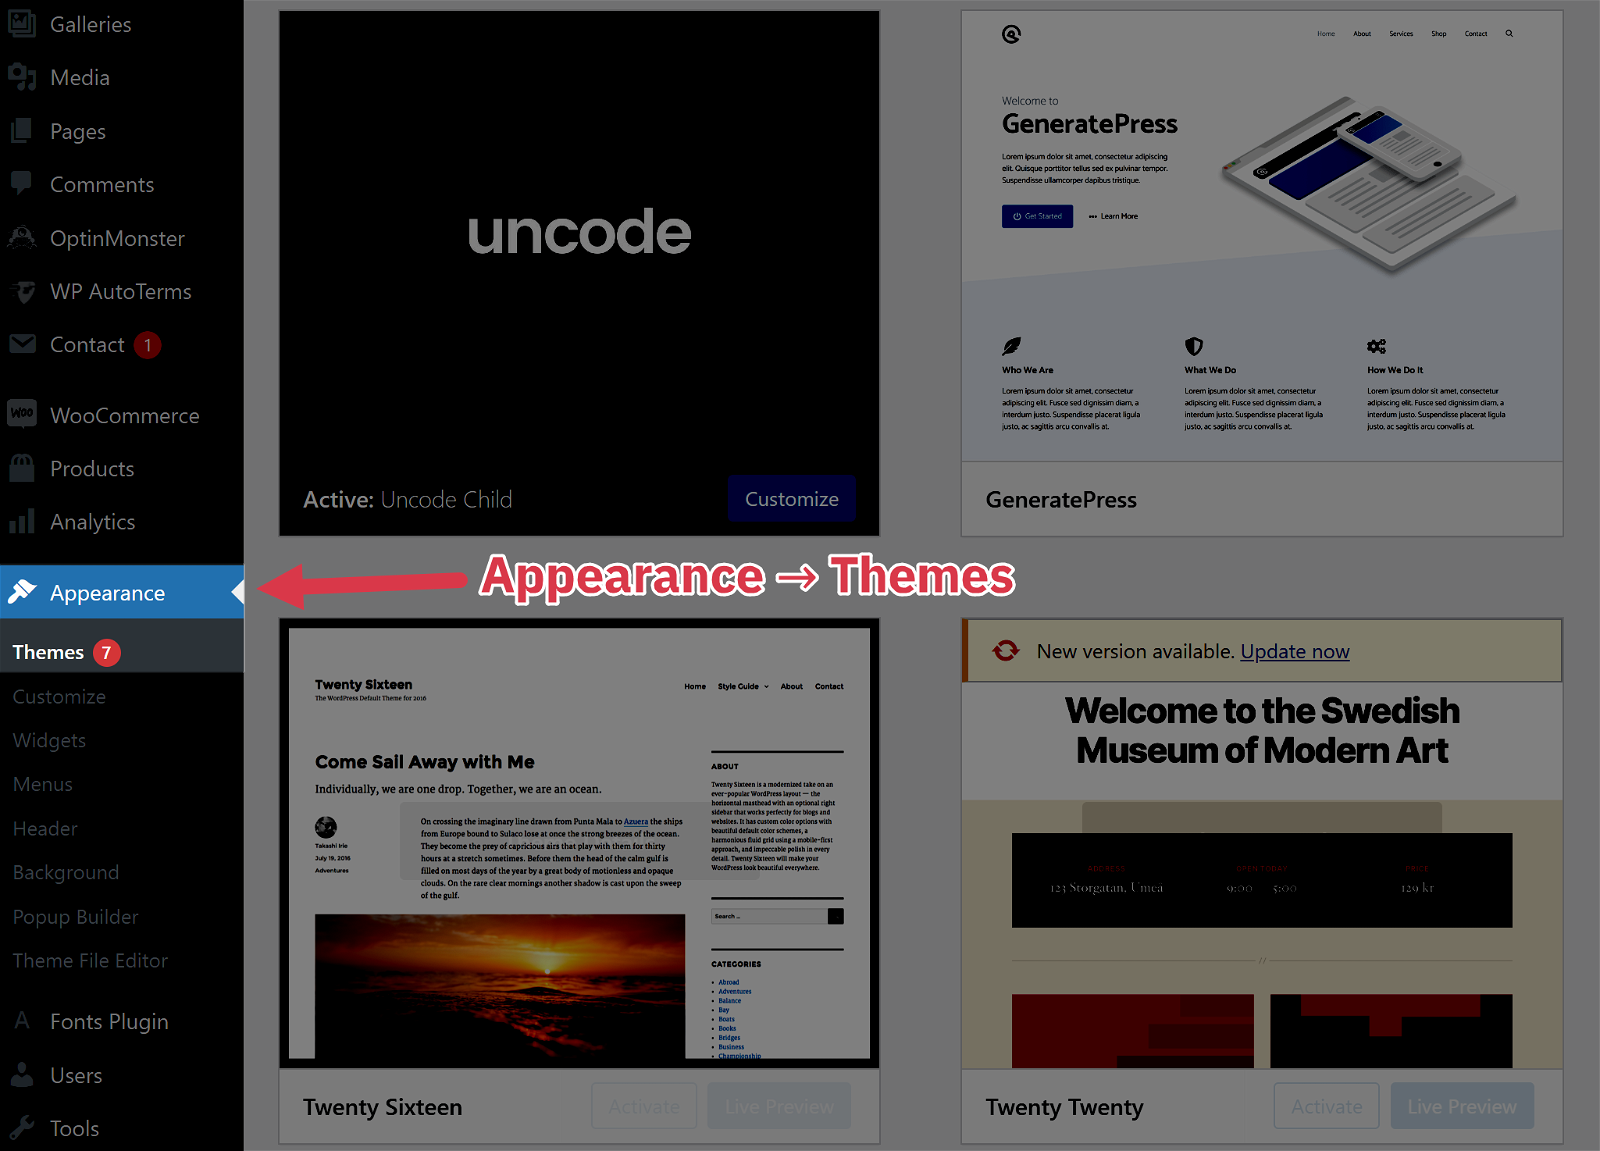
Step 3: Click “Add New.”
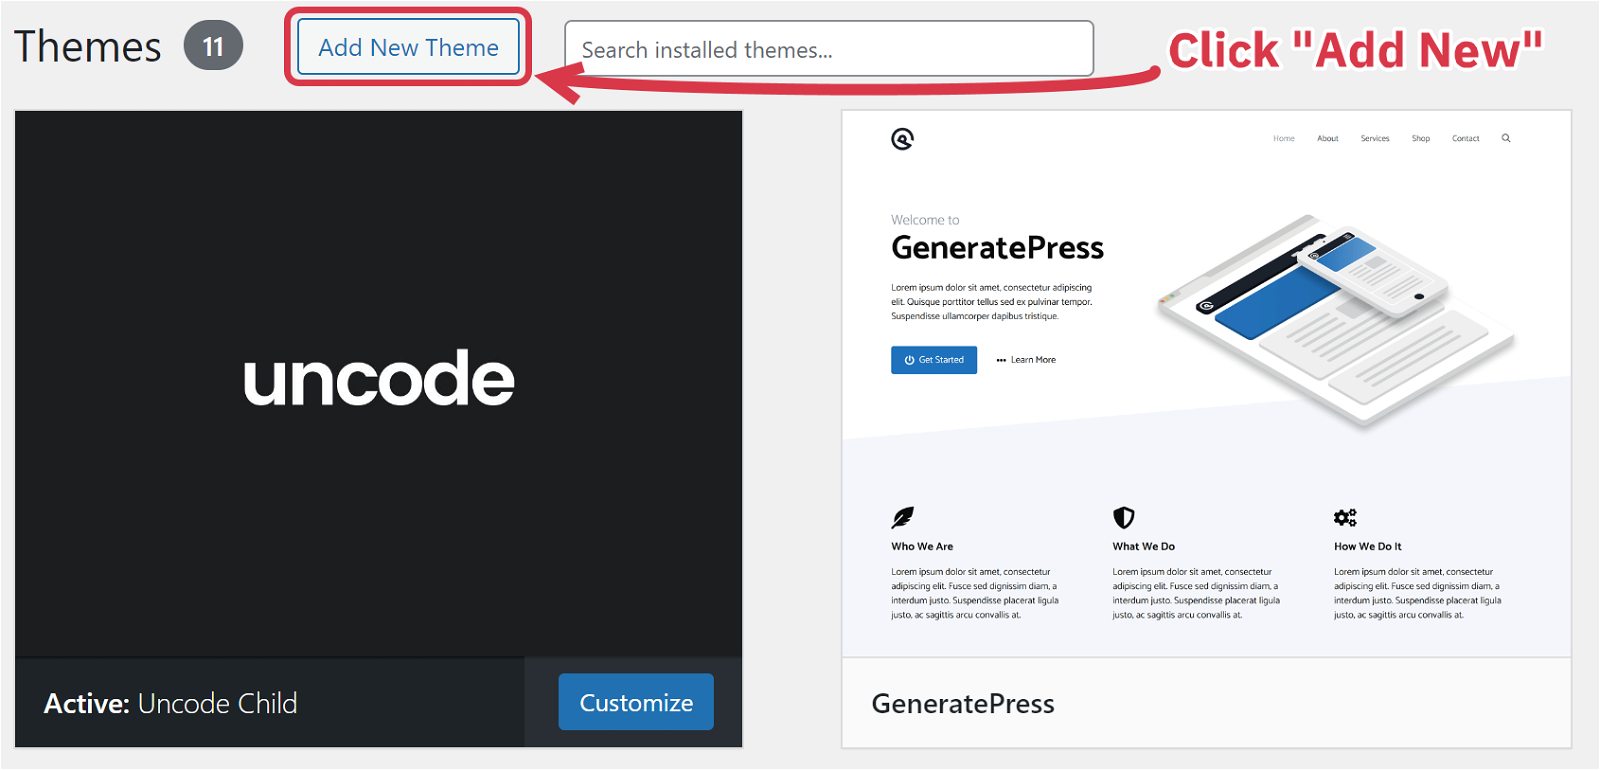
Step 4: Search for GeneratePress and click “Activate” to make it the active theme.
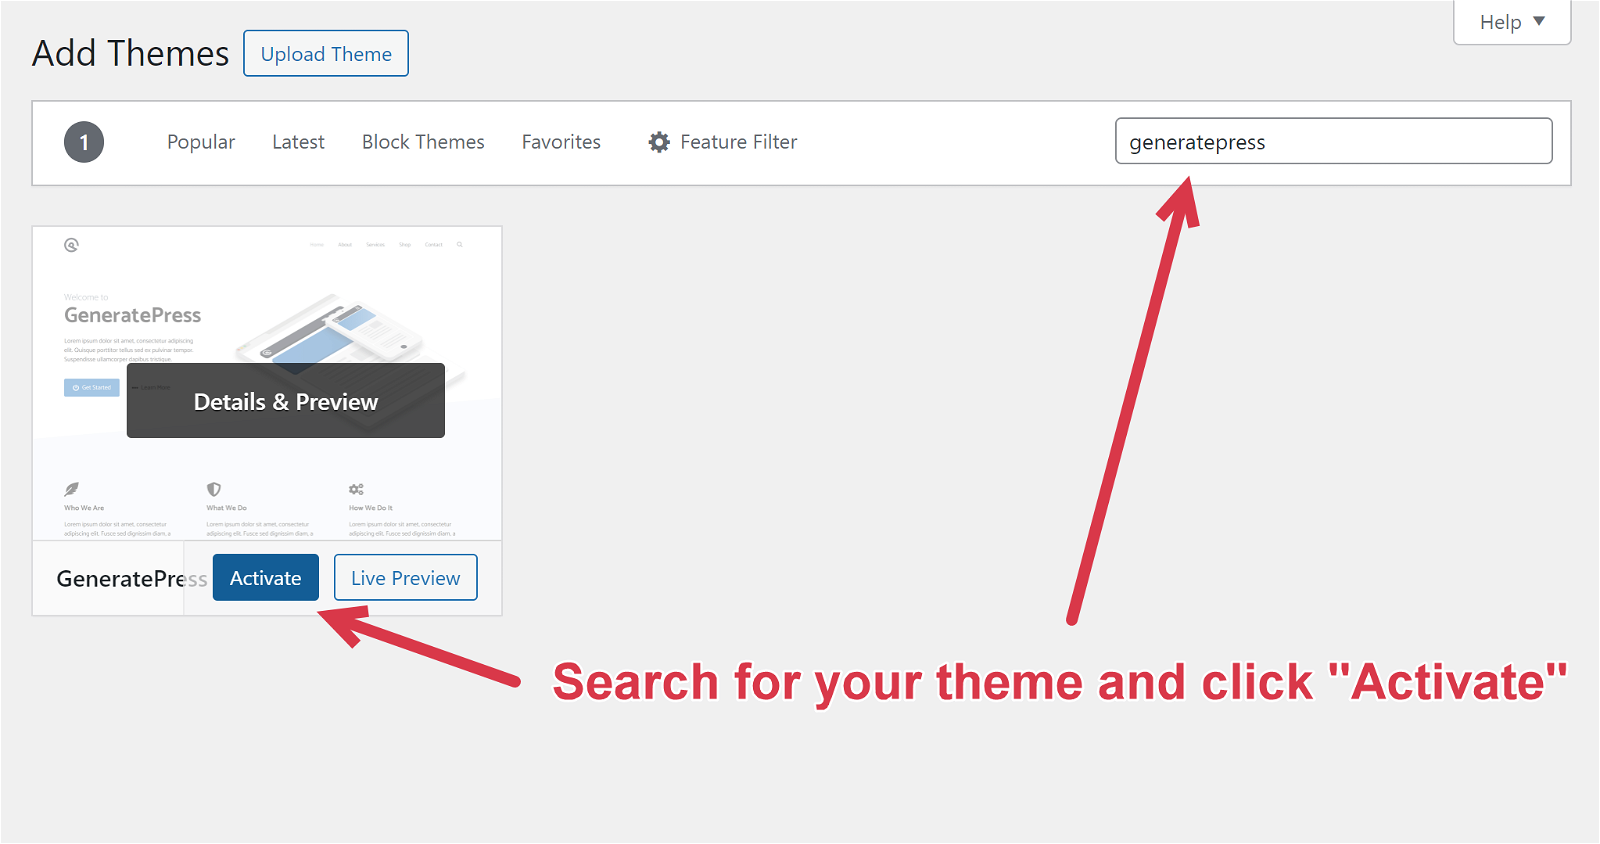
Congratulations! You’ve successfully chosen and installed a theme. Now, you can start customizing it.
6 Decide on Design & Branding
With a custom theme in place, it’s time to focus on the design and branding elements. These will define your website’s visual identity.
This is another pivotal step. Your design choices are more than aesthetics – they are a fundamental part of your blog’s personality.
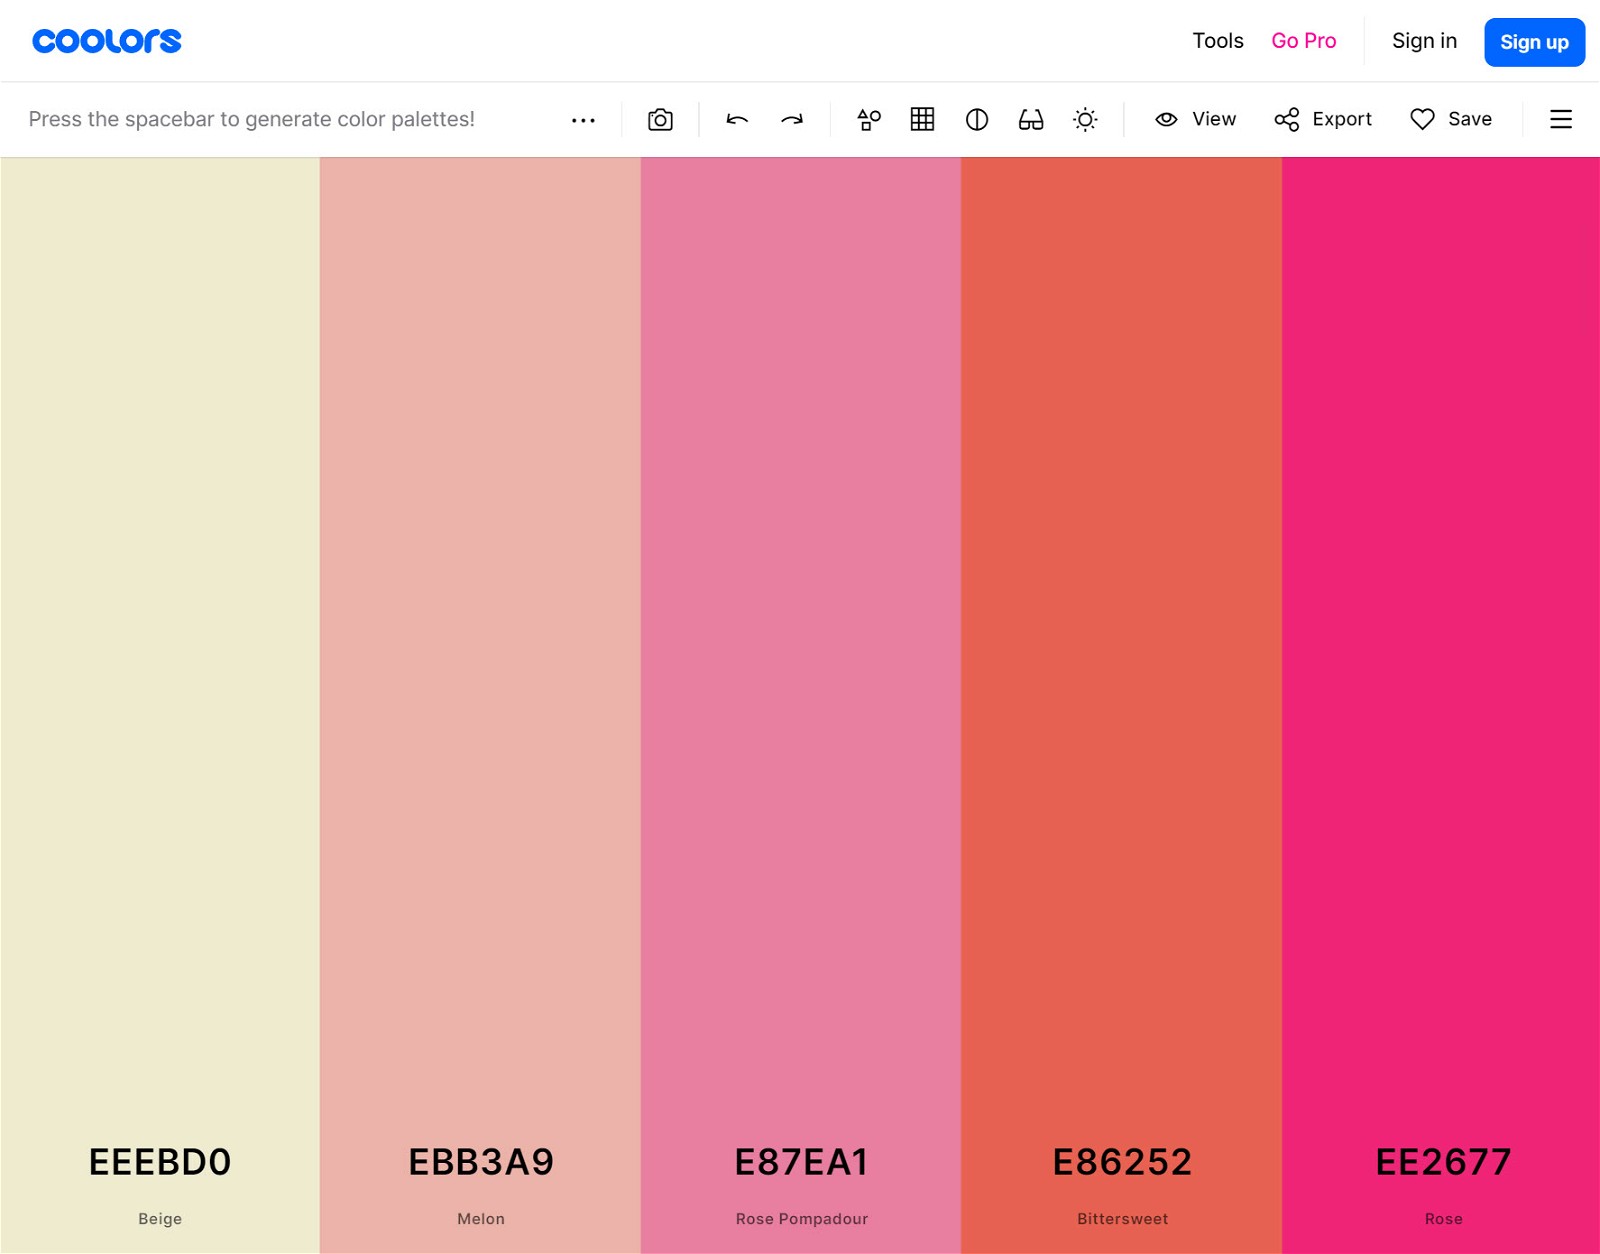
Consider your niche and think about colors and stylistic elements that might enhance your branding.
For example, a blog focusing on textile crafts like knitting or quilting might have a color palette rich in warm tones such as deep reds, soft oranges, and earthy browns. This can be paired with textures in the design that mimic fabric, like quilted backgrounds or knit-pattern borders.
In this section, we’ll choose the most essential elements of your site design – color scheme and logo.
To choose a harmonious color scheme, I recommend using Coolors – a user-friendly tool that generates cohesive color palettes.
Next, you need a logo. Take the time to select a good one, as this is often the first impression visitors have of your website. It sets the tone for what readers can expect from your blog in terms of quality and content.
Not a professional designer? Not a problem. Canva offers a wide range of logo templates to play with. You can easily find and customize a template that aligns with your website’s style.
7 Create Essential Pages
Now, it’s time to create essential pages for your website. Every blog needs these, so don’t skip them!
Homepage
This is the central hub of your craft blog. It should clearly convey your blog’s purpose and make it easy for visitors to navigate to the content they want. Share your most popular crafting posts, important updates, and link to crucial pages you want visitors to be aware of.
About Page
Here, you can introduce yourself to your readers and share your crafting background. Add personal touches such as anecdotes and details about past crafting projects. A photo also helps to make this page relatable and welcoming.
Contact Page
This page should include a contact form, email address, and any related social media channels. Adding extra information can enhance SEO, but these basics are fine for now.
Privacy Policy + Terms & Conditions Pages
You need these pages to ensure legal compliance and protect both you and your visitors. They must explain what information you collect from users and outline the terms and rules for using your website.
You can easily generate both via PrivacyPolicies.com.
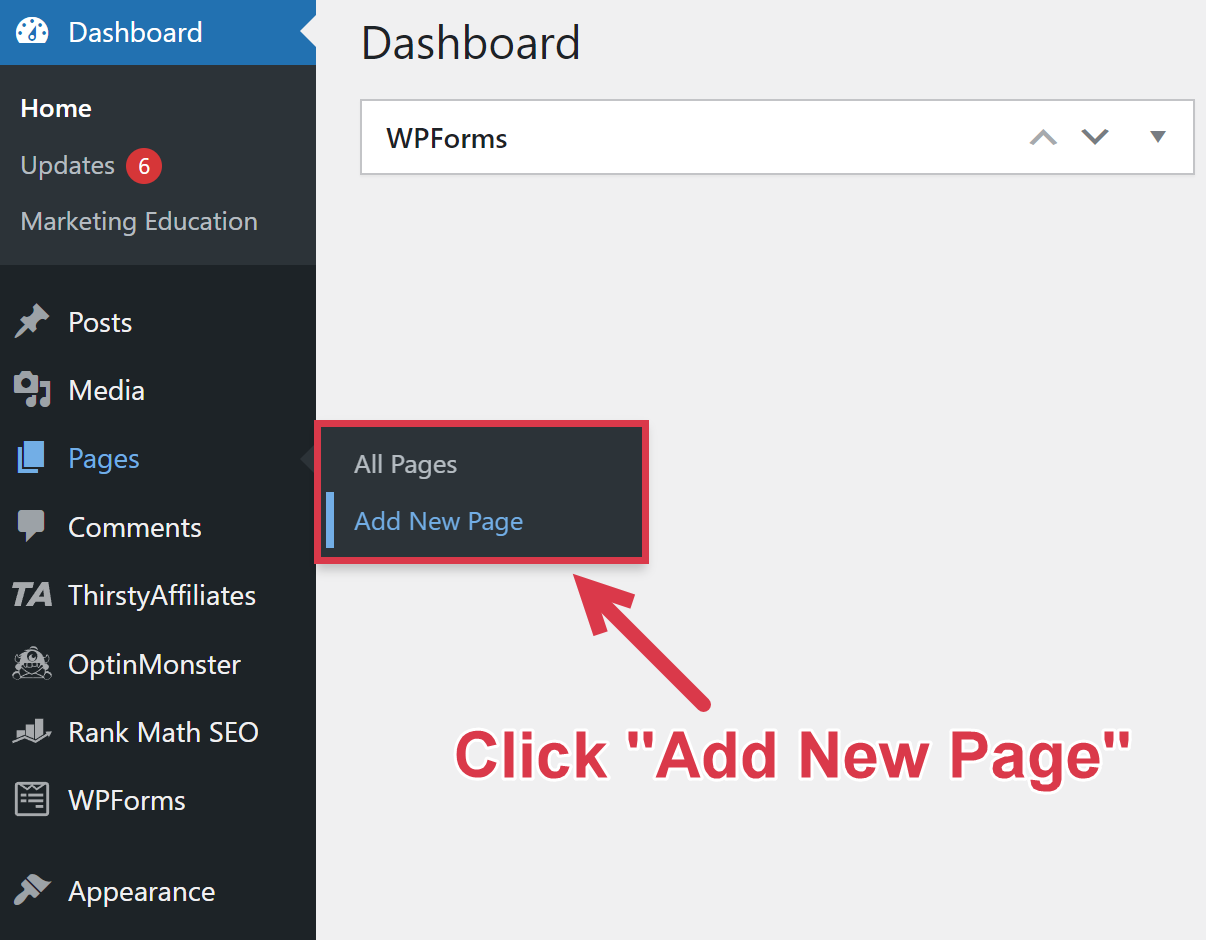
Creating a new page in WordPress is a straightforward process. Simply log into your WordPress dashboard, open the “Pages” menu, and click “Add New.”
8 Start Creating Content
Finally, you’ve reached the exciting stage of creating content for your craft blog. Use your creativity and knowledge to draw in readers and establish your site as a valuable resource.
But before you dive into writing, let’s talk strategy.
It’s crucial to create keyword-focused content to attract readers and earn money as a craft blogger. This strategy involves writing content using phrases that people interested in your craft niche frequently search for.
Once your content is well-optimized, Google and other search engines will show it to users searching for those keywords. This will drive traffic to your blog.
However, you can’t simply write about the most popular craft topics and expect instant success.
A keyword with a high search volume also has intense competition to rank for it. This makes it challenging for a new blog to rank well.
Instead, your craft blog should target less competitive keywords. This raises your chances of gaining traffic and revenue. The key is to find keywords that have lower competition but still have decent search volume.
For effective keyword research, Ahrefs Keyword Explorer is your go-to tool.
Start by using a “seed keyword” related to your craft blog niche. This will uncover relevant keywords with the best balance of search volume and competition.
As an example, searching “knitting crafts” in Ahrefs yields the following matching terms:
| Keyword | Search Volume | Keyword Difficulty |
|---|---|---|
| knitting ideas | 900 | 20 |
| knitting ideas for beginners | 200 | 12 |
| 7 mm knitting needles us size | 150 | 8 |
| Knitting crafts for beginners | 30 | 12 |
| Finger knitting crafts | 20 | 6 |
From here, you can plan your first ten blog posts and brainstorm exciting content ideas. Here are a few example titles from this keyword list:
- “5 Simple Knitting Crafts for Beginners”
- “Must-Try Crafts to Make With Yarn Without Knitting”
- “25 Cool Finger Knitting Crafts for Kids”
Now that you’ve got your titles, it’s time to put your creative talents to work and start writing.
Here are a few tips for creating remarkable, SEO-optimized blog posts that your craft-loving audience will enjoy:
- Draft a clear purpose. Clearly define each blog post. Do you want to teach a technique, showcase a project, or inspire creativity? Outlining your key takeaways provides your readers with a blueprint for your content.
- Write with your audience in mind. Design tailor-made content for the various skill levels and interests of your readers. A beginner-friendly tutorial should differ from a deep dive into advanced crafting techniques.
- Stay seamlessly aligned with your topic. Staying on topic is essential for SEO success. Ensure your blog post closely aligns with the search intent of your target keyword. Straying too far may lead to lost readers.
- Weave in personal touches. Your blogging journey should reflect your unique crafting journey. Share personal stories, craft ideas, challenges, or inspirations to connect authentically with readers.
- Add links to relevant posts. Link to other relevant posts on your website to enhance the reader’s experience. This practice also strengthens your blog’s structure and SEO.
- Insert emotion into your writing. Crafting is more than materials and techniques – it’s a labor of love. And your blog should reflect that. Inject emotion into your writing to convey your enthusiasm for crafting.
- Add pictures of crafts. Visual appeal is most important in the crafting world. Use high-quality images of your craft projects to enrich your posts. Engage readers and enhance your blog’s visual storytelling by showcasing original photos.
- Consider fair use laws. If you’re using images of other people’s crafts, look into fair use laws and don’t fall into legal issues.
With these tips, you can create content that caters to your audience’s crafting needs. This helps establish you as an authoritative craft blogger in the crafting community.
9 Promote Your Craft Blog
It’s time to promote your website to ensure your crafting wisdom reaches a wider audience.
Here are some strategies to promote your own blog effectively.
- Connect with crafting communities: Share your valuable content in dedicated crafting forums and on social media. Popular options include subreddits like r/crafts and r/handmade, Facebook groups, and general craft forums like Gransnet. Ensure each post is a tailored creation that matches the community’s interest.
- Make an email newsletter: Encourage your readers to join your crafting community through newsletter subscriptions. This keeps them updated on your latest crafting creations while weaving a sense of belonging among fellow crafters.
- Partner with other bloggers or influencers: Consider collaborations and cross-promotions with a fellow craft blogger or local craft stores. This might include sponsored posts, YouTube videos, or crafting events showcasing your expertise.
- Promote your blog locally: Explore potential local methods of promotion that involve your friends or family. Consider hosting crafting parties, workshops, joining a craft group on Meetup, or even craft nights with discussions.
When promoting your blog, focus on helping others with useful advice and sincere interactions. That’ll make a better, longer-lasting impression than spamming your content.
10 Monetize Your Craft Blog
After all the creative energy poured into your craft blog, it’s finally time to turn your passion into profit.
Here are three effective approaches to monetize your craft blog without downgrading the reader’s experience.
Affiliate Marketing
Use affiliate links to recommend tools, materials, and courses you adore. You earn a commission on each purchase.
Why It’s Great: Your readers discover handpicked products, and you receive compensation through thoughtful recommendations.
Getting Started: Read our comprehensive guide on how to start affiliate marketing and check out our list of the best arts and crafts affiliate programs.
Display Ads
Showcase ads on your website using an ad network or sponsorship agreements.
Why It’s Great: You can earn money by simply driving traffic to your blog content. Pair this method with affiliate marketing or a personal store for greater success.
Getting Started: Use the Ezoic ad network to get going. They pay more than Google AdSense, and there’s no minimum traffic requirement to join. You can join higher-paying programs like Mediavine or Raptive as you gain more traffic.
Selling Your Own Products
Monetize your craft blog by selling digital products, like expert guides and online courses. You can also sell your finished craft products.
Why It’s Great: You provide value to your readers while earning substantial revenue. It’s a great idea if you’re looking to create your own business.
Getting Started: Sell on platforms like Etsy for physical masterpieces or Teachable for skillful courses to get a feel for your audience’s desires. Step-by-step guides, video tutorials, or handmade creations can be a great starting point.
Summing Up
Starting a craft blog is an exciting journey that combines your passion for crafting with the potential for financial gain.
From narrowing down your niche to monetizing your expertise, I’ve walked you through the essential steps to set your craft blog up for success.
But I have to be honest — this guide is just the tip of the iceberg. The world of craft blogging is vast and ever-changing, and there’s always more to learn and implement.
That’s precisely why we’ve created a free training designed to take your blog to the next level.
This training dives deep into the nitty-gritty details that can make or break a new blog.
Specifically, you’ll discover seven key strategies that can boost your blog’s growth trajectory by a staggering 83%.
So, if you’re serious about turning your craft blog into a full-time income, take advantage of this opportunity to accelerate your success.
FAQs
Craft bloggers make an average of $1041 monthly. This amount ranges from a few hundred to several thousand dollars depending on factors like sub-niche, audience size, monetization methods, and content quality.
More profitable blogs create valuable content, use strategic marketing, and consistently work to grow the audience.
Craft blogging is a virtual showcasing of creative endeavors, whether it’s knitting, painting, woodworking, or any craft, through a blog. Craft bloggers use an online platform to share their projects, offer tutorials, and engage with a community of craft enthusiasts. It’s a great way to connect with like-minded individuals who share a passion for crafting.