If you want to learn how to start a teacher blog, you’re in the right place.
Here at Authority Hacker, we’ve taught more than 15,000 students how to build profitable blogs – including many in the education niche.
We’ve also cracked the code to making money with a blog. Here’s a small fraction of our blogging earnings:


To help you reach similar success with your teacher blog, we’ve poured our knowledge into this 10-step guide.
Why Start a Teacher Blog
Launching a teacher blog is a great idea for many reasons.
For starters, you can share your insights and knowledge with a huge global community.
Your blog can also help you grab the attention of future employers or clients. Plus, it’s a great way to expand your expertise. You can refine your writing and communication skills quickly and effectively.
Most importantly, starting a teacher blog is a great way to earn money. You can start your own coaching or online teaching business, sell products like guides, worksheets, or lesson plans, and recommend courses, webinars, and educational resources offered by other vendors.
The potential is sky-high – our affiliate marketing statistics show that affiliate marketers in the education and eLearning niche earn an average of over $15,500 per month.
Examples of Successful Teacher Blogs

The Teacher Toolkit
Here are three great teacher blogs that have earned significant revenue and traction in recent years.
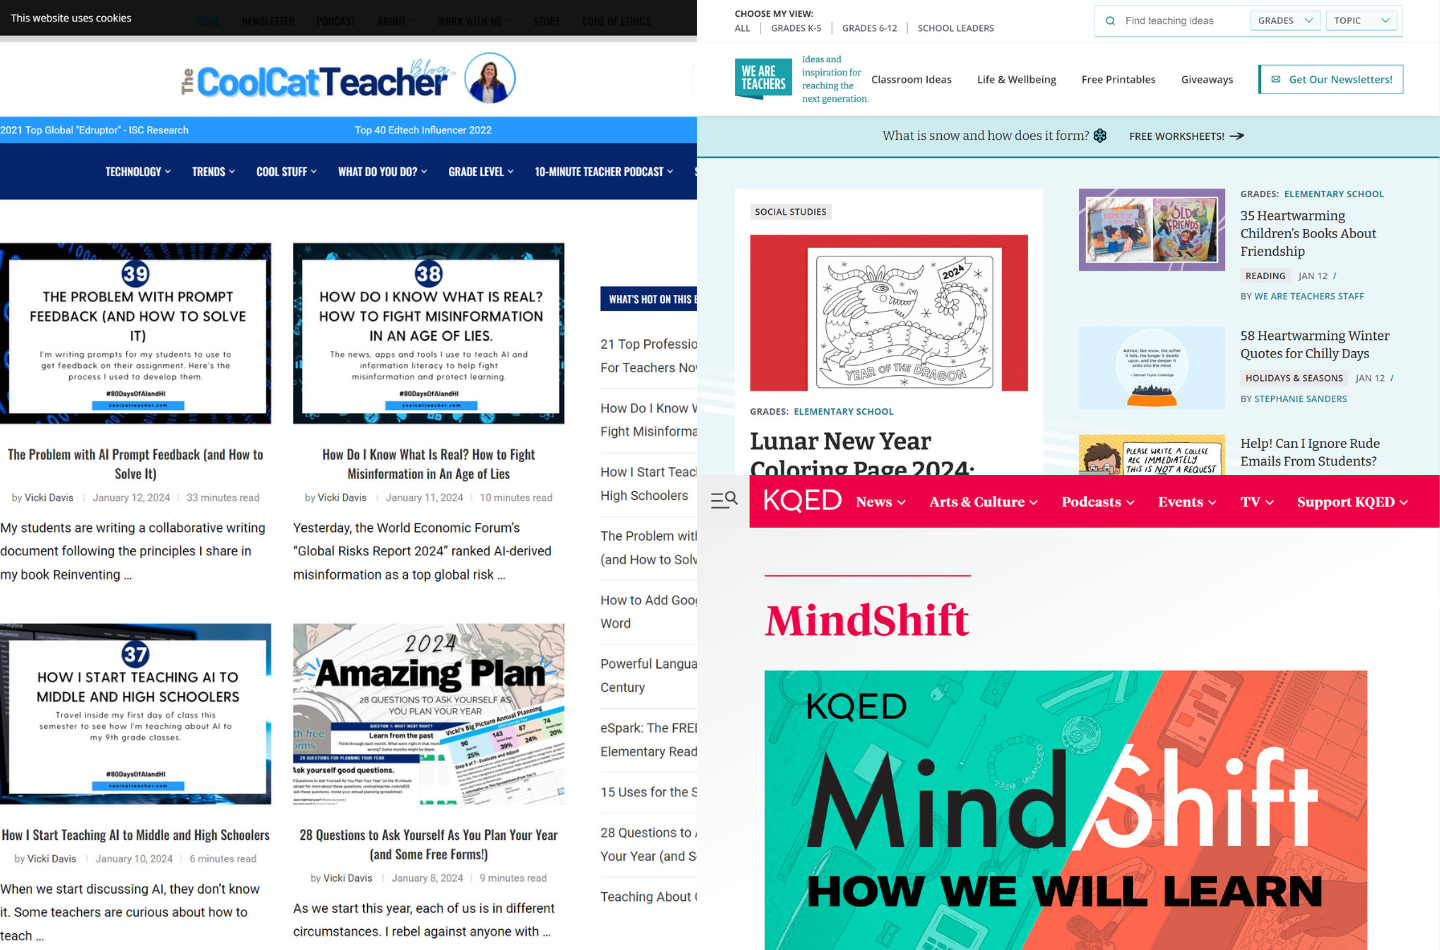
The Teacher Toolkit showcases teaching techniques that educators can integrate into their classrooms.

Teach Thought
Teach Thought covers top tactics for successful teachers to insights into student learning habits.
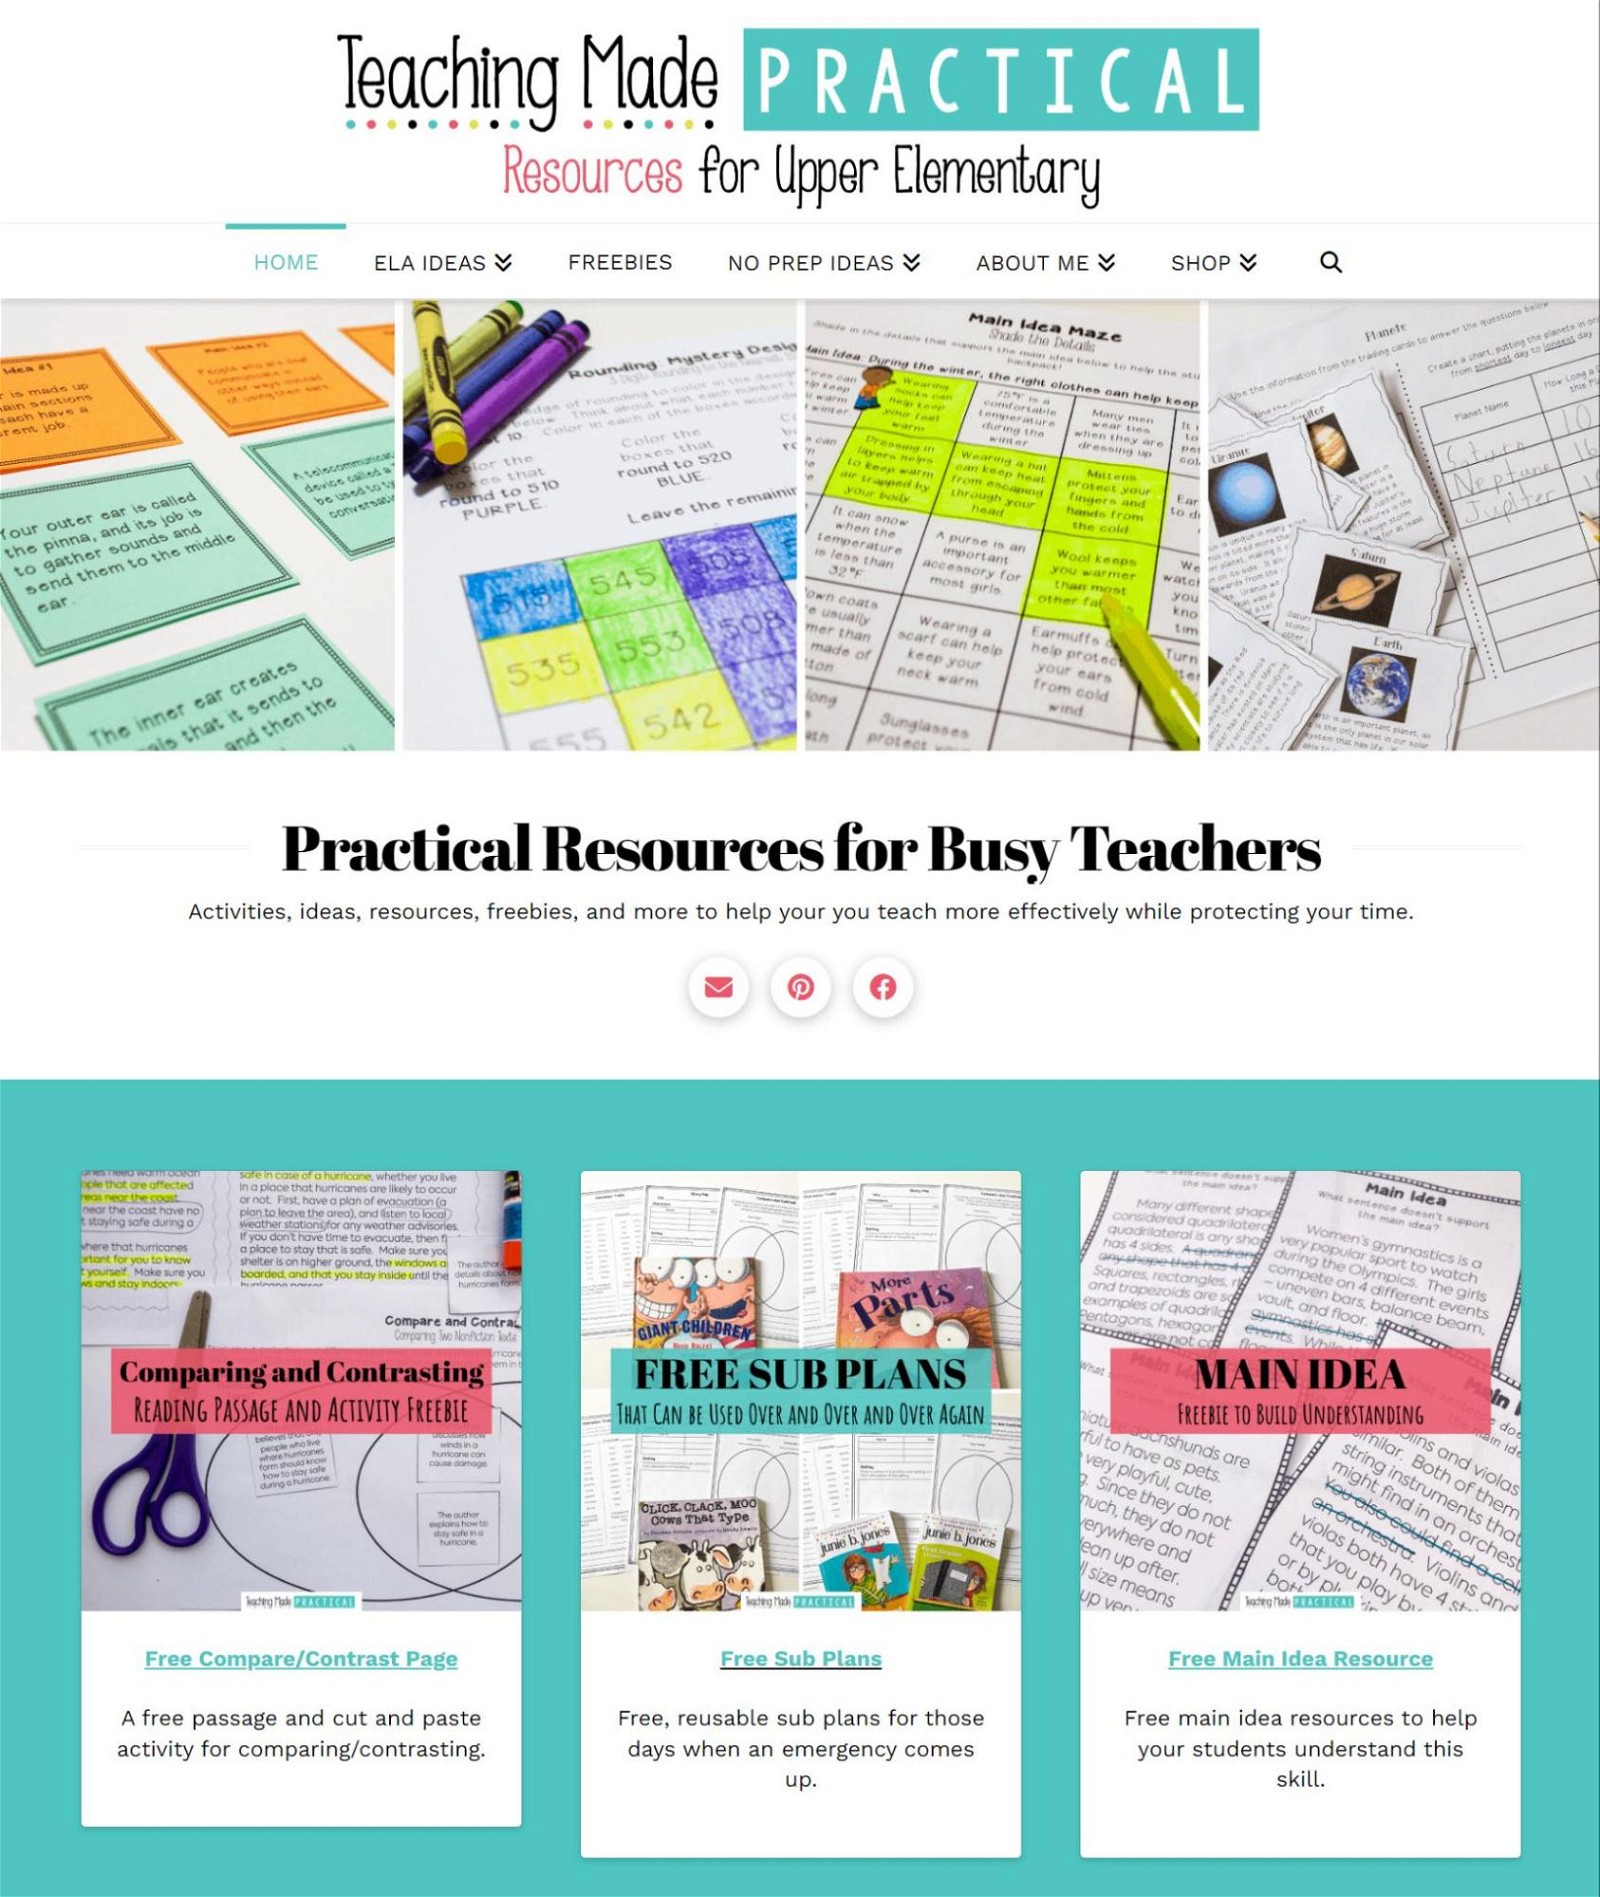
Teaching Made Practical
Teaching Made Practical provides guidance and resources for upper elementary teachers.
How to Start a Teacher Blog in 10 Steps
Let’s go through the 10 steps to creating an amazing teacher blog.
1 Narrow Down Your Teacher Niche
Teacher bloggers can write about a host of different topics.
After all, the educational industry is huge. Your blog can focus on anything, from teaching students how to improve their test results to supporting other educators.
However, you’ll want to narrow your focus to maximize your chances of success.
Think about it – if you want resources on kindergarten education, which would you prefer to visit?
- A blog exclusively about kindergarten
- A generic teaching blog that covers all grade levels
Most people prefer the first option, and this preference will make it easier to build an audience.
Here are some potential blog niches you can cover:
- Teaching students of a specific age. Share tips and tricks for kindergarten, secondary education, or higher education.
- Specialty topic blogs. Build your blog around your specialist topic, and develop a reputation as a thought leader with guides and reports.
- Educational policy blogs. Share your knowledge with other educators, providing insights into new regulations, guidelines, and market research.
When selecting your niche, you should consider how much experience you have and the public’s level of interest in the niche.
Your experience will ensure you’re producing high-level blog posts, while a high level of interest ensures you can make money from your blog.
To qualify a niche for popularity and money-making potential, follow this guide:
Make a list of blogs in your prospective niche. To find these, you can search on Google for keywords you might write about or use a blog aggregator like Detailed to identify successful blogs in your industry.
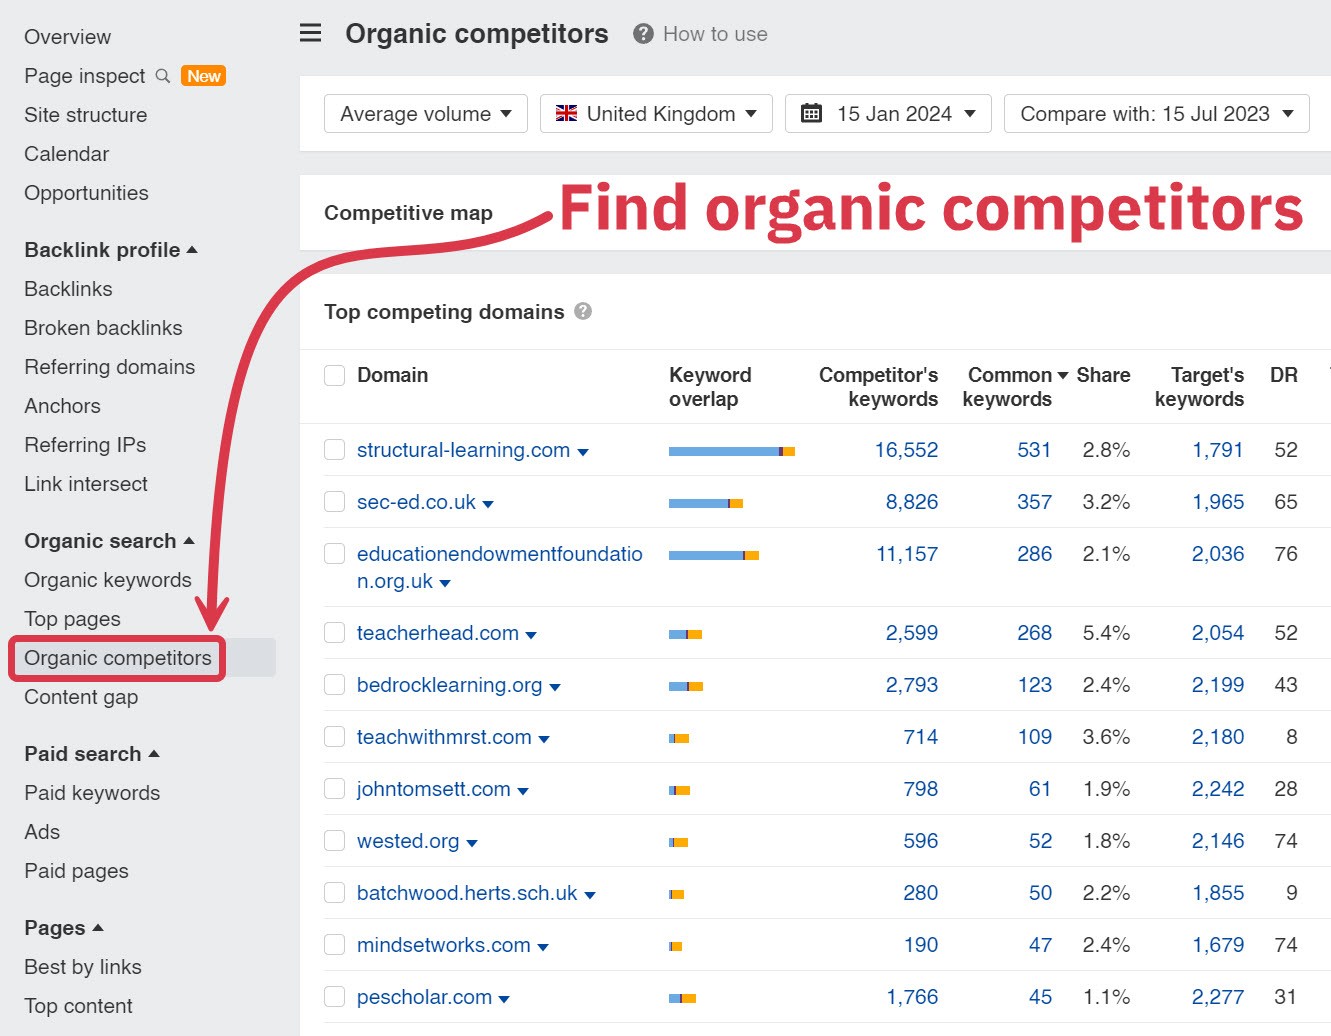
When you find a relevant website, you can also use the Organic Competitors tool in Ahrefs to identify similar websites.
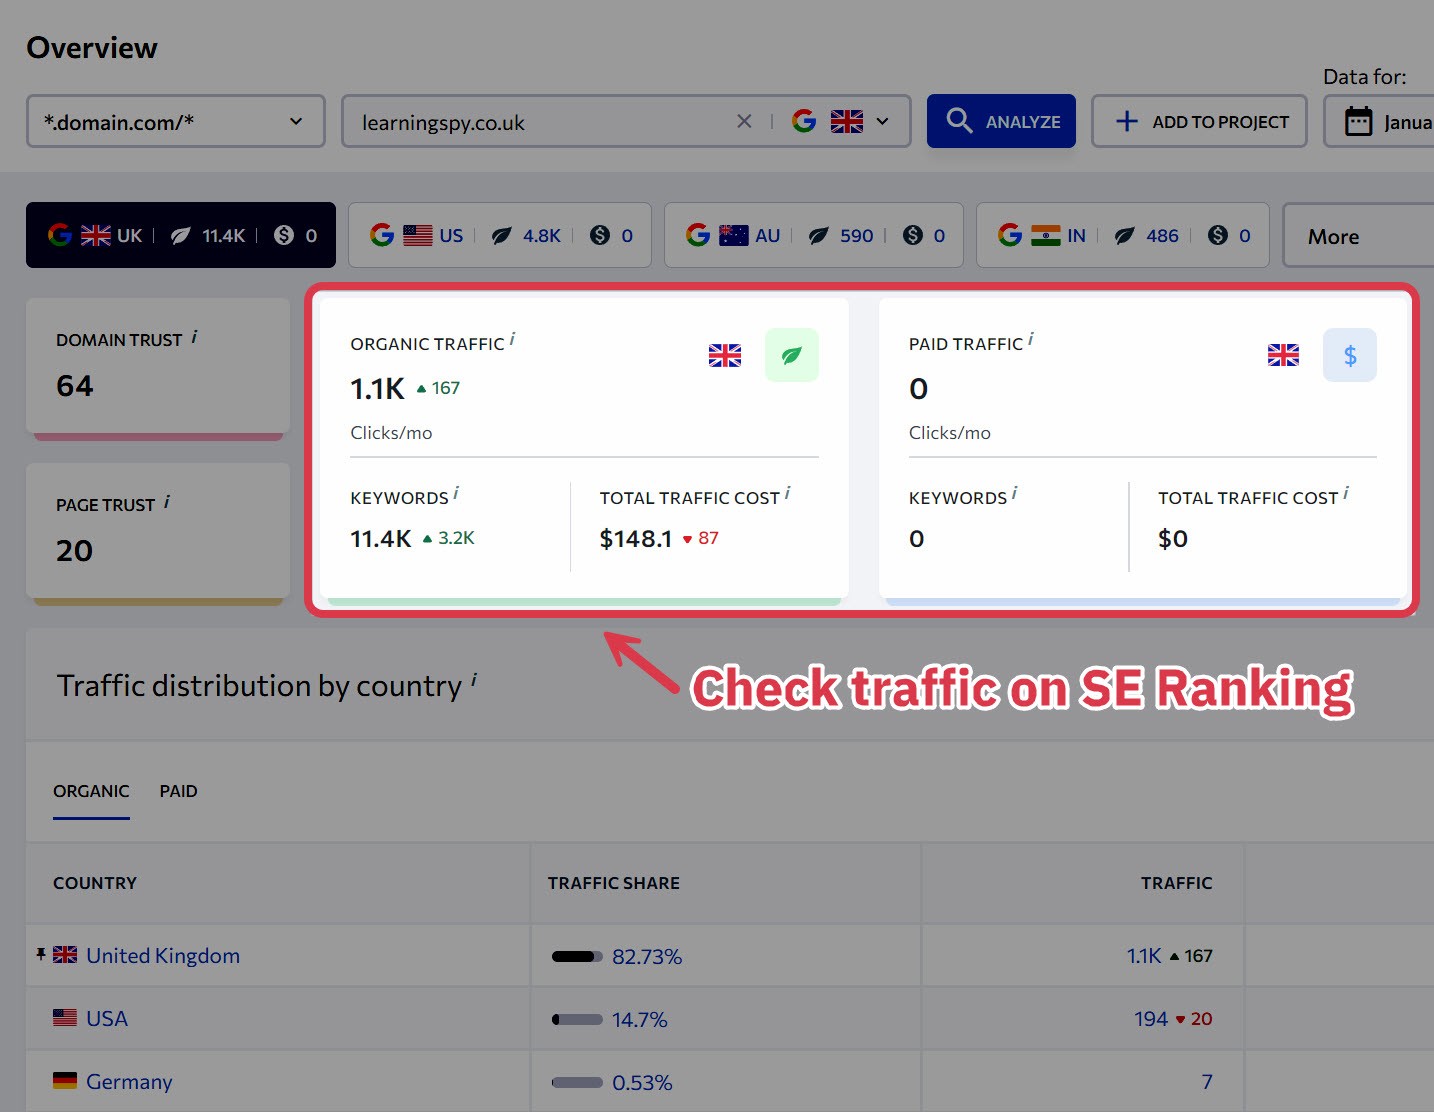
Check each website’s traffic. Sign up for a free trial of SE Ranking and use their Competitive Research tool to view monthly traffic estimates.
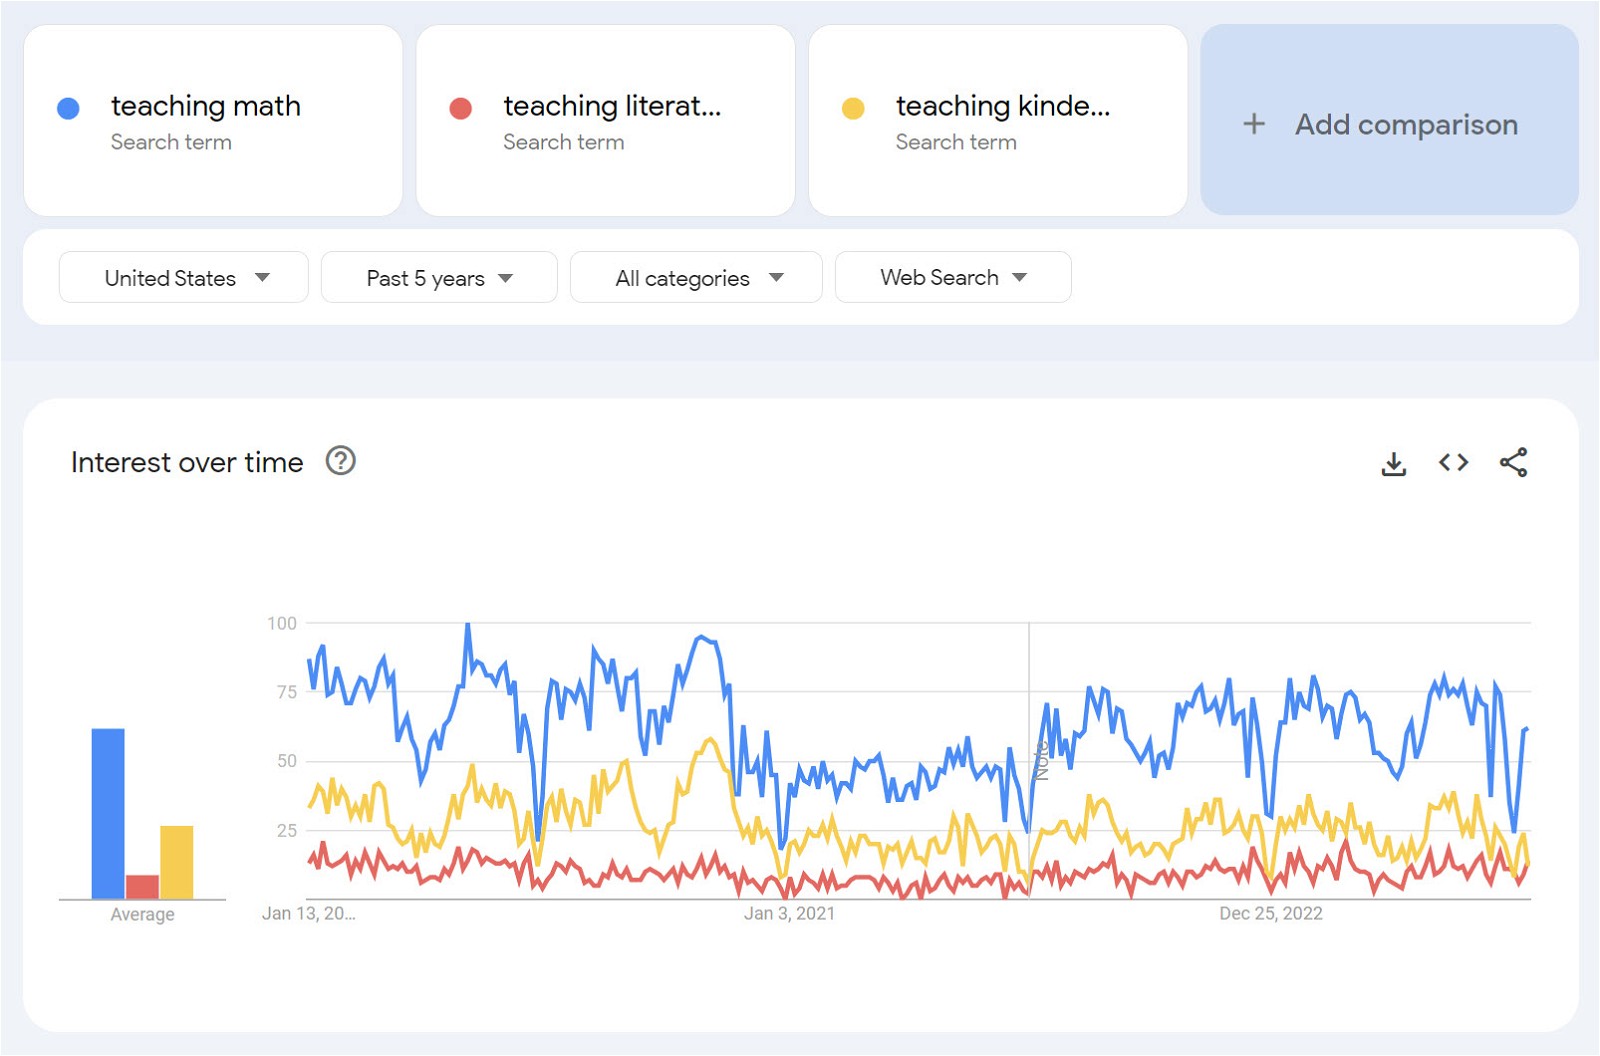
If you’re stuck between a few niches, You can use Google Trends to compare the potential growth of each niche.
If you need extra help choosing the right niche, check out our guide:
Once you’re confident you’re picking an excellent niche, you can move on to the next step.
2 Choose a Blogging Platform
Now you know your niche, it’s time to pick a blogging platform.
While you can start your own blog with a free domain space from a social blogging platform like Medium or Blogger, there are some huge downsides to this strategy:
- It’s hard to make money on these platforms.
- The platform has control over what you’re allowed to say.
- Your blog can be shut down at any time.
The best strategy is to build your own website. Here are some benefits of this approach:
- Much easier to monetize your blog.
- Complete control over your education blog content.
- Branding tools (themes, logos, and color palettes) to help you stand out.
- Protection from other parties removing your content.
- Opportunities for promotion through SEO and social media.
- Ways to build your email list and protect yourself from SEO algorithm changes.
I’ve experimented with plenty of blogging platforms before, but WordPress.org is my number one choice. (Keep in mind that WordPress.org isn’t the same as WordPress.com.)
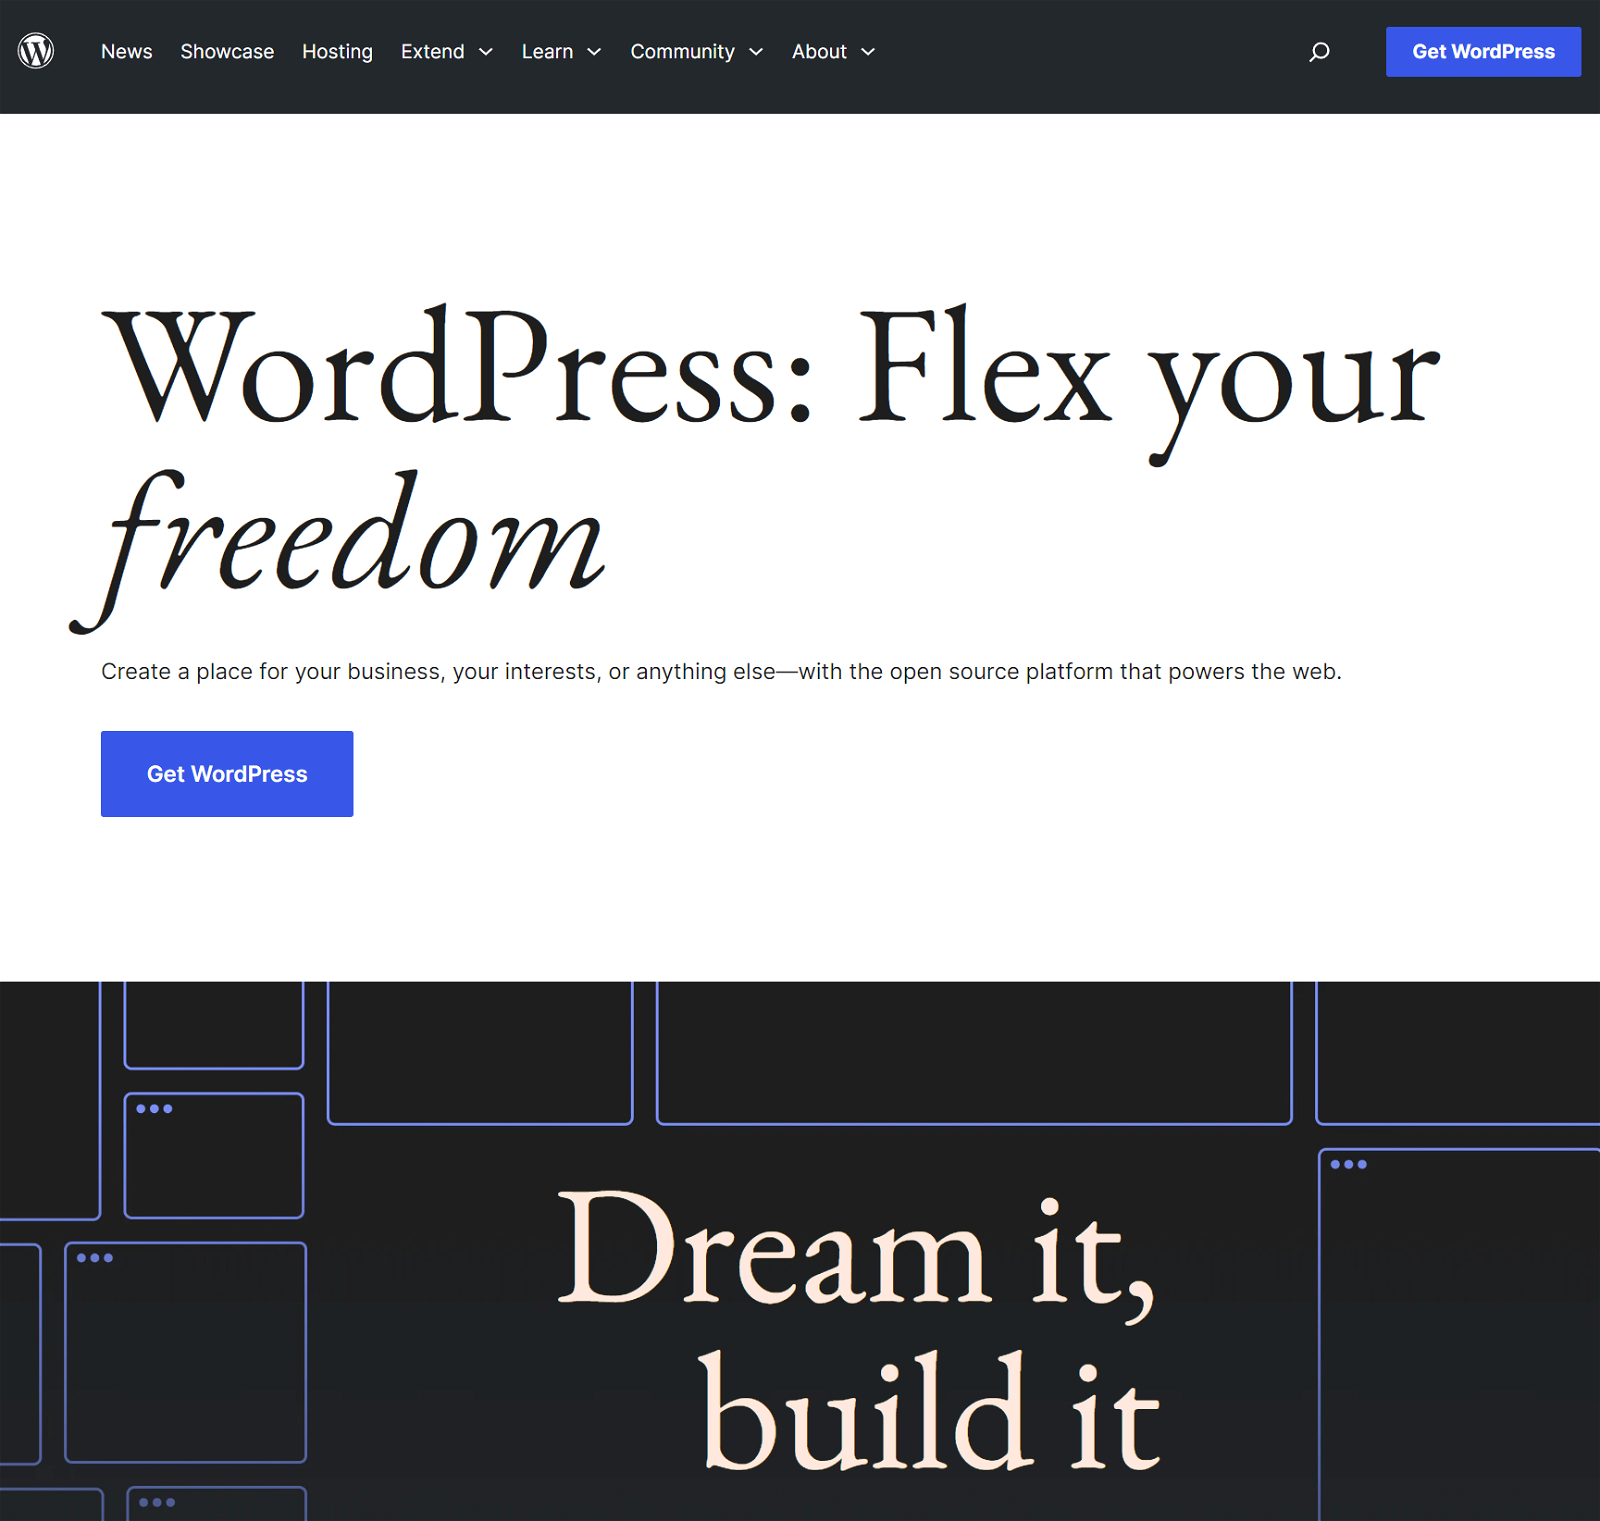
WordPress is free, intuitive, and has thousands of themes and plugins that let you customize your site exactly how you want it.
3 Choose Your Domain Name
A memorable domain name is one of the first things you’ll need when creating a teacher blog.
This is the address readers will type into their browsers to find your website. Each domain includes a website name and an extension (like .com).

Don’t rush through the naming process. Your domain name is key to ensuring people can find you online and recognize your brand.
While there’s no one-size-fits-all strategy for selecting an amazing blog name, there are a few tips you can follow to boost your chances of success.
- Keep it simple. Short, and straightforward blog names are easier to remember. Try to stick to just one or two words in your website name.
- Buy a .com domain. The .com extension provides a level of trust and recognition that no other extension has. However, if you find a great name without an available .com, you can consider some .com alternatives.
- Use wordplay. Make your blog name stick in the minds of your audience with rhyming, alliteration, or metaphors.
- Check for trademarks. Run a trademark search to ensure your blog name doesn’t already belong to another company.
- Include your niche. Hint at your blog’s topic. If you’re focusing on STEM education, you might choose a name like “STEMScience.com”.
If you’re having a hard time thinking of a domain name, AI generators like Brandsnap can speed up the process.
Once you find your name, you need to buy it from a domain registrar. We recommend Namecheap, which offers domains for around $10 per year.
4 Buy Web Hosting
Next up is buying web hosting. This gives you the infrastructure you need to store your website data and make your content accessible on the internet.
Many bloggers use Bluehost for its cheaper plans, but we recommend SiteGround. It’s faster, more reliable, and very affordable.
Here’s how you get started:
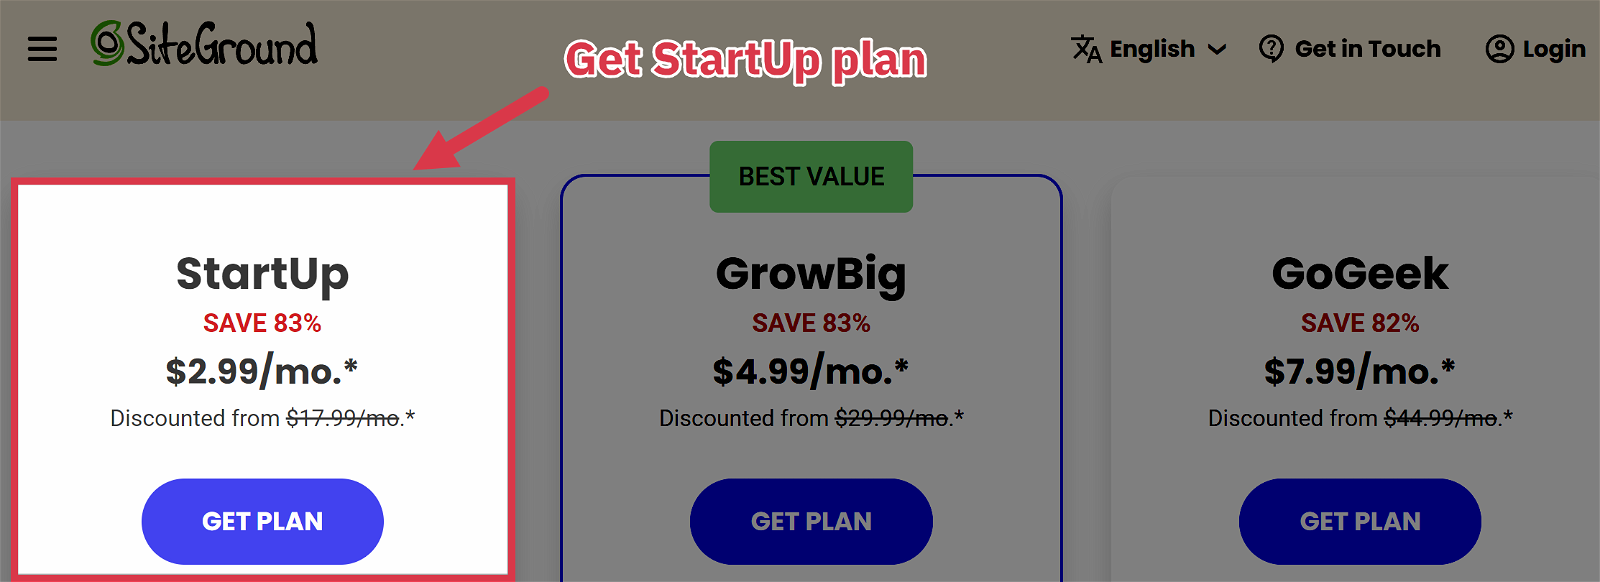
Step 1: Head to the SiteGround WordPress hosting page and choose your plan. I recommend the StartUp plan for beginners.
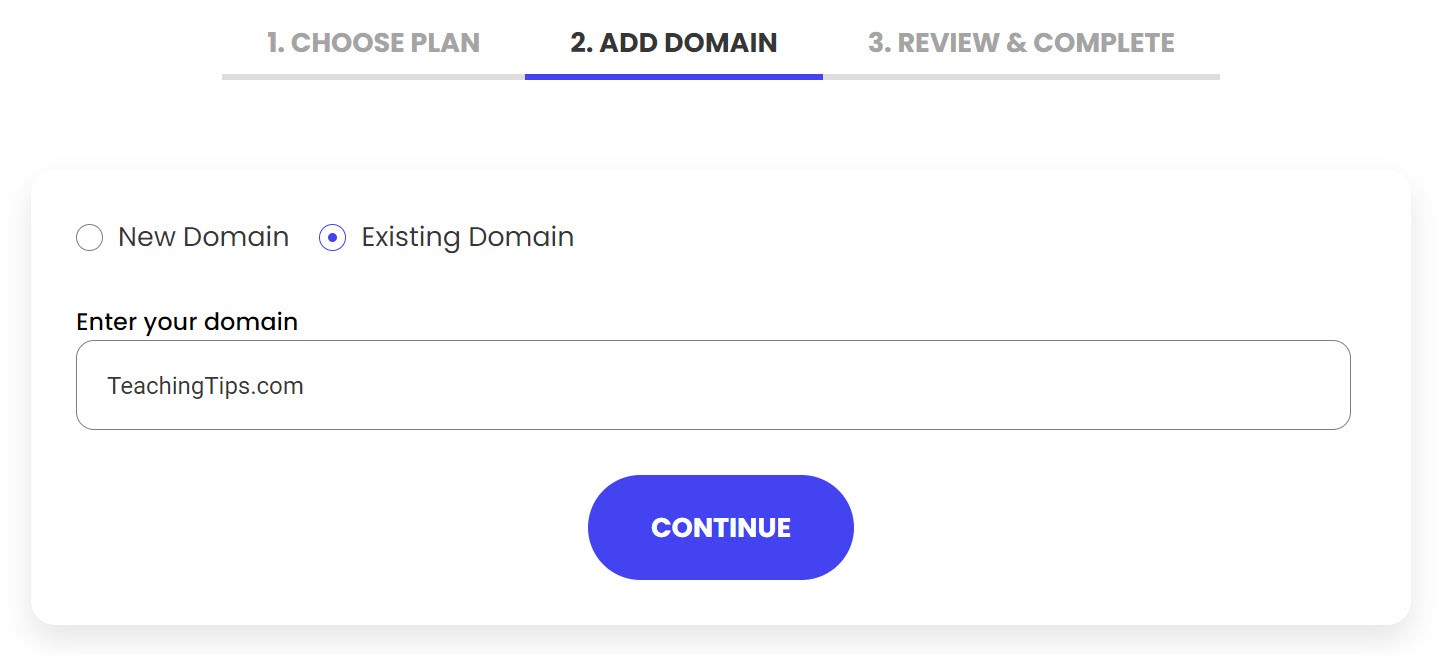
Step 2: Select “I already have a domain,” then enter your teaching blog name.
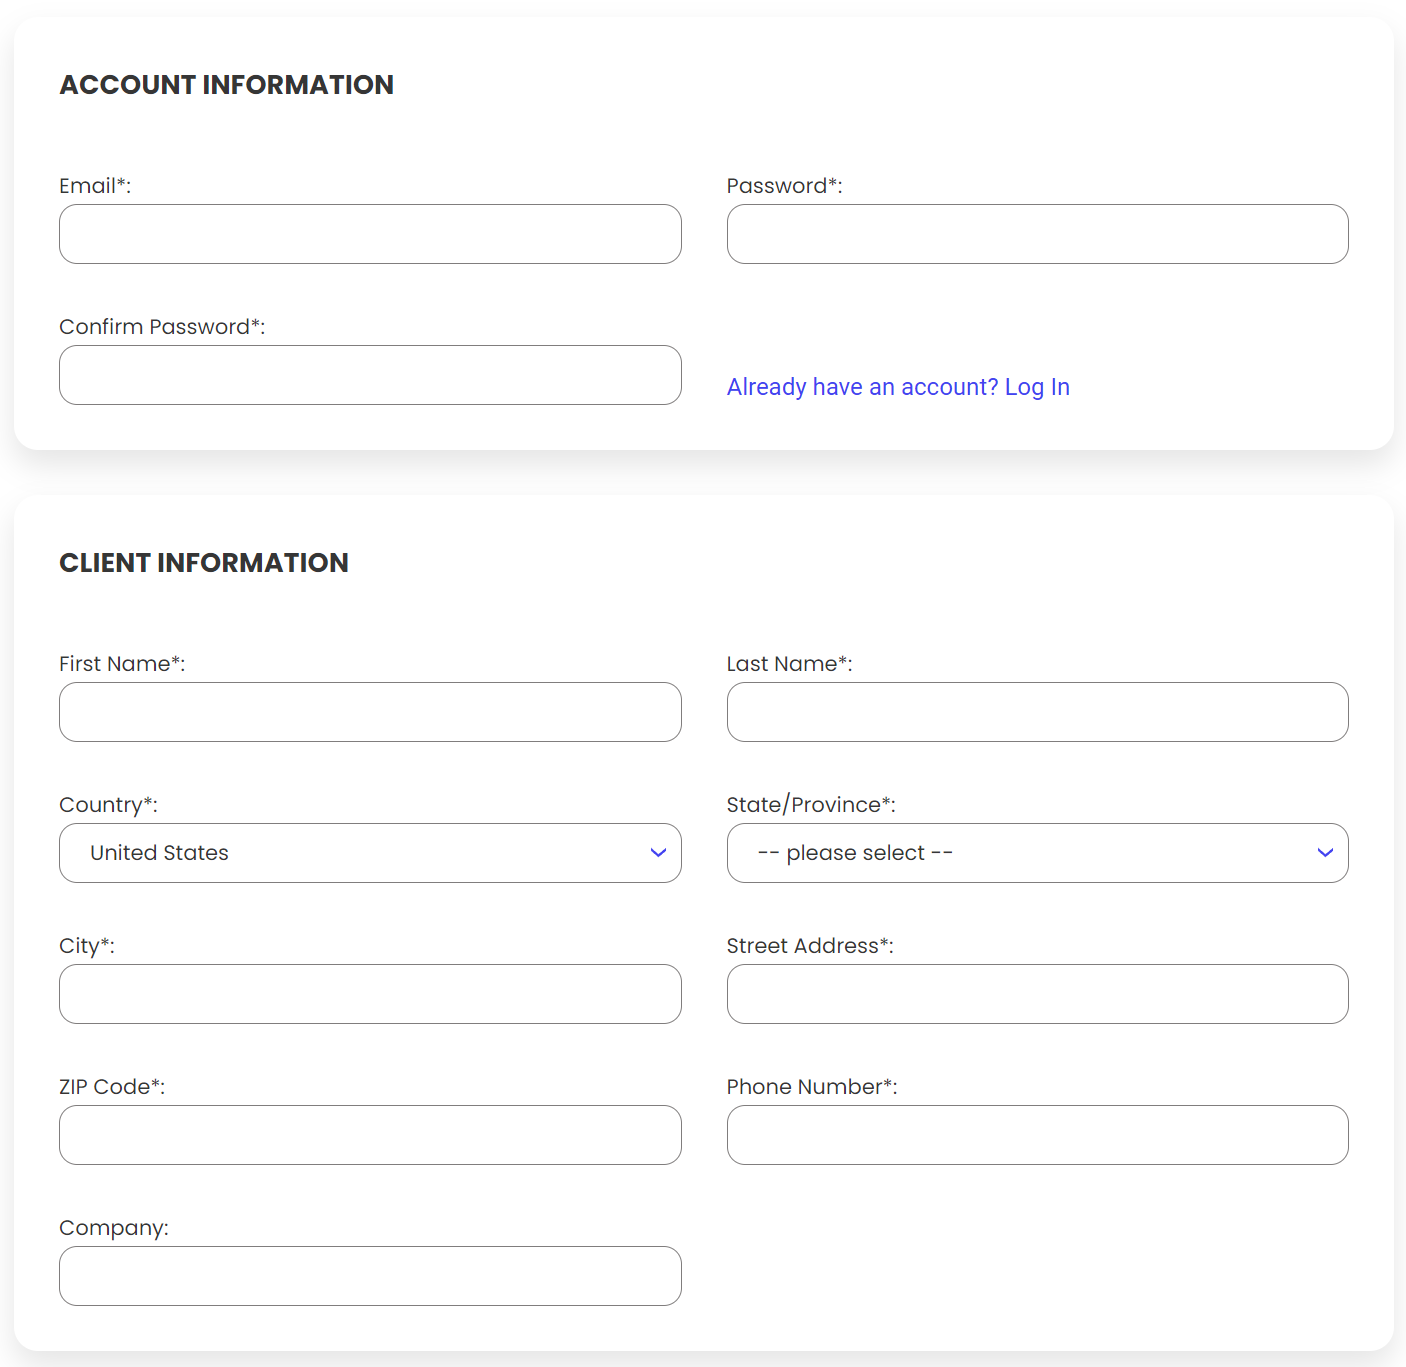
Step 3: Enter the required account details.
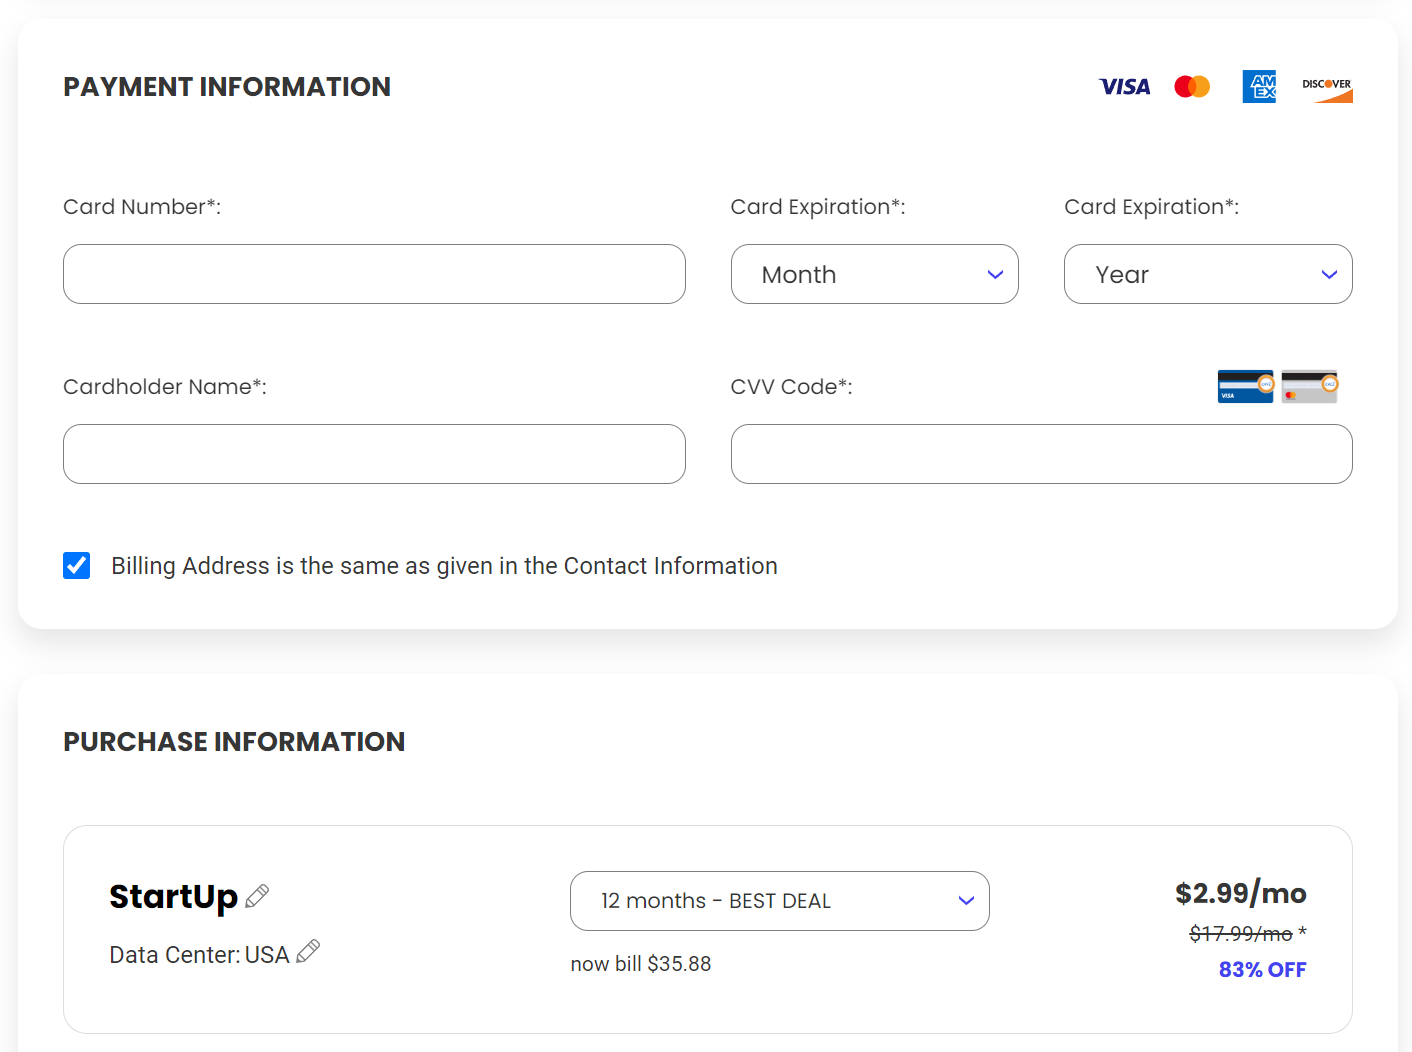
Step 4: Add payment info and choose a subscription duration. The 12-month subscription is the best deal, but the discount ends after your first year.
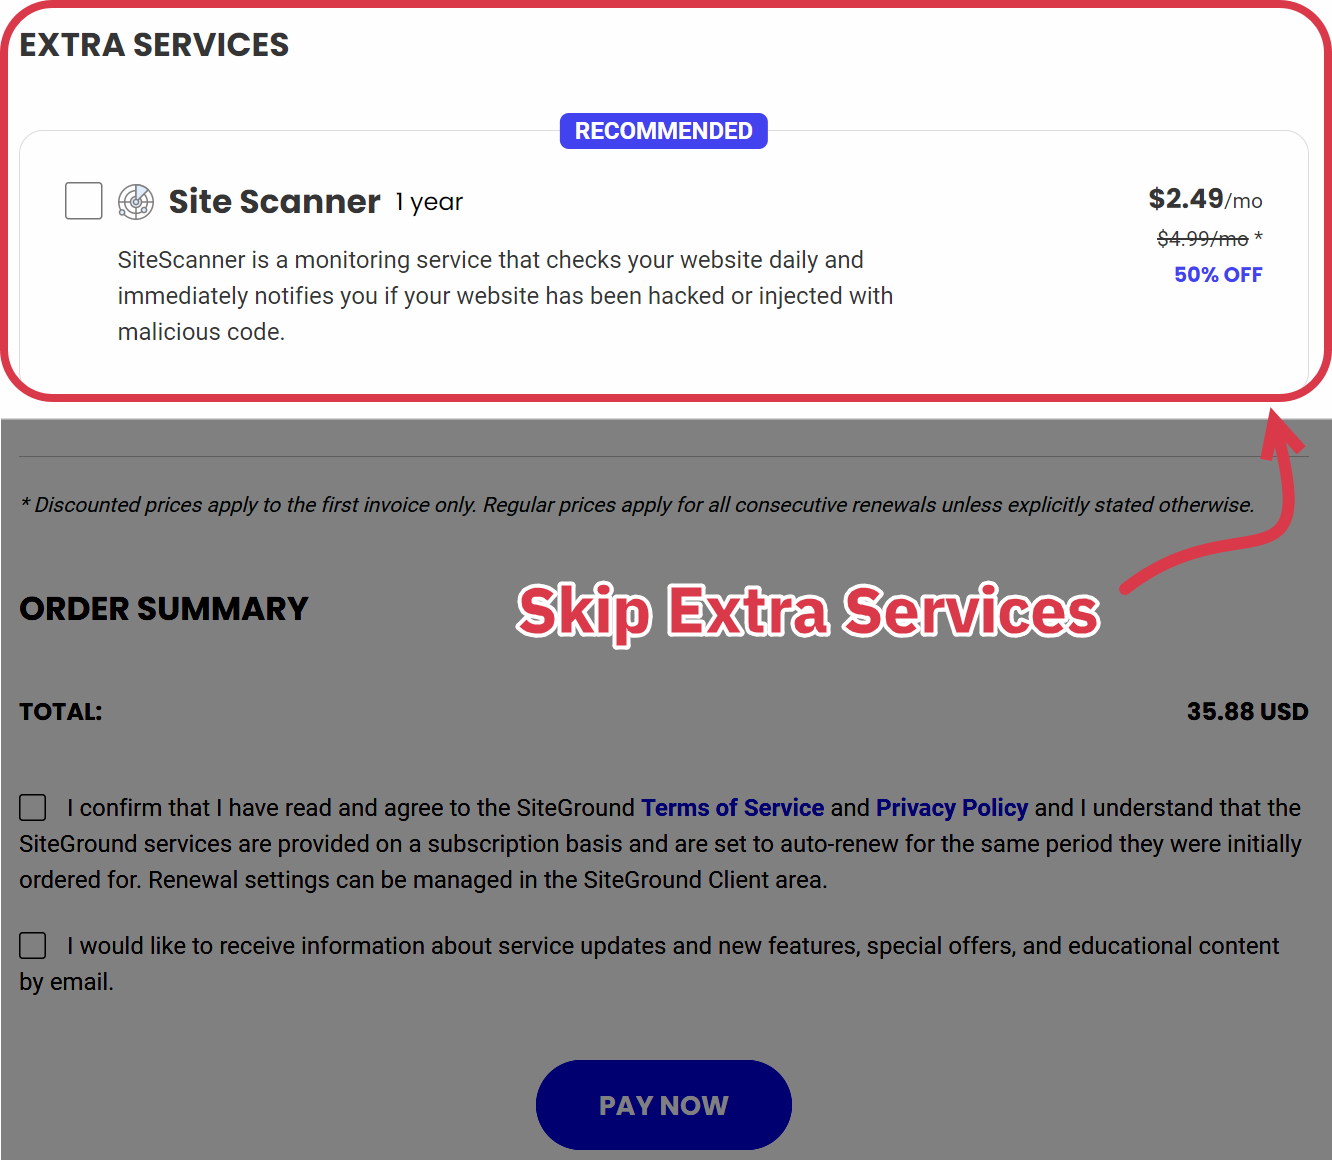
Step 6: Skip the extra services – a new blog doesn’t need these.
Step 7: Point your domain to SiteGround. If you bought your domain from a company like NameCheap, you’ll need to change the DNS settings to point your domain name to your new host. Contact the SiteGround support team if you’re having trouble.
Congratulations! You now have web hosting for your teacher blog.
5 Choose a Theme for Your Teacher Blog
Once you’ve purchased your hosting service, you can choose your WordPress theme, which is a template that dictates the layout and design of your blog.
Your theme’s design should match the overall feel of your blog and brand. For example, if you have a kindergarten blog, you might have playful fonts that are easy to read, illustrations of animals or nature, interactive elements like clickable shapes or animations, and large, user-friendly navigation buttons.
There are free themes available for WordPress, but I’d recommend making sure any free theme you consider has the option to upgrade to a premium version. Entirely free themes are often limited in terms of functionality and customization options.
I recommend Astra, Kadence, or GeneratePress. These are fantastic themes with both free and paid options.
Once you’ve chosen your theme, you can add it to your site in just a few steps.
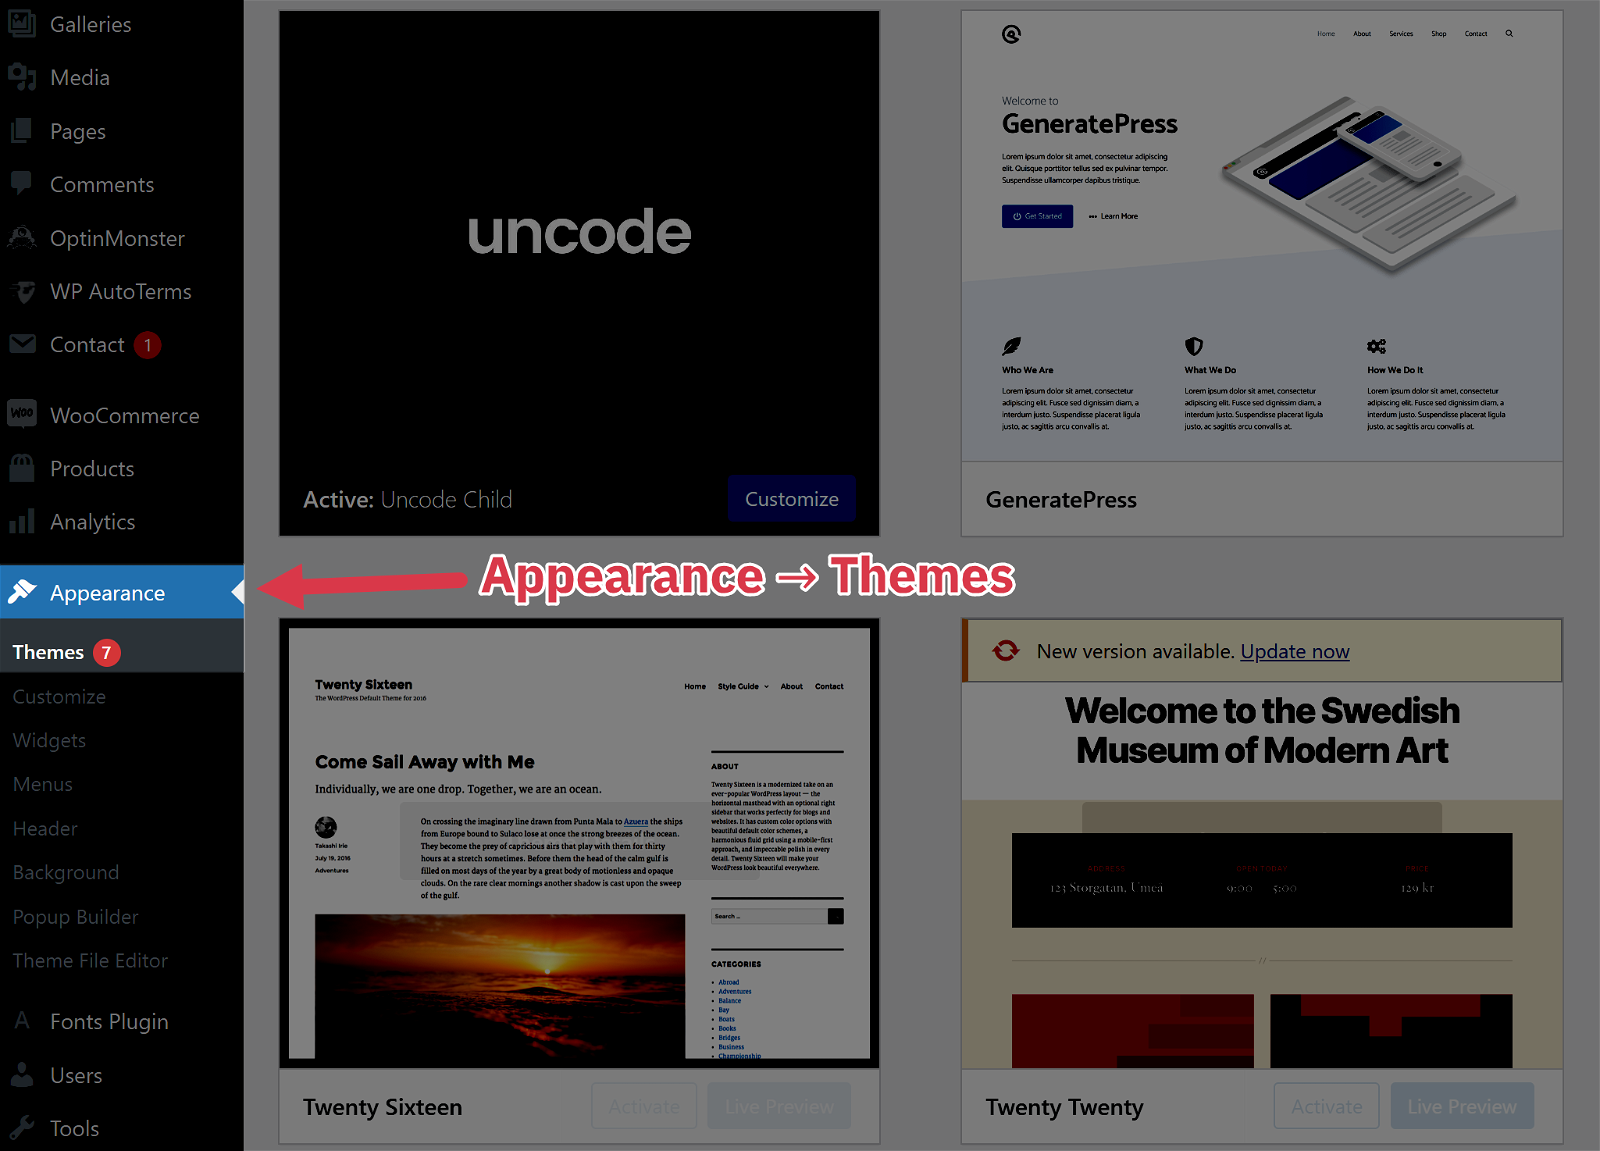
Log into your WordPress dashboard, and click on “Appearance” followed by “Themes”.
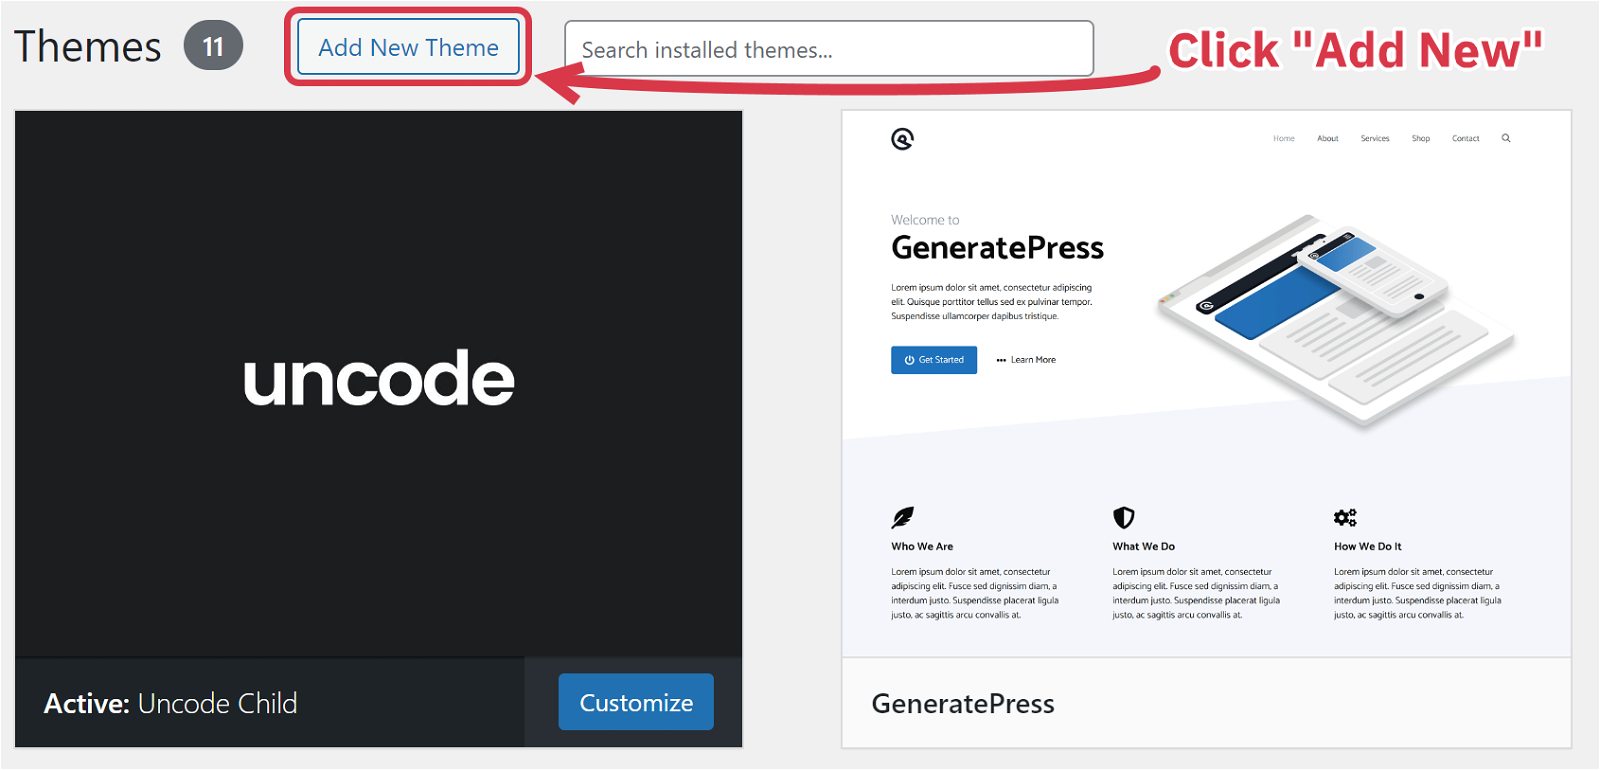
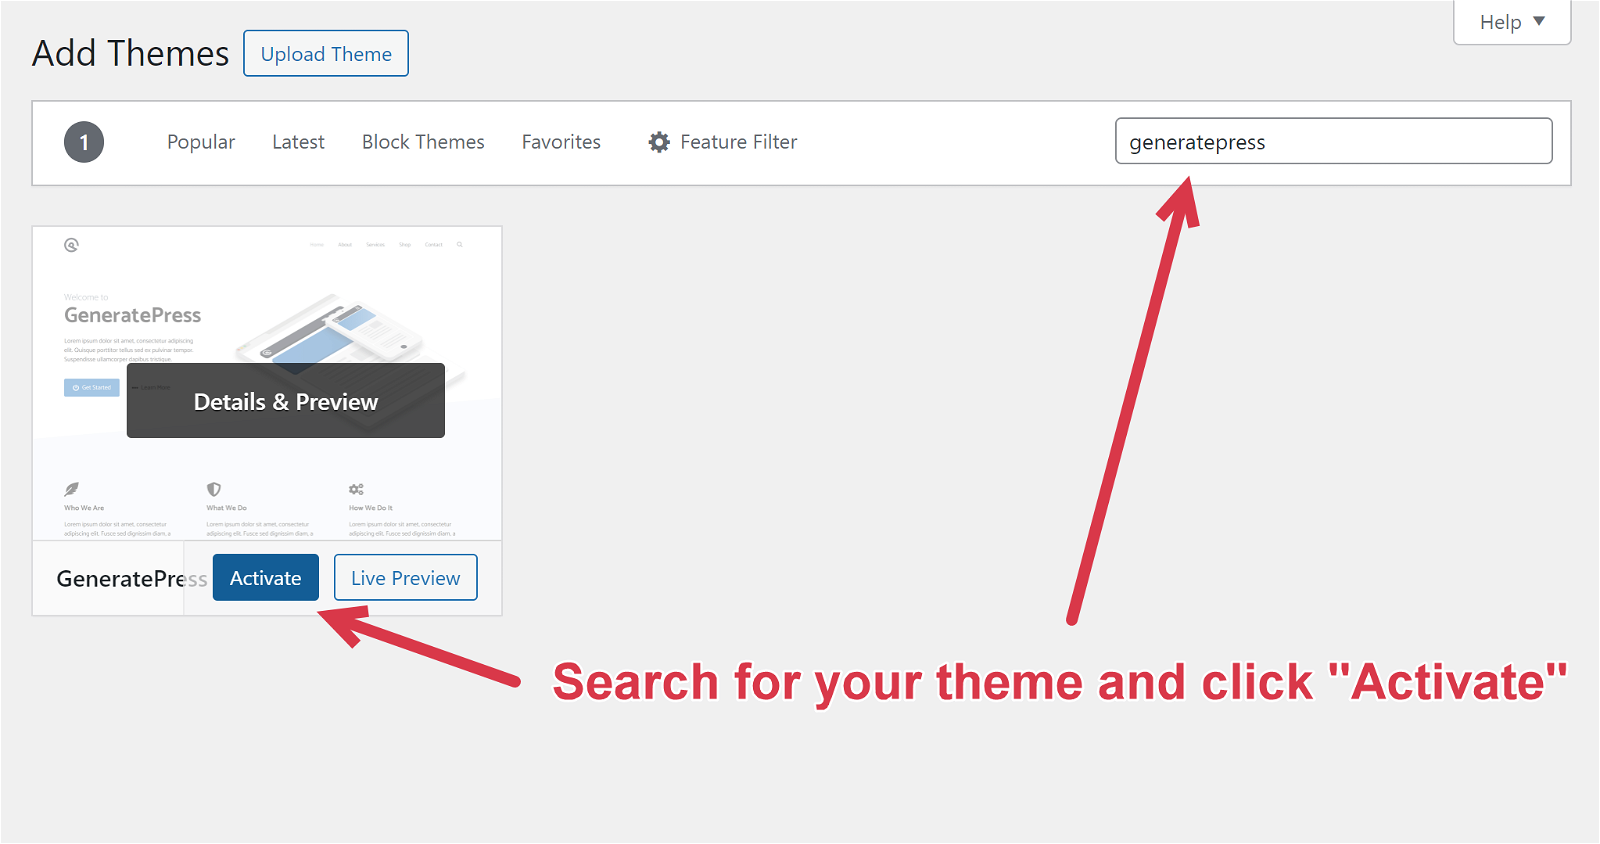
Next, click on “Add New” and search for the theme you want to use (such as Kadence).
Finally, hit the “Activate Theme” button to add your theme to your blog.
Once you have your own theme installed, you can begin customizing it to suit the personality and aesthetic of your educational blog.
6 Decide on Design & Branding
Now it’s time to implement some essential design elements. We’ll start with the color palette and logo.
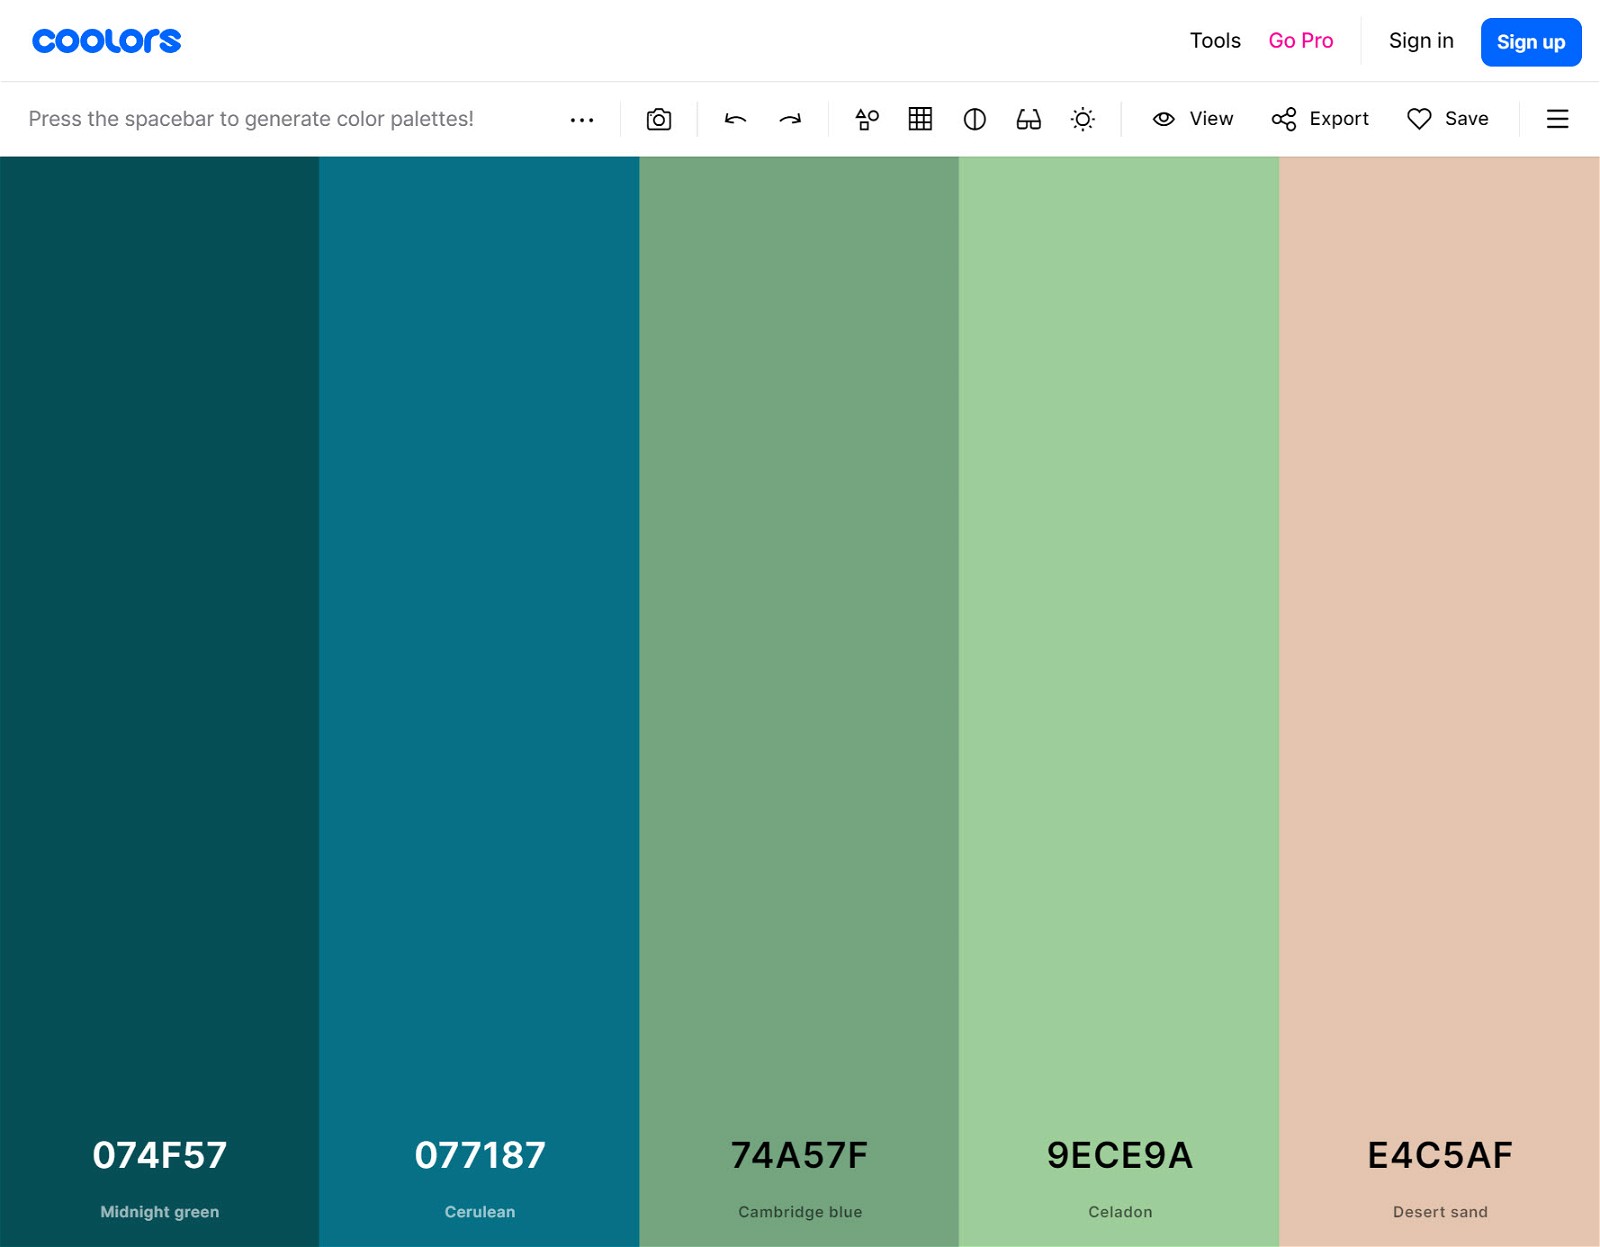
When choosing your blog’s color scheme, try to use colors that relate to your niche. For example, a science teacher blog can use green, blue, and white to represent nature and scientific clarity, while an English teacher blog might have a palette of deep purple, cream, and gold to symbolize creativity and classical literature.
The best way to choose a color scheme is with the free Coolors tool, which lets you instantly generate harmonious colors.
Once you have your color palette, you can use it to design a logo. Tools like Canva make it easy to create a stunning logo for your self-hosted WordPress site in minutes.
Search for “teacher blog logo” and choose one of the many available templates.
Once you find a template you like, you can change the colors, fonts, and other graphical features however you like.
7 Create Essential Pages
Once you’ve perfected your visual identity, it’s time to start adding content to your teacher blog. Crucially, before you start producing educational blogs, there are a few essential pages you’ll want to create first.
Homepage
The homepage is the front page of your website, and the first thing students and other educational institutions will see.
Your homepage should provide an insight into the kind of content you’re going to share, and your mission or values as a blogger.
About Page
Your “About” page is where you begin building trust with your audience, showing your authority, expertise, and experience. If possible, include information about your background in the education industry.
Contact Page
A contact page will ensure people can get in touch about your services or online courses. It also means other professionals can reach out to you about partnerships and collaborations.
Your contact page should include a basic contact form, links to any social media sites or personal blogs you already have, and an email address.
Privacy Policy + Terms & Conditions
To make sure you’re compliant with the rules and regulations surrounding blogs and websites, you’ll also need a privacy policy and terms & conditions page. This outlines the information you’re going to collect from readers and the terms they must adhere to when browsing your site.
You can generate these pages for free at PrivacyPolicies.com.
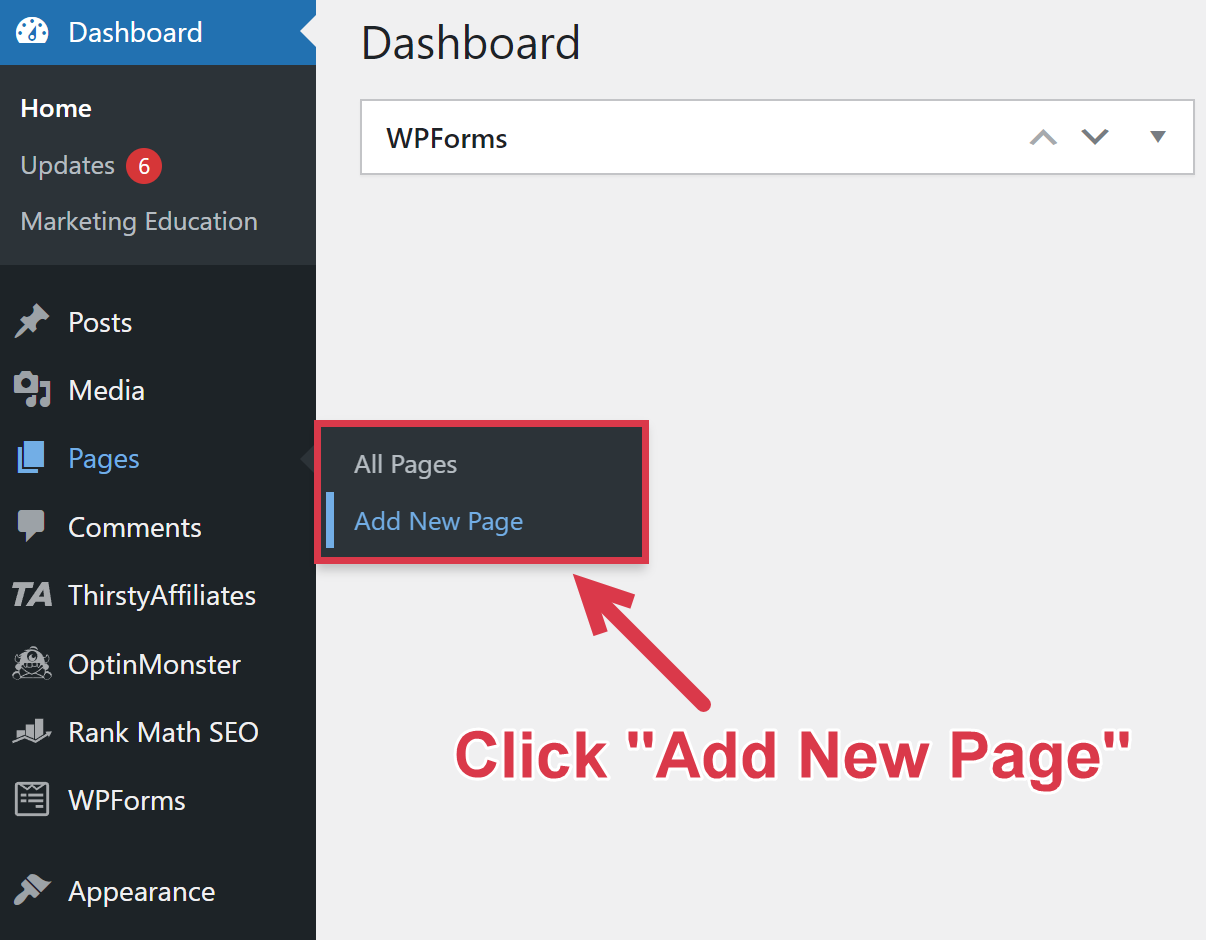
Adding a page to your WordPress blog is pretty easy. Once you log into your dashboard, just click the “Pages” section on the left-hand menu. Select “Add New” and design your page according to your specific needs.
8 Start Creating Content
It’s the moment you’ve been waiting for! You’re finally ready to start creating content for your blog.
When you start a teacher blog, the most important thing you can focus on is creating helpful content that answers reader questions, and drives attention to your brand.
The best way to choose what you write about is through a keyword-focused content strategy. This involves identifying topics that people are searching for on search engines like Google and creating blog posts that address those queries.
It’s tempting to go for the keywords with the highest search volume, but this is a mistake for a new blogger. Those terms have the highest competition from established websites, and you stand little to no chance of ranking.
That’s why you need to target search terms with low competition and decent search volume. This allows you to rank well for keywords that will bring in an acceptable level of traffic.
You can use the Ahrefs Keyword Explorer to find these low-competition keywords.
When you input a seed keyword into Ahrefs, it offers a variety of relevant additional terms to explore, along with insights into search volume. For example, typing “kindergarten resources” brings up the following results:
| Keyword | Monthly Volume | Keyword Difficulty |
|---|---|---|
| Kindergarten resources | 70 | 11 |
| Kindergarten resources for teachers | 50 | 10 |
| Kindergarten resources for parents | 20 | 16 |
| Pre kindergarten resources | 10 | 0 |
Use this strategy to come up with 10 blog post titles. Here are some examples:
- 15 Best Kindergarten Resources for Teachers
- 10 Essential Pre-Kindergarten Resources
- 12 Helpful Kindergarten Resources for Parents
Now it’s time to write your blog posts. Here are some tips to help you get started:
- Research your audience. Learn as much as you can about the goals, pain points, and questions of the people you want to serve with your teacher blog. You can use insights from competitor posts and search forums or subreddits for ideas.
- Validate your claims. If you’re sharing statistics, quotes, and facts on your blog, make sure you cite your sources.
- Share authentic insights. Don’t just regurgitate information from other education blogs you find online. Share your unique insights based on your experiences in the industry.
- Be careful about personal information. Don’t reveal personal information about students or other teachers.
- Update regularly. Keep your content fresh and up-to-date, especially if it relates to curriculum changes, educational technology, or teaching methods. This helps in maintaining your blog’s relevance and authority.
- Use visuals effectively. Enhance your posts with relevant images, infographics, or videos. Visual aids can make complex topics more accessible and appealing, especially for visual learners.
Above all else, the key to making your teacher blog a success is ensuring you deliver value. It’s also worth paying attention to the feedback you get from readers so you can improve future posts.
9 Promote Your Teacher Blog
Your Google search traffic will ramp up eventually, but it can take months before that happens. To kickstart your blog, you should promote it.
Here are a few of my favorite promotional strategies:
- Post on teacher community sites. Search for community sites and social media groups dedicated to teachers and post your content there. This is a great way to ensure you’re grabbing the attention of the right kinds of website visitors.
- Respond to questions online. Your teacher knowledge makes you a fantastic resource for people looking for answers to common questions in your niche. Search for questions on channels like Quora and Yahoo answers you can answer, with links back to your blog.
- Promote your blog at events. Consider attending teacher training sessions and industry events where you can share links to your blog in person. You could even generate a QR code for your website and add it to your business cards.
- Collaborate with other teaching bloggers. You can write guest posts for other education websites and get your name in front of their audience.
Whatever you do, make sure your promotional tactics are sincere and helpful. Spamming links to your blog without providing value is a surefire way to develop a bad reputation.
10 Monetize Your Blog
After putting so much hard work and time into your teacher blog, it only makes sense to ensure your site pays dividends.
Here are a few of the top promotional strategies:
Affiliate marketing
Recommend courses, printouts, and other educational materials. Get a commission each time you refer a sale through your affiliate link.
Why It’s Great: You can earn money without the hassle of developing and selling your own products.
Get Started: Read our guide on how to start affiliate marketing and check our list of the best education affiliate programs.
Display Ads
Show ads on your website via ad networks or direct sponsorships
Why It’s Great: You get paid whenever a visitor views or clicks on an ad. As long as your website gets traffic, you’re earning money.
Get Started: Sign up for Ezoic to get ads on your site immediately. Switch to a higher-paying network like Mediavine or Raptive once your site has more traffic.
Selling Your Own Products
Create digital or physical education products and sell them to your audience.
Why It’s Great: Selling your own products typically offers much higher profits than other monetization methods.
Get Started: Offer one-on-one coaching sessions, create and offer online classes through a digital platform, or sell educational resources. Etsy is a great platform for selling printables, and Teachable is a solid choice for course creation.
Tutoring
Put your educational talents to use by offering private tutoring services.
Why It’s Great: You can set your own rates and remotely teach students from the comfort of your home.
Get Started: Sign up with a tutoring platform like TutorMe or Varsity Tutors and advertise your profile on your blog.
Summing Up
We’ve covered a lot in this post, but blogging is a constantly evolving skill with a high learning curve.
Although we included as much info as we could, this guide only scratches the surface of what’s required to build a successful teacher blog.
To help you take your blogging game to the next level, we put together a free training that encapsulates our 10+ years of blogging expertise.
This training will teach you how to make your new blog 83% more successful.
If you’re serious about building a full-time income from your teacher blog, this is the next step.
FAQs
Teacher blogs can make a lot of money. In fact, the average education blogger earns $15,551 per year. Some of the best ways to make money on your teaching blog include affiliate marketing, display ads, and selling your own products.
You can monetize your teacher blog by selling your own products, using affiliate marketing to recommend products offered by other educational brands, running display ads, offering coaching or consulting services, and offering sponsored posts.